These twelve DIY home decor ideas are tested across actual weekend project sessions — not staged photoshoots. Each project includes the exact materials, the realistic time investment, the cost range, and the common mistake that turns a Saturday project into a Sunday redo. Every project is achievable by anyone with basic tool literacy (a drill, a brush, a measuring tape), and none requires power tools beyond what fits in a small toolbox.
DIY home decor falls apart when projects exceed three to six hours total active time. The twelve below all fall under that ceiling — most under four hours. Anything longer becomes a procrastination project that lingers half-finished for weeks. The discipline of choosing short, high-impact projects is what makes DIY decor actually finish.
By the end of this guide, you'll know exactly which twelve weekend DIY projects deliver the highest visual impact for the lowest skill level, the materials and brands that consistently work, and the techniques that prevent the most common DIY decor failures.
WHAT'S INSIDE
- The $40 floating oak shelf that takes 90 minutes and replaces $200 retail
- Limewash a single wall in one Saturday for under $50 in materials
- The no-sew linen curtains anyone can make in 30 minutes per panel
- Why rewiring a thrifted lamp is the highest-ROI 20-minute DIY of all
The handmade thing always has more warmth than the bought one. The small flaws are the proof a person made it.
— Studio McGee blog [citation needed — verify before publish]
What counts as DIY home decor?
DIY home decor is any decorative or functional piece you make or finish yourself rather than buying complete — building a floating shelf, sewing a pillow cover, limewashing a wall, rewiring a thrifted lamp. It ranges from no-tool projects (styling, painting) to weekend builds that need a drill and a saw.
The appeal is twofold: cost and character. A DIY oak shelf costs a third of the store version, and the small irregularities — a hand-oiled grain, a slightly imperfect seam — are exactly what give a room the made-not-bought warmth that mass production can't fake. The trick is matching the project to your actual skill and time, not the version in the tutorial photo.
More in DIY you may love
See allWhy DIY decor is everywhere in 2026
Tighter budgets pushed people toward making instead of buying, and the warm, secondhand-leaning aesthetic happens to reward exactly the kind of imperfect, handmade pieces DIY produces. "DIY home decor ideas" is one of Pinterest's largest home categories, and the limewash-a-wall and float-a-shelf projects trend hard every season.
There's a slow-living thread too — the satisfaction of a Sunday spent making something for a room you live in. And practically, DIY is the only way to get certain looks affordably: a custom oak shelf, a limewashed wall, a rewired vintage lamp all cost a fraction done yourself, and look better for the effort.
26 DIY home decor projects to try
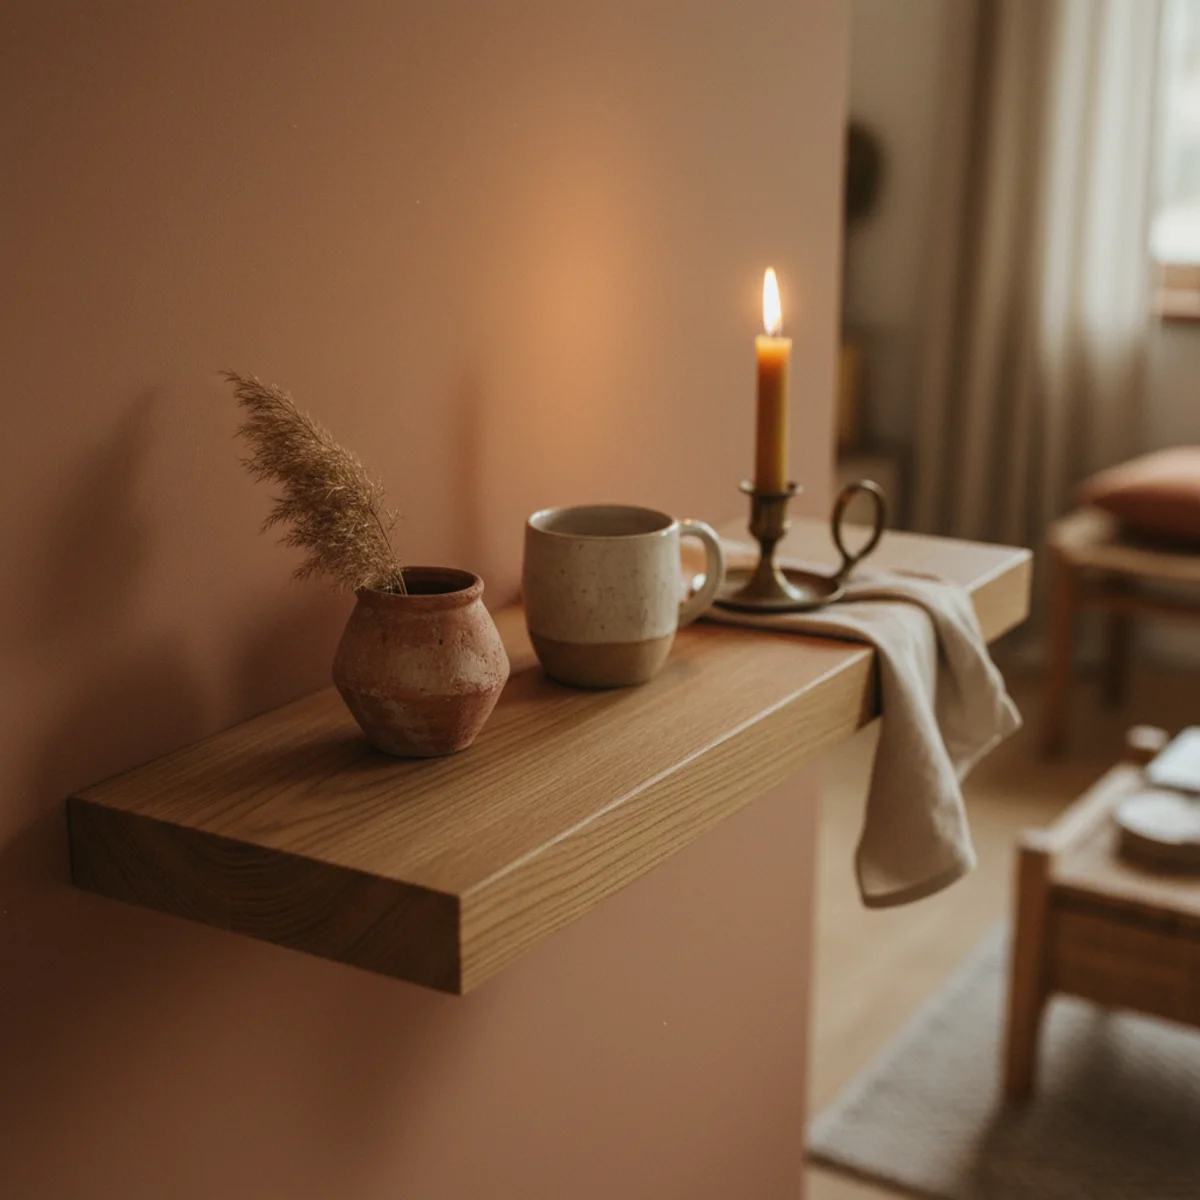
01Build a Floating Oak Shelf for Under $40
A 36-inch floating oak shelf retails for $150 to $300; the DIY version costs $30 to $40 in materials and takes 90 minutes. The project requires no power tools beyond a drill, no specialized woodworking skill, and delivers a shelf indistinguishable from $200 retail. This is the highest-leverage DIY for any warm home — and the shelf becomes the foundation for half the styling ideas across the rest of the site.
Buy one 1x8x36 inch solid oak board ($18 at Home Depot or Lowe's) and two heavy-duty floating shelf brackets ($15 for a 2-pack at Home Depot, look for 200lb-rated). Sand the board lightly with 220-grit sandpaper, oil with Danish oil or pure tung oil ($12 per pint, two coats, 24-hour dry between) for the warm matte finish. Mount brackets into wall studs at the correct height (16-on-center for most US walls). Slide oak board onto brackets, secure with included screws underneath. Total active time: 90 minutes. Total cost: $30 to $40 depending on oil brand. The shelf holds 50+ pounds easily.
AFFILIATE SLOTPROJECT1x8x36" solid oak board + heavy-duty floating brackets + Danish oilAdd affiliate URL when configuredWhy it works
Because retail floating shelves bundle the material cost (the oak board) with the labor (assembly, finishing, packaging) plus markup. The DIY breaks the bundle: you pay for materials at hardware-store prices and skip the labor by doing it yourself in 90 minutes. The retail markup on solid-wood floating shelves is typically 4 to 8 times the material cost — which is why DIY this single project pays for itself if you only make one.
Pro tip — Skip the cheap pine board option even though it's $8 cheaper than oak — pine takes oil unevenly, dents easily, and reads cheaper visually. Spending the extra $8 to $10 on oak (or walnut at $24) is the small upgrade that delivers retail-quality results. Solid hardwood is what makes the project look professional, not the technique.
$35 in materials, 90 minutes, indistinguishable from $200 retail — the highest-leverage DIY shelf project. See also: Danish oil
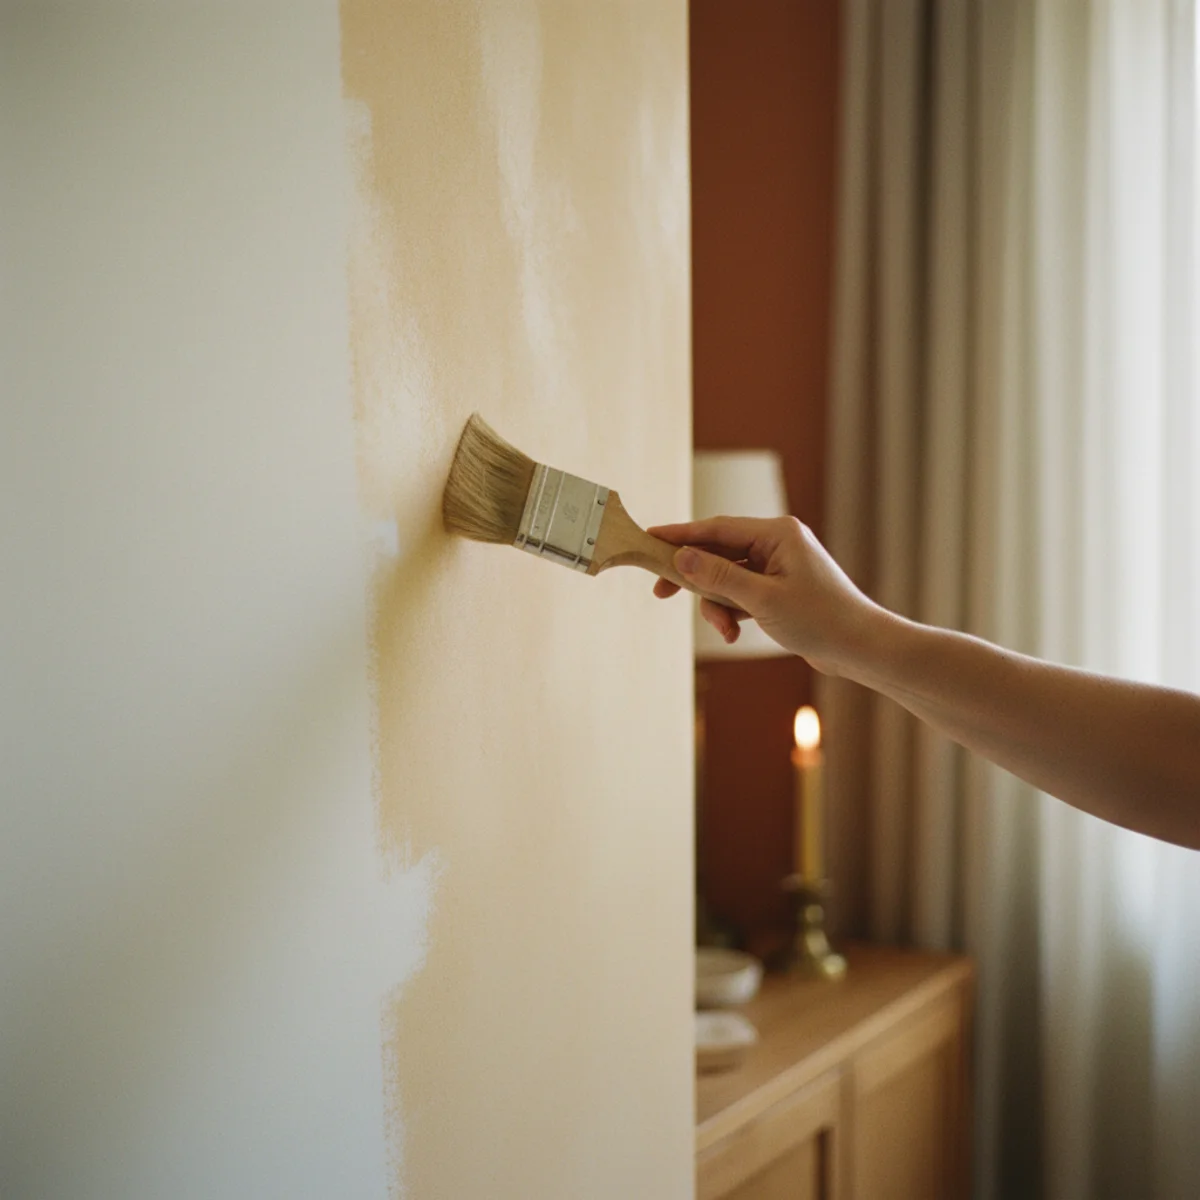
02Limewash a Single Wall in One Saturday
Limewashing one focal wall transforms a room more than any other single DIY project — the wall reads as plaster, not paint, with subtle two-tone mottling that catches light differently throughout the day. The project requires no special skill beyond a brush technique that takes thirty minutes to learn, and the materials cost under $50 for one wall. The result is the warmest, most architectural wall finish available to home DIYers in 2026.
Buy limewash paint from Bauwerk Color, Romabio, or Portola Paints in a warm white or cream tone ($40 to $80 per gallon, covers about 200 square feet — one wall). Use a 4-inch lime brush ($15 from the same brand) — never a regular paint brush or roller. Apply two coats in crosshatching X-shaped strokes, 24 hours between coats. First coat looks streaky and patchy (that's correct); second coat blends into subtle two-tone mottle. Skip glossy or recently latex-painted walls unless lightly sanded with 220-grit first. Total active time: 4 to 6 hours across two days. Total cost: $55 to $95 for materials.
AFFILIATE SLOTPROJECTLimewash paint (Bauwerk, Romabio, or Portola) + 4-inch lime brushAdd affiliate URL when configuredWhy it works
Because limewash is real lime-based plaster — the same material used in ancient Italian and Moroccan walls — and it creates microscopic texture variation that no flat paint can replicate. The mottled finish catches light differently at every hour, which keeps the wall from reading dead under 2700K lighting. Flat paint achieves a uniform surface; limewash achieves the depth of plaster. The visible difference is far greater than the cost difference suggests.
Pro tip — Practice the crosshatching X-shaped brush technique on a 4-by-4-foot piece of drywall scrap or inside a closet first — limewash brushing is unlike normal painting and the first 20 minutes feel awkward before the technique clicks. Once you get the rhythm, the rest of the wall takes about 90 minutes.
One Saturday, $55 in materials — limewash that costs $400+ if you hire a plasterer. See also: warm white or cream tone
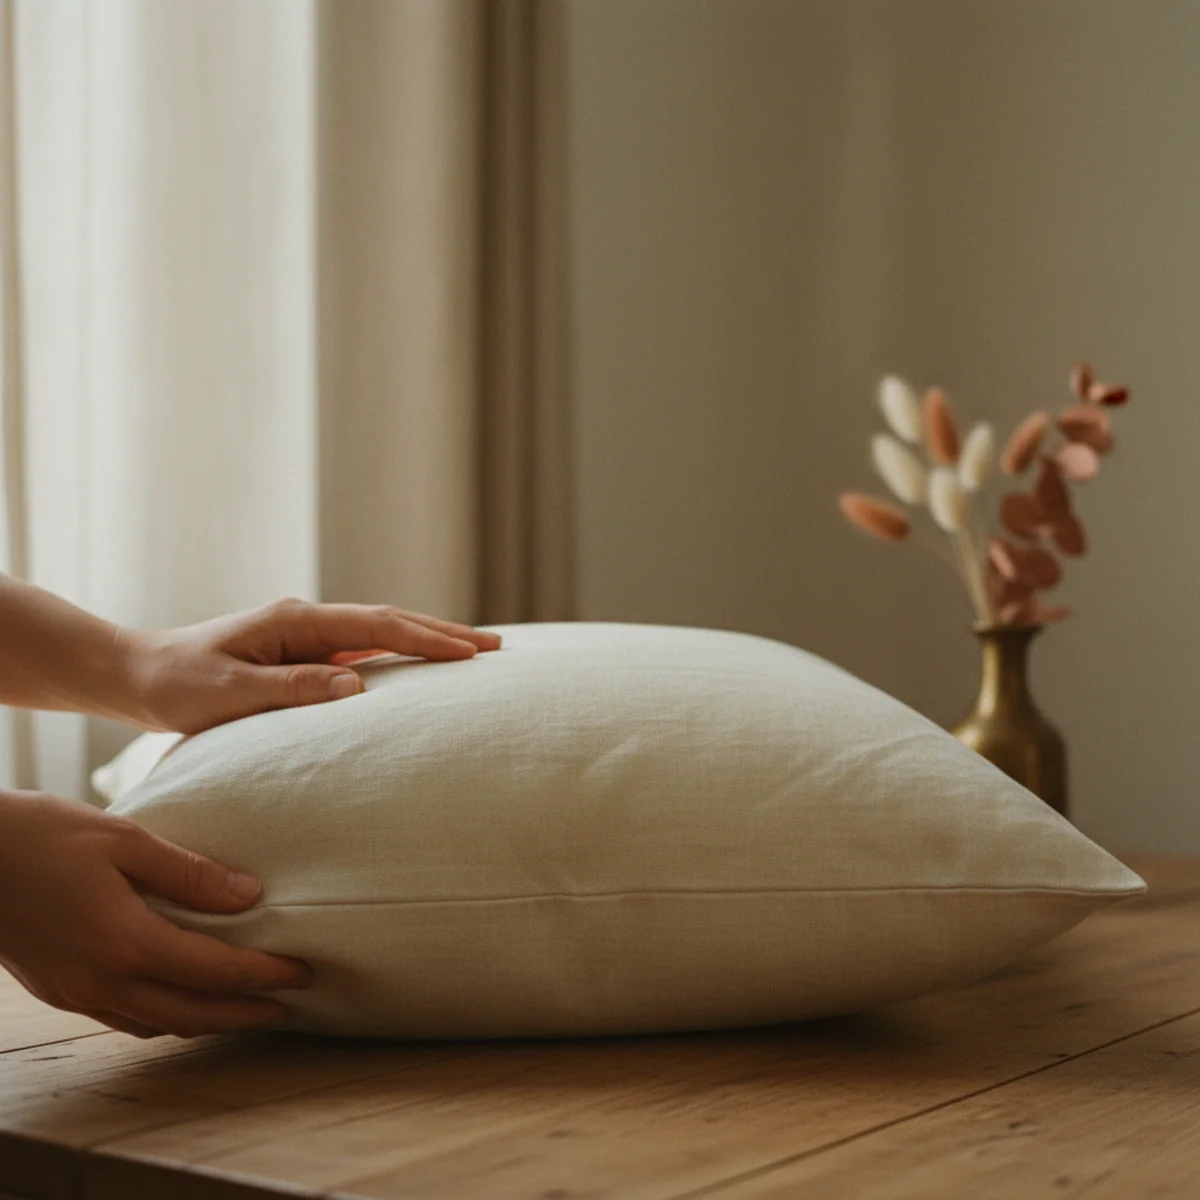
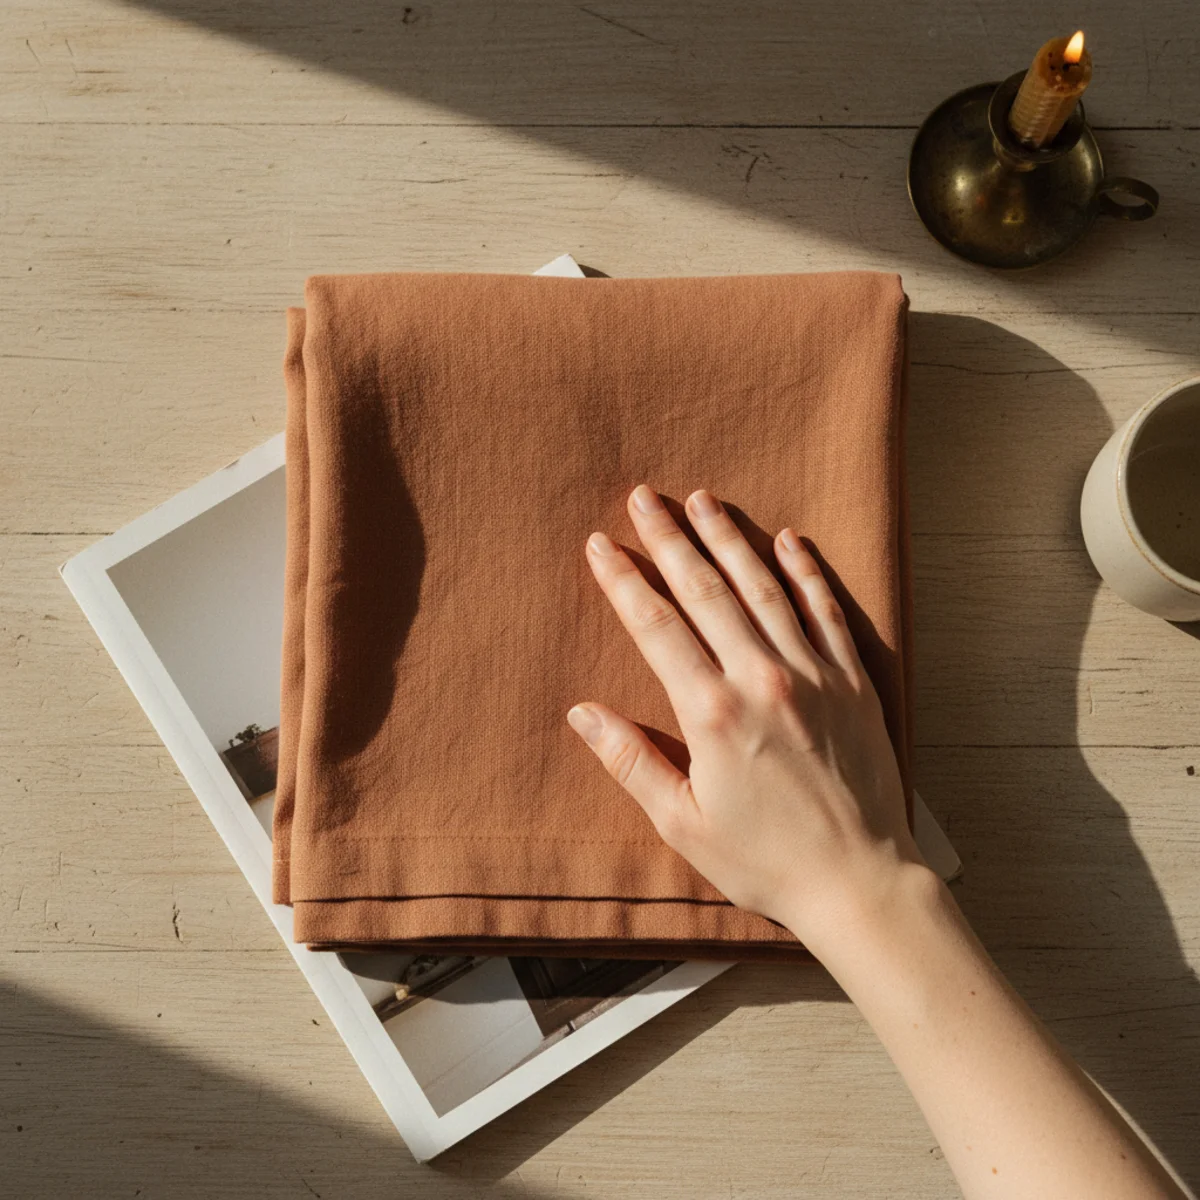
03Sew a Linen Throw Pillow Cover (No Pattern Needed)
Linen throw pillow covers retail for $40 to $80 each; the DIY version costs $8 to $15 in linen fabric and takes 30 to 45 minutes per cover with basic sewing-machine skills (or hand-sewing in 60 minutes). The project requires no pattern, no zipper, no complex construction — just three straight seams. The result is a cover indistinguishable from $79 retail and far better than $20 polyester-blend retail alternatives.
Buy 1 yard of medium-weight linen ($12 to $18 per yard from JoAnn, Fabric.com, or Stone Mountain Fabrics) per 18-inch pillow cover. Cut two squares 19x19 inches (18-inch pillow + 1 inch seam allowance). Hem one edge of each square (the opening) with a 1-inch fold under. Place squares right-sides together, sew three sides with 1/2 inch seam allowance, turn right-side out. Use envelope-back closure (one square overlaps the back by 4 inches) — no zipper needed. Total active time: 30 to 45 minutes per cover. Total cost: $8 to $15 per cover. Wash in cold delicate cycle, line-dry.
AFFILIATE SLOTPROJECT1 yard medium-weight linen per 18-inch envelope-back pillow coverAdd affiliate URL when configuredWhy it works
Because real linen has a soft drape and slight irregularity that polyester-blend covers can't replicate — and you can't buy quality linen covers at retail under $40. The DIY hits the sweet spot: real linen at $8 to $15 per cover, indistinguishable from $79 retail. The 30 minutes of basic sewing is the only barrier, and it's lower than most people expect — three straight seams and a hem is all the technique required.
Pro tip — Buy slightly oversized linen squares (20x20 inches instead of 19x19) — linen shrinks 3 to 5 percent in the first wash, and oversized cuts give you margin. The hemmed cover will fit the 18-inch pillow form perfectly after one cold wash and air-dry; an exactly-sized cut will be too tight.
$12 in linen, 35 minutes, envelope-back closure — DIY pillow covers that read like $79 retail. See also: envelope-back closure
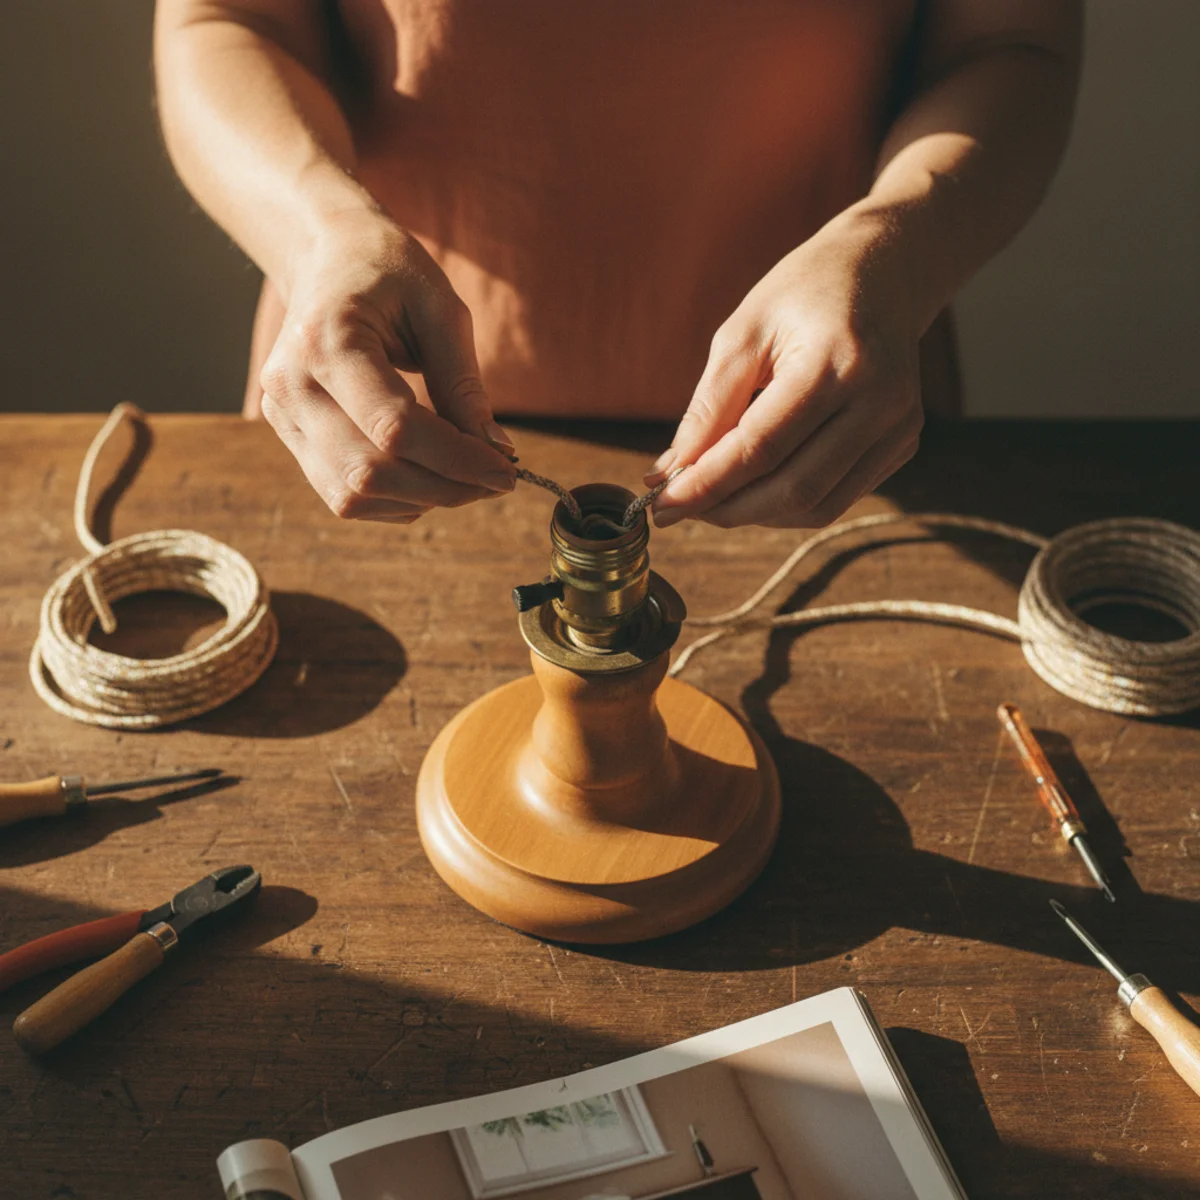
04Rewire a Thrifted Lamp in 20 Minutes
A thrifted lamp base at $20 plus a $8 rewire kit equals a $300-equivalent lamp. Rewiring is the single highest-ROI 20-minute DIY in home decor — the skill unlocks the entire vintage-lamp economy at thrift shops and estate sales, where most lamps under $30 need rewiring to be safe. The rewire process is genuinely simple: three wires, two terminals, a strain relief. YouTube has dozens of tutorials.
Buy a complete rewire kit ($8 to $12 from Home Depot, includes new cord, socket, harp, and threaded rod). Disconnect the lamp from power, remove the old socket (squeeze the brass shell to release), pull old cord out from the base. Thread new cord through the lamp base. Wire the new socket: smooth wire to brass screw, ribbed wire to silver screw, knot the cord underneath as strain relief. Reassemble the socket and harp. Test before reassembling the shade. Total active time: 20 minutes per lamp. Cost: $8 to $12 per rewire. The lamp is now fully safe and modern-compliant.
AFFILIATE SLOTPROJECTStandard lamp rewire kit (cord, socket, harp, threaded rod)Add affiliate URL when configuredWhy it works
Because the rewire skill is the difference between $5 to $30 thrifted lamp bases being usable or unusable. Without rewiring skills, dozens of beautiful vintage lamps at every thrift shop go unbought because their cords are cracked or their sockets are unsafe. With the skill, the same lamps become buyable — and the savings compound across every lamp purchase forever. The 20 minutes pays back across years of lamp purchases.
Pro tip — Keep two or three rewire kits in your toolbox at all times — you'll spot rewireable lamps at thrift shops more often than you'd expect, and being able to commit on the spot without a return trip to Home Depot keeps the momentum on lamp-hunting weekends. The kits cost $8 each; the lamps you find can save hundreds.
$25 thrifted brass + $8 rewire kit + $4 bulb = $37 lamp that reads like $300 retail. See also: vintage-lamp economy
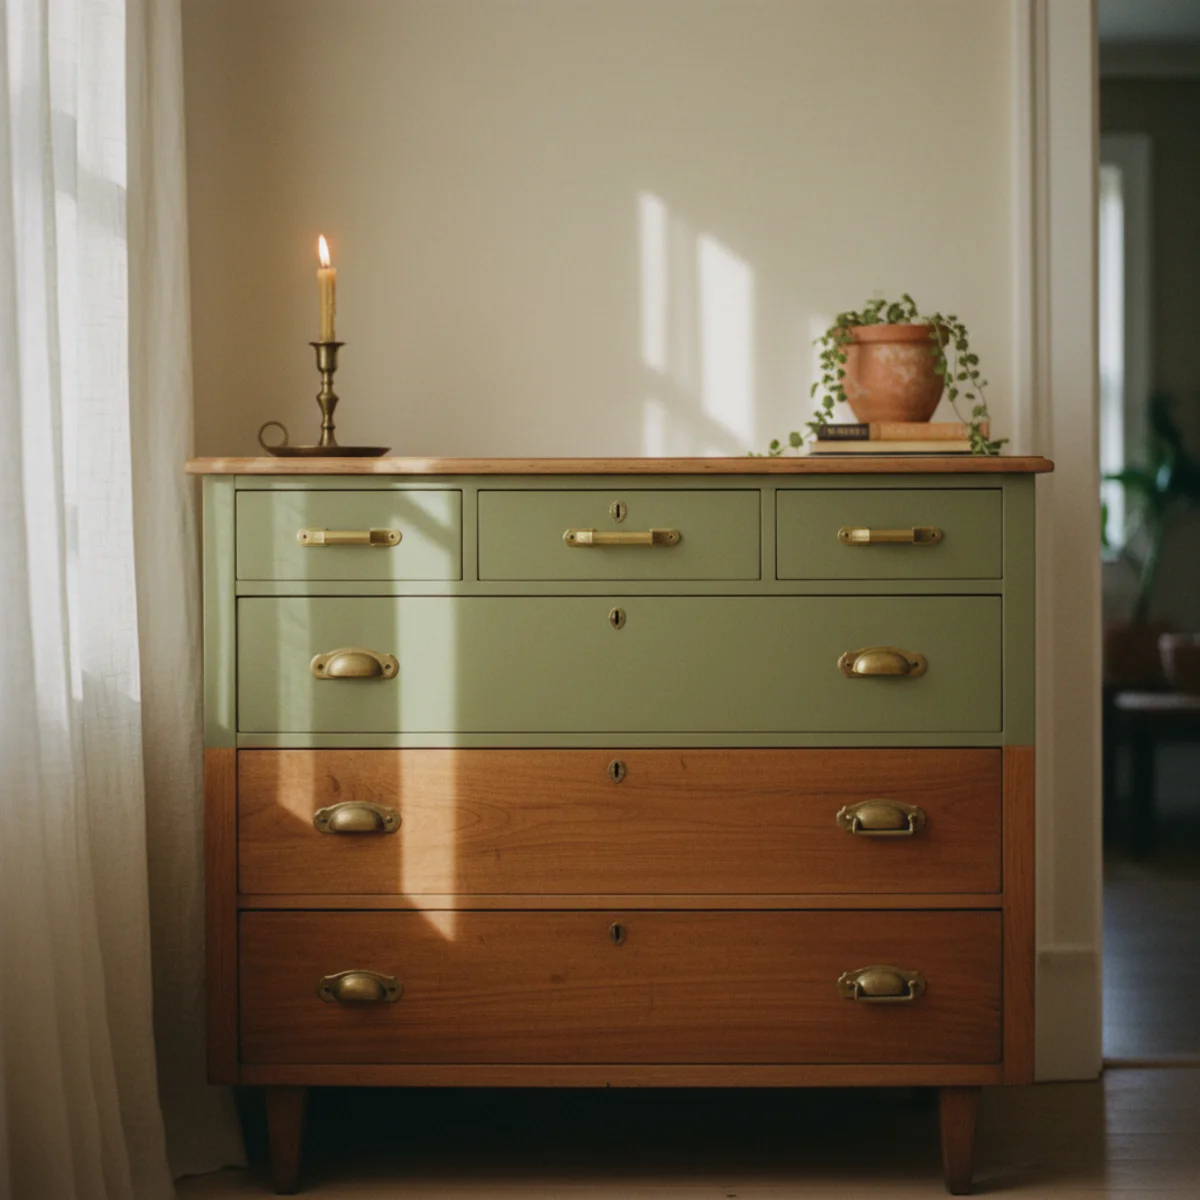
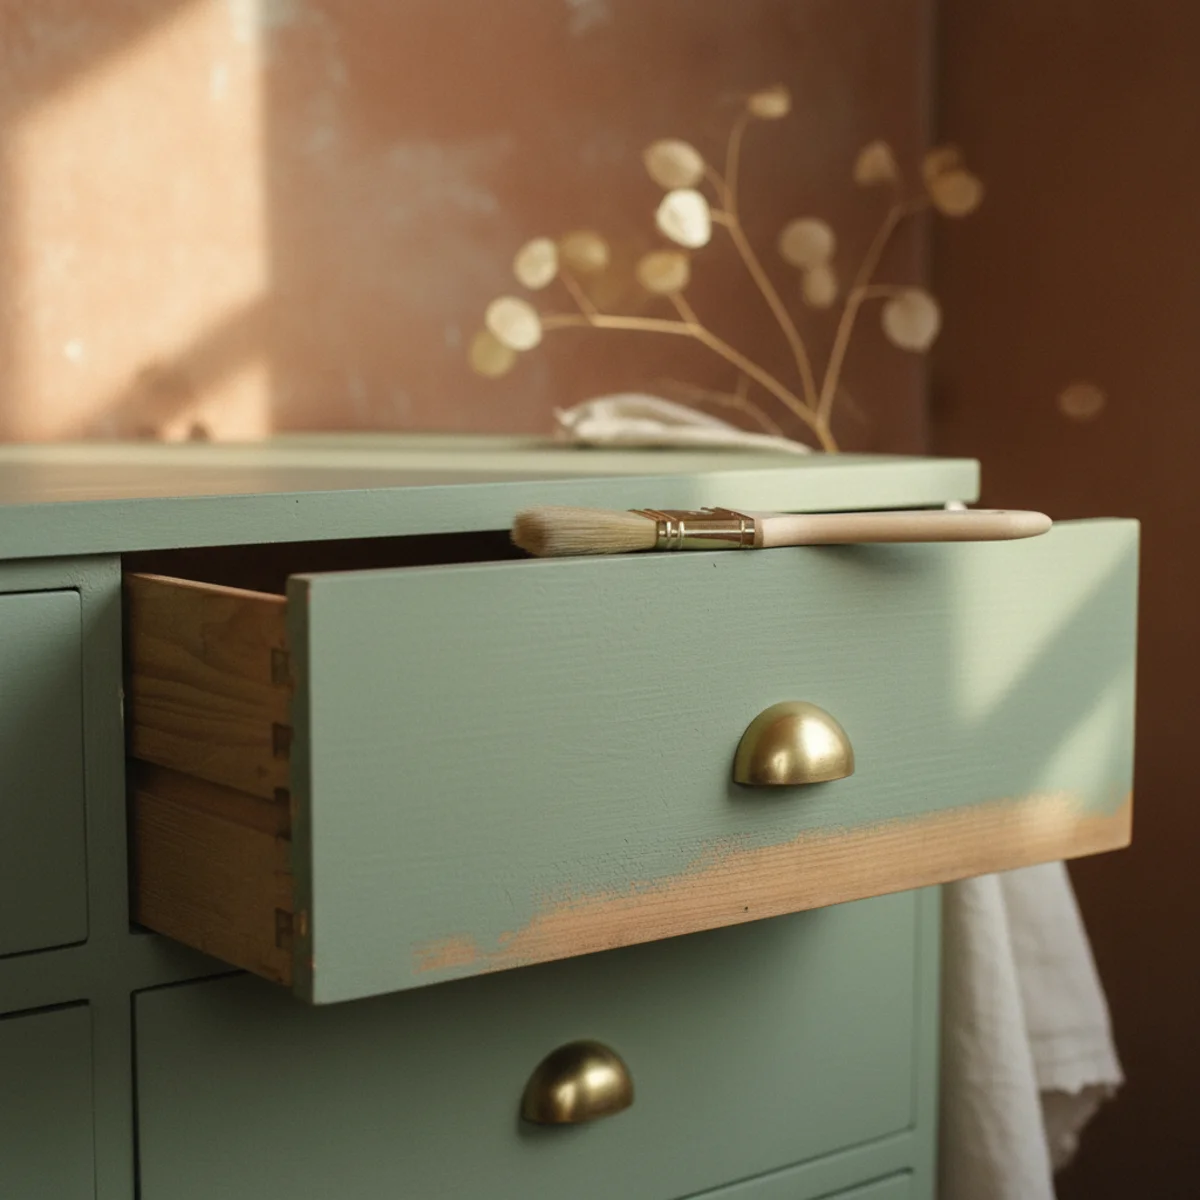
05Paint a Secondhand Dresser to Match Your Palette
Secondhand dressers at $40 to $150 from Marketplace or thrift shops can be painted to match any warm-home palette in one Saturday for under $40 in supplies. The transformation is dramatic — a generic 1990s veneer dresser becomes a custom warm-cream or sage statement piece, fully matched to the room. The skill is mostly patience (proper prep) rather than artistry.
Find a secondhand dresser at $40 to $150 (Marketplace, Goodwill, estate sales). Clean thoroughly with TSP cleaner ($4 from Home Depot), sand all surfaces lightly with 150-grit sandpaper (15 minutes per drawer face), wipe dust away. Apply one coat of bonding primer ($15 from Zinsser or Stix) — this is the most-skipped step that determines whether your paint sticks or peels in six months. Apply two coats of warm-home interior paint in matte or satin sheen, 4 hours between coats. Best brands: Benjamin Moore Advance, Sherwin-Williams Emerald Urethane. Replace original hardware with aged brass knobs or pulls ($4 to $20 each from House of Antique Hardware). Total active time: 4 to 6 hours across two days. Total cost: $80 to $100 (paint, primer, hardware) plus dresser.
AFFILIATE SLOTPROJECTSecondhand dresser + bonding primer + warm-home paint + aged brass hardwareAdd affiliate URL when configuredWhy it works
Because vintage and secondhand dressers have heavier construction (solid wood drawer boxes, dovetail joinery) than equivalently-priced new dressers (particleboard, stapled corners). The DIY paint job upgrades the look while preserving the better construction, giving you a custom-color piece with construction quality that retail $200 to $400 dressers can't match. The paint is what unlocks the value already present in the secondhand piece.
Pro tip — Skip the primer step only at your peril — every painted dresser horror story (paint peeling, sticky surfaces, color bleeding) traces back to skipping or rushing primer. The 30 minutes of bonding primer is the difference between a paint job that lasts decades and one that needs redoing in six months.
Marketplace dresser + warm cream paint + brass knobs — $130 total for a $400-equivalent piece. See also: warm-home palette
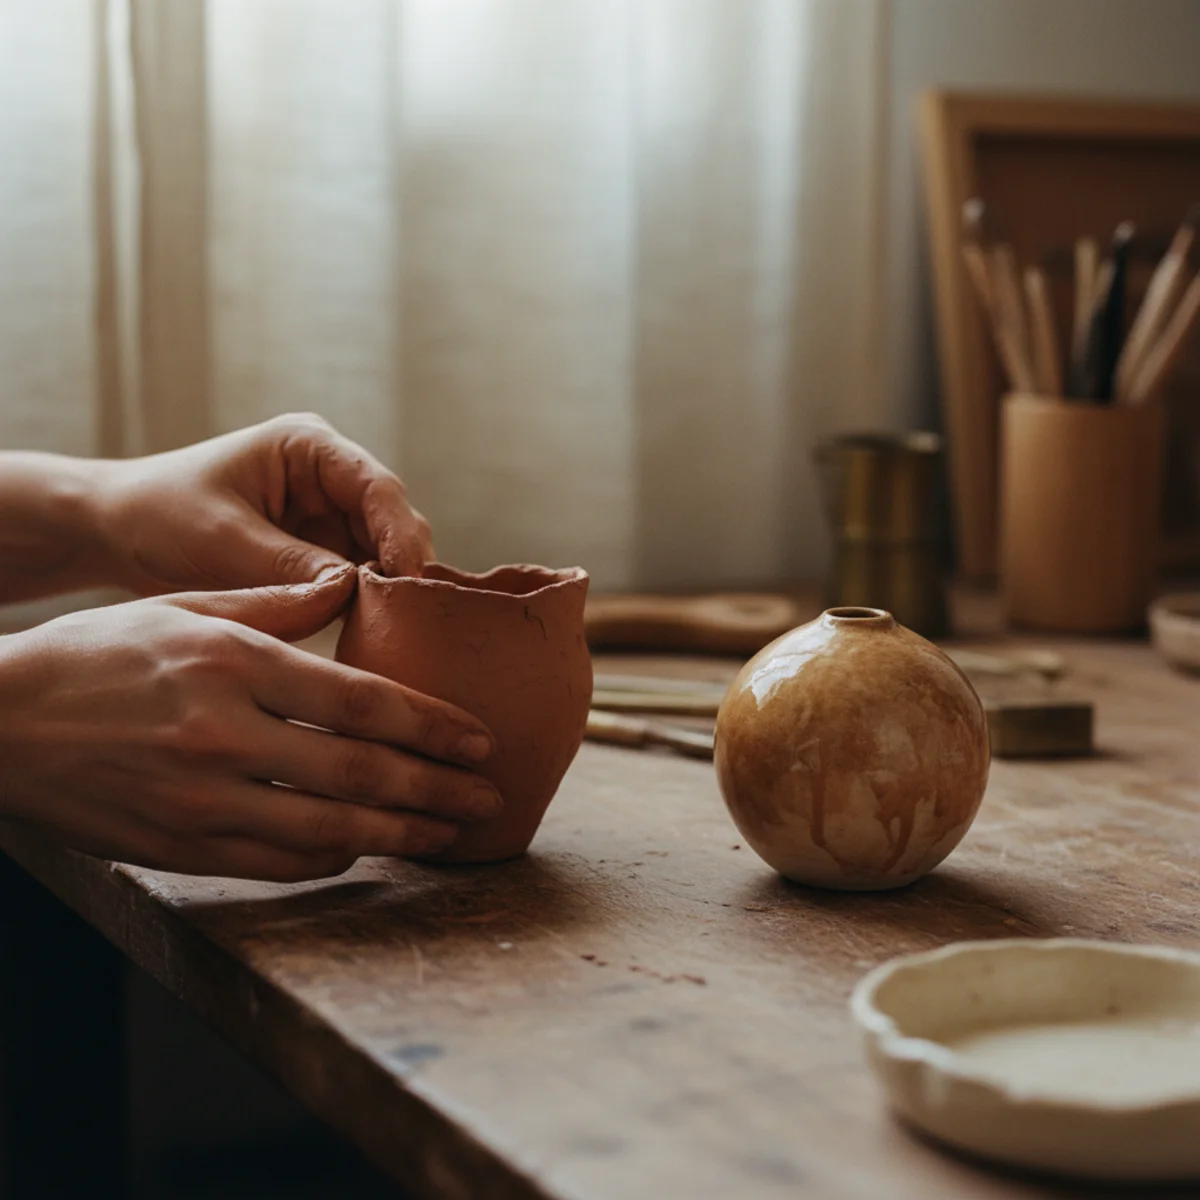
06Make a Plaster or Clay Vase by Hand
Hand-made plaster and air-dry clay vases retail for $40 to $200 each from craft fairs and Etsy. The DIY version costs $10 to $20 in materials and 90 minutes of active time (plus drying), and the slight irregularity of hand-made shapes reads as more sophisticated than mass-produced ceramics. The vase doesn't have to hold water — it's a sculptural object, often used for dried botanicals.
Two approaches: PLASTER — buy a small bag of plaster of Paris ($8 from Home Depot), mix per package instructions, pour into a balloon or paper-bag mold filled with sand for shape, let dry 24 hours, peel away mold, sand smooth. AIR-DRY CLAY — buy a tub of air-dry clay ($15 from Crayola Air-Dry or DAS), shape by hand into a small vase form (3 to 8 inches tall), let dry 48 hours, sand smooth with 220-grit. Both methods finished with one coat of matte sealer ($8 from Krylon) if desired. Total active time: 60 to 90 minutes plus drying. Total cost: $10 to $20.
AFFILIATE SLOTPROJECTPlaster of Paris with balloon mold OR air-dry clay shaped by handAdd affiliate URL when configuredWhy it works
Because the slight irregularity of hand-made shapes — asymmetric walls, fingerprint texture, slightly imperfect rim — reads as evidence of human-making, which is exactly what warm-home decor wants. Mass-produced ceramics achieve perfect symmetry, which reads commercial. The hand-made imperfection is the entire point; the project is rewarded by being non-perfect, which lowers the skill barrier dramatically.
Pro tip — Use a balloon as the mold for plaster vases — partially inflate, fill with sand or rice as ballast, pour wet plaster around the balloon shape, let dry, then pop the balloon. The resulting shape has organic irregularity impossible to achieve with rigid molds, and the technique requires zero skill beyond pouring.
$10 in plaster, 60 minutes of shaping — irregular hand-made vase that retails for $80+ from Etsy makers. See also: sculptural object
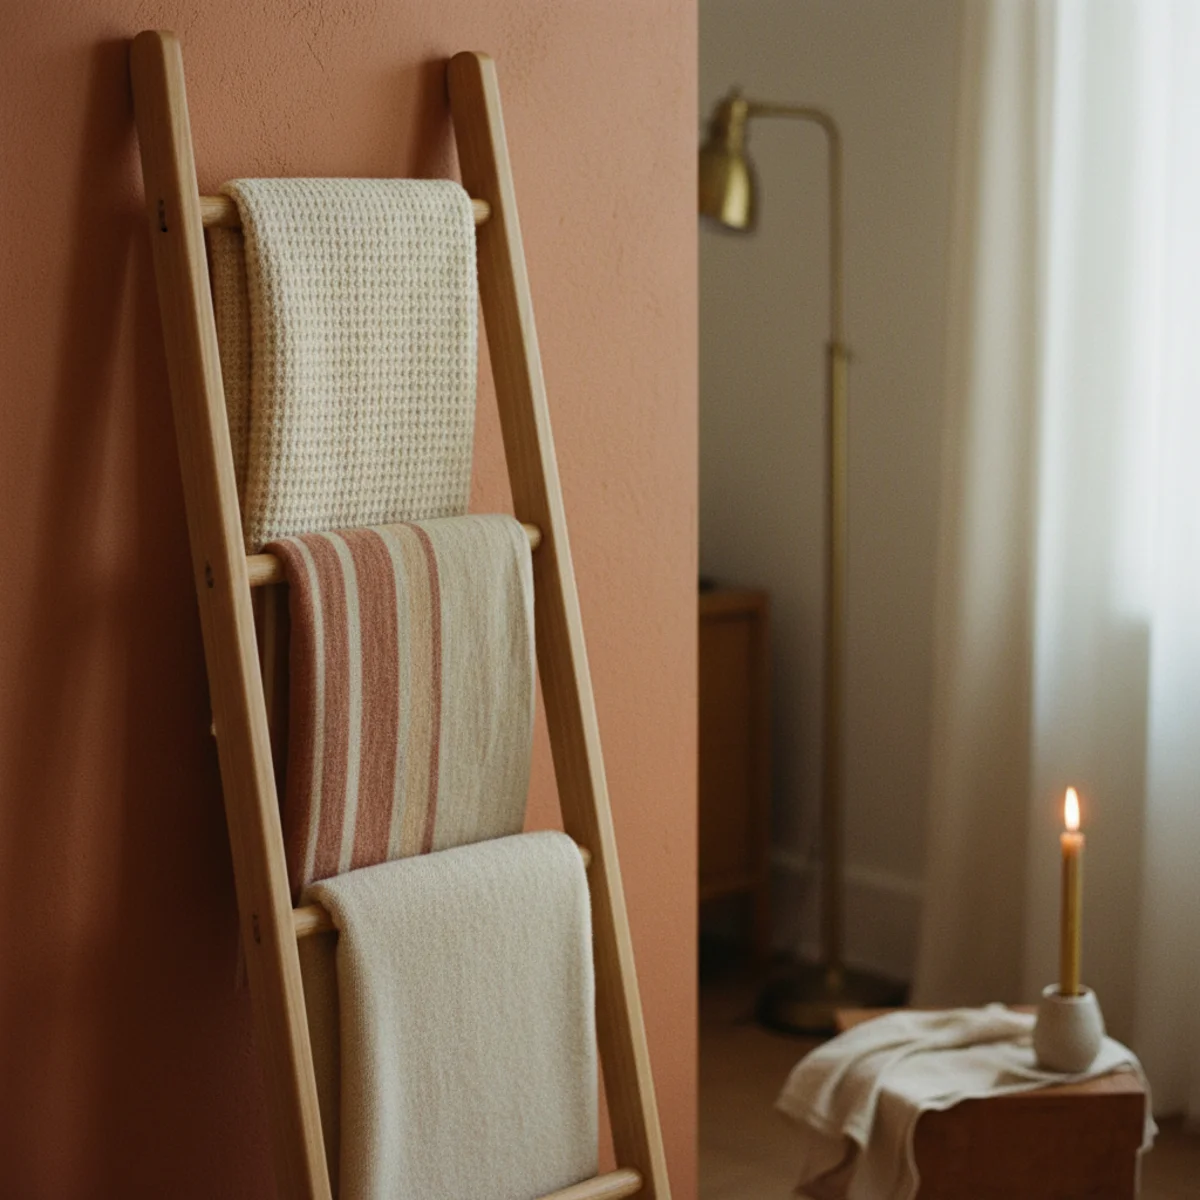
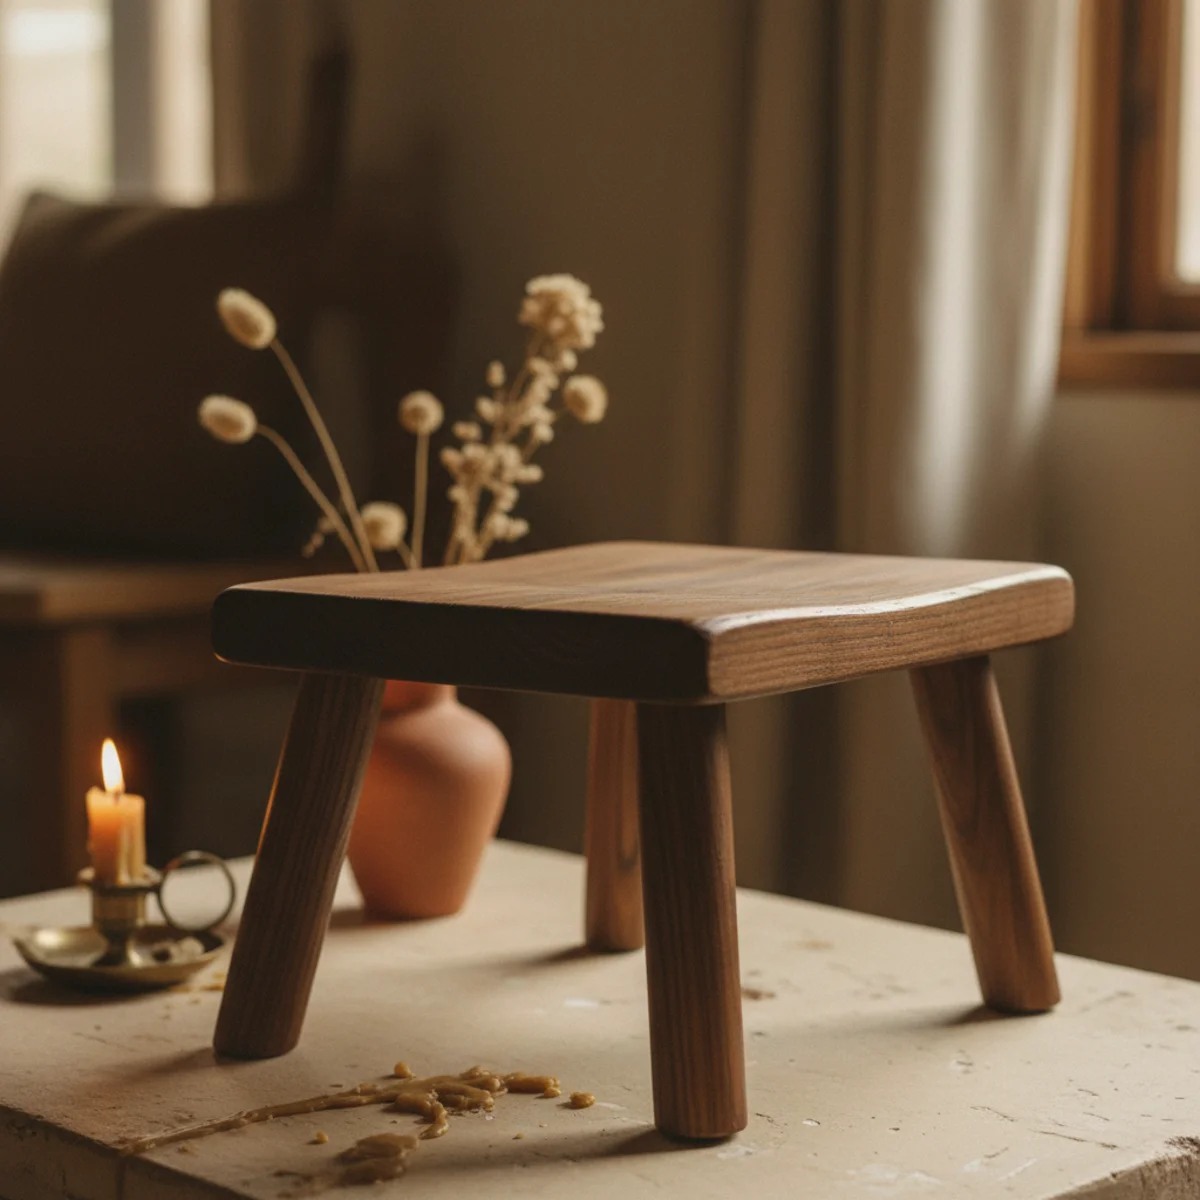
07Build a Blanket Ladder for Cozy Storage
A leaning blanket ladder retails for $80 to $200; the DIY version costs $25 to $40 in materials and takes 90 minutes. The ladder solves the universal problem of throw-blanket storage — too many throws, no good place to keep them — by displaying three to five blankets vertically in a small floor footprint. The leaning posture also reads as architectural rather than decorative, which fits warm-home aesthetics.
Buy two 1x3x72-inch oak or pine boards ($16 to $24 total) and four 1x2x18-inch oak or pine boards ($8 to $12) for rungs. Mark rung positions at 12-inch intervals on both side rails. Drill pilot holes and screw rungs into rails with 2-inch wood screws. Sand lightly with 220-grit, oil with Danish oil for warm finish ($12). Lean against wall at slight angle (top edge 6 to 8 inches from wall, bottom edge against the wall). Each rung holds 1 to 2 folded throws. Total active time: 90 minutes. Total cost: $30 to $40 with oil. Pick oak for warm finish, pine for budget.
AFFILIATE SLOTPROJECTTwo 1x3x72" rails + four 1x2x18" rungs + Danish oilAdd affiliate URL when configuredWhy it works
Because folded throws on a couch back read as messy when there are more than two; on a chair as cluttered; in a basket they get mashed and forgotten. The ladder displays each throw individually, vertically, with the texture visible — turning storage into visual styling. The 4 to 5 rungs hold up to 10 throws (two per rung) in a 16-by-72-inch floor footprint, far less space than any closet-based alternative.
Pro tip — Sand the rung edges slightly more aggressively than the rails — soft rounded rung edges mean throws drape gracefully over them rather than catching on sharp corners. A few extra minutes with 220-grit sandpaper on each rung edge is the small detail that makes the ladder work as styling rather than just storage.
$35 in oak, 90 minutes — leaning blanket ladder that holds five throws in a 16x72 inch footprint. See also: wool throws
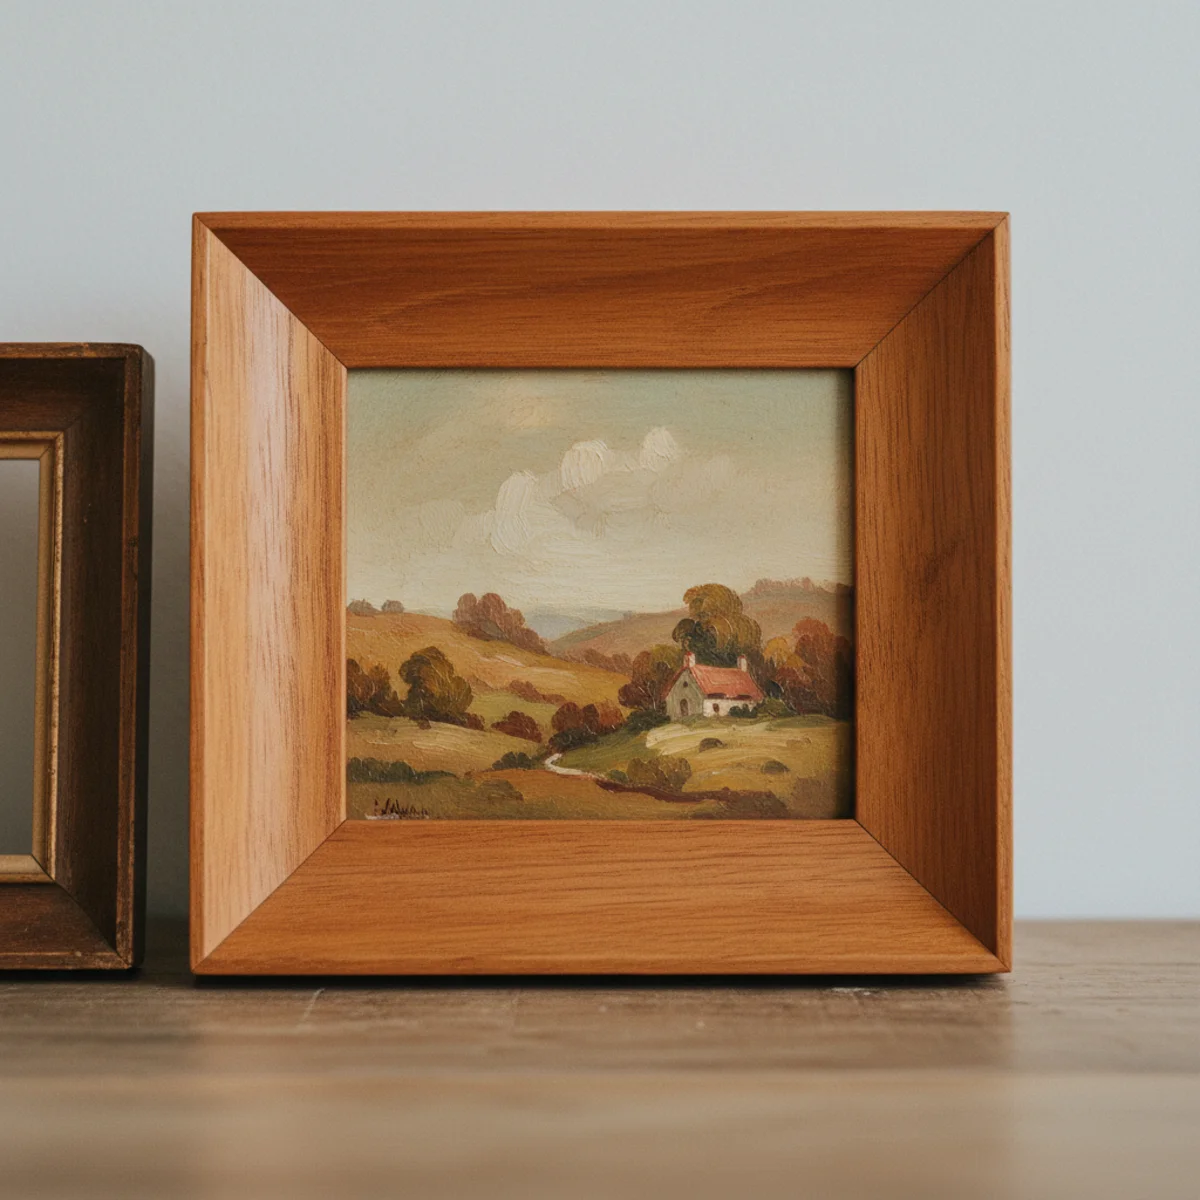
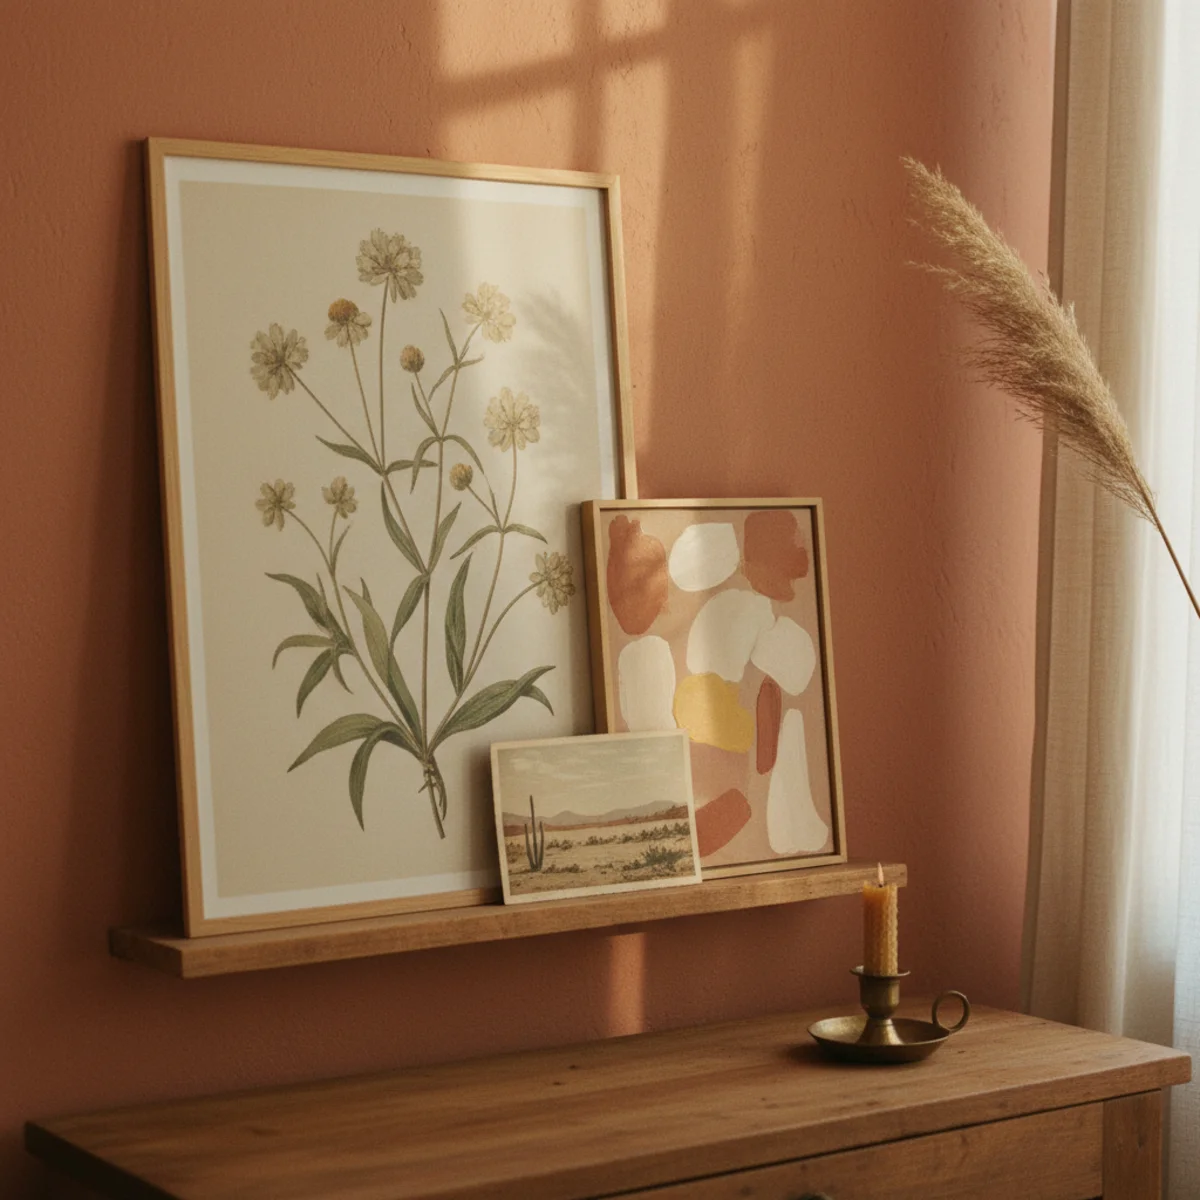
08Reframe Vintage Art With Warm-Toned Frames
Vintage art at thrift shops and estate sales often comes in dated 1980s frames that fight warm-home aesthetics. Reframing the same art in a simple wood or aged-brass frame transforms the piece from outdated to elegant — and costs $10 to $30 in a new frame from IKEA, Pottery Barn, or thrift shops. The art itself is unchanged; only the frame matters for how the piece reads on the wall.
Pull vintage art (oil paintings, watercolors, prints, photographs) from existing dated frames — typically held by small nails or staples on the back. Clean the art surface gently with a soft cloth. Buy a replacement frame in oak, walnut, oiled wood, or aged brass at the same outer dimensions as the original (or slightly larger to add a mat). Best sources: IKEA HOVSTA at $20-40, Pottery Barn at $40-80, vintage frames thrifted at $5-15. Mount art inside new frame using included backing or acid-free foam core ($4 from Michael's). Total active time: 15 to 30 minutes per piece. Total cost: $10 to $30 per reframing.
AFFILIATE SLOTPROJECTReplacement frame in oak, walnut, oiled wood, or aged brass + acid-free foam coreAdd affiliate URL when configuredWhy it works
Because the frame is what the eye reads first — before the art itself. A dated 1980s gold-foil frame in plastic makes any art inside read as a thrift find; the same art in a warm oak or aged brass frame reads as a collected vintage piece. The frame upgrade is essentially decoupling the value of the art (often beautiful, often unchanged) from the value of its presentation (often dated, easily fixed). The 15-minute reframing is one of the highest visual-impact DIYs available.
Pro tip — Keep a small stockpile of reframing-quality frames in three or four common sizes (8x10, 11x14, 16x20) so when you find vintage art at a thrift shop, you can immediately commit knowing you have the right frame at home. The stockpile costs $80 to $150 once and pays back across years of art hunting.
Same vintage botanical print, new oak frame — $25 reframing that transforms the art from dated to elegant. See also: vintage art
09Stain Raw Pine Stools or Side Tables Dark
Raw pine furniture (stools, side tables, small benches) at $20 to $60 from IKEA, Target, or unfinished-furniture stores can be stained to read like walnut or oak for under $20 in materials and one Saturday. The DIY transforms cheap pine pieces into warm-toned furniture that matches the rest of the warm-home palette — a key move for budget warm interiors.
Buy raw or lightly-finished pine furniture ($20 to $60 from IKEA's unfinished line, Target's Pillowfort line, or unfinished-furniture stores). Sand lightly with 220-grit. Apply pre-stain conditioner ($8 from Minwax) — this is the critical step that prevents pine's typical blotchy stain absorption. Wait 15 minutes, then apply wood stain (Minwax Provincial 211 for medium walnut, Minwax Special Walnut 224 for warm walnut, Minwax Early American 230 for lighter oak tone) with a clean cloth. Wipe excess after 5 to 10 minutes. Let dry 24 hours. Apply one coat of Danish oil or paste wax for the matte warm finish. Total active time: 60 to 90 minutes plus drying. Total cost: $15 to $20.
AFFILIATE SLOTPROJECTPre-stain conditioner + Minwax Provincial 211 or Special Walnut 224 + Danish oilAdd affiliate URL when configuredWhy it works
Because pine is the cheapest solid hardwood available and takes warm stains beautifully when prepared correctly. The pre-stain conditioner is the critical secret — it evens out pine's absorption so the stain reads uniform rather than blotchy. Properly conditioned and stained pine is almost indistinguishable from walnut or oak at one-fifth the price, which is why DIY-stained pine is the budget-warm-home secret of professional stylists.
Pro tip — Test the stain on the underside of the piece first before committing to the visible surfaces — even with conditioner, pine varies enough between boards that the same stain can read slightly differently on different sections. Testing first lets you adjust stain darkness (second coat for deeper) or pivot to a different stain color entirely if needed.
$25 raw IKEA stool + $15 in stain = warm walnut piece for $40 total, matches the rest of the room. See also: warm-home palette
10Make No-Sew Linen Curtain Panels
Linen curtain panels retail for $40 to $200 per panel; the no-sew DIY version costs $15 to $25 per panel and takes 30 minutes per panel with iron-on hem tape. No sewing machine required, no pattern, no specialized skill. Just linen fabric, iron-on hem tape, an iron, and a tape measure. The result is panels indistinguishable from $79 retail at half the cost.
Buy 3 yards of medium-weight linen per panel ($36 to $54 at $12-18/yard from JoAnn or Fabric.com). Cut to desired length plus 4 inches (2 inches top hem, 2 inches bottom hem). Cut to desired width plus 2 inches (1 inch each side hem). Lay flat, fold 1-inch hem on each side, press with iron, apply iron-on hem tape ($6 from JoAnn) along the fold, iron to seal. Repeat for top hem (2 inches, hem tape) and bottom hem (2 inches, hem tape). Add ring clips ($8 for 10 from IKEA) to top hem for hanging — no pocket sewing needed. Total active time: 30 minutes per panel. Total cost: $50 to $70 per panel.
AFFILIATE SLOTPROJECT3 yards medium-weight linen + iron-on hem tape + ring clipsAdd affiliate URL when configuredWhy it works
Because curtain hems don't carry stress like seams on clothing do — they just need to hold the fabric edge flat. Iron-on hem tape creates a permanent bond that survives wash cycles and daily use indefinitely, identical to a sewn hem for curtain purposes. The skill barrier for sewing curtains (sewing machine, even tension, straight lines on long fabric) is what kept most people from making them; hem tape removes that entire barrier in one step.
Pro tip — Wash and dry the linen before cutting and hemming — linen shrinks 5 to 8 percent in the first wash, and pre-washing means your finished curtains will hang at the planned length forever. Cutting unwashed linen leads to curtains that are 2 to 3 inches shorter than expected after the first wash.
$60 in linen and hem tape, 30 minutes per panel — no-sew curtains that read like $179 retail. See also: linen fabric
11Build a Picture Ledge for Layered Art Display
A picture ledge is a narrow horizontal shelf designed to display leaning art and photographs — the same look as IKEA MOSSLANDA at $14, but DIY in solid wood at $20 to $30 per ledge. The ledge lets you layer multiple framed pieces in front of each other (the layering technique from the shelf-styling rules) without committing to specific positions on the wall. Easy to swap art weekly if you want.
Buy a 1x3x36-inch solid oak or walnut board ($12 to $24) and a 1x2x36-inch board ($6 to $10) for the front lip. Sand both boards with 220-grit, oil with Danish oil. Attach front lip to main board with 1.5-inch wood screws from underneath, creating a 1.5-inch front lip that art leans against. Mount completed ledge to wall studs at desired height (typically 56 to 60 inches off floor for picture display) with two heavy-duty screws into studs. Total active time: 45 minutes. Total cost: $20 to $35 per ledge. Holds 5 to 10 layered pieces of art in a 4-inch deep, 36-inch wide footprint.
AFFILIATE SLOTPROJECT1x3x36" solid oak + 1x2x36" front lip + Danish oil + heavy-duty wall screwsAdd affiliate URL when configuredWhy it works
Because hung art is committed — you've drilled holes, you've measured the position, you're not changing it without spackle. A picture ledge holds the same art with zero commitment per piece: lean what you have today, swap it tomorrow, layer multiple pieces in front of each other. The flexibility unlocks the kind of casual art display that reads as collected and evolving, where hung art reads as fixed and decided.
Pro tip — Build two or three ledges and stack them vertically at 12 to 18 inches apart — the stacked-ledge wall creates a gallery effect with full layering flexibility on every level. Three ledges holds 15 to 30 pieces of layered art, far more than a hung gallery of the same wall space.
$25 in oak, 45 minutes — picture ledge that displays layered art with zero commitment per piece. See also: leaning art
12Pour Your Own Beeswax Candles for Warm Glow
Hand-poured beeswax candles retail for $20 to $50 each; the DIY version costs $3 to $5 per candle and takes 30 minutes for a batch of six. Beeswax (not paraffin, not soy) is the warmest-burning candle wax — slightly golden glow, naturally sweet honey scent, dripless flame, six-hour burn time per cubic inch. The candles also outlast retail equivalents because home-poured beeswax is denser than commercial production.
Buy 1 pound of natural beeswax pastilles ($15 to $20 from Sky Organics or Honey Candles) — makes about 6 candles. Buy candle wicks pre-tabbed ($5 for 20 wicks from Etsy) and small glass containers (Weck jars at $8 for 6, small thrifted glasses at $1 each). Melt beeswax in a double boiler (or large Pyrex measuring cup in saucepan of simmering water). Glue tabbed wick to bottom of glass with a drop of melted wax. Pour melted wax slowly into glass, holding wick centered with a chopstick or pencil. Let set 4 hours. Trim wick to 1/4 inch above wax. Total active time: 30 minutes for a batch of 6. Total cost: $3 to $5 per candle.
AFFILIATE SLOTPROJECTNatural beeswax pastilles + pre-tabbed wicks + small thrifted glass containersAdd affiliate URL when configuredWhy it works
Because beeswax burns at a higher temperature (1500°F vs 1000°F for paraffin) which produces a fuller spectrum of warm light — including more red-orange wavelengths that match 2700K bulbs. Beeswax also burns clean without the soot, scent additives, or potential toxins of paraffin candles. The naturally honey-scented air, dripless flame, and warm golden glow are all unique to beeswax — and the per-candle cost when DIY is one-fifth of retail.
Pro tip — Use thrifted small glass containers (small juice glasses, espresso cups, antique inkwells) at $1 each from Goodwill for the candle vessels — varied vintage glass reads more sophisticated than identical Weck jars, and the cost is a fraction. Vary the heights and shapes across the batch for a cohesive but non-matchy candle collection.
$5 each instead of $35 retail — hand-poured beeswax candles with the warmest glow in any candle category. See also: 2700K bulbs

How to start a DIY decor project
Match the project to your weekend and your skills. These four steps keep it from going sideways.
- 1Pick a project that fits your tools
Be honest about what you own and can borrow. A no-sew curtain or a paint job needs nothing; a floating shelf needs a drill and a level.
- 2Gather everything before you start
Lay out materials and tools first. Half of DIY failures are a missing bracket or the wrong screw discovered mid-project.
- 3Prep properly, then build
Sand, prime, measure twice. The prep is boring and it's where the quality lives — especially sanding between coats.
- 4Finish for warmth, not shine
Oil wood instead of lacquering, choose matte over gloss, and let small irregularities stand. They're the handmade warmth you're after.
Quick tips
- Always sand between coats of paint or stain — it's the step that separates homemade from made.
- Find studs before mounting anything heavy; drywall anchors fail under a loaded shelf.
- Oil wood rather than lacquer; matte ages gracefully and repairs easily.
- Photograph wiring or assembly before you take anything apart.
- Buy ten percent more material than the math says — mistakes and offcuts happen.
- Test stains and paints on a hidden area first; the color on the lid lies.
DIY projects by skill level
No-sew curtains, styling, decanting, reframing art, pouring candles — an afternoon, zero hardware.
Painting furniture, limewashing a wall, sewing pillow covers — a drill, a brush, a sewing machine.
Floating shelves, picture ledges, blanket ladders, lamp rewiring — a drill, a saw, a level, patience.
Stick to reversible projects: removable limewash panels, leaning shelves, no-hole hanging systems.
The best DIY decor looks made, not bought. The small imperfections are the proof a person was here.
Frequently asked questions
What's the highest-impact DIY home decor project for beginners?+
How long do these DIY decor projects typically take?+
Do I need power tools for these DIY projects?+
What's the most overlooked DIY decor skill?+
How do I make DIY decor projects look professional?+
Can I do these DIY projects in a rental apartment?+
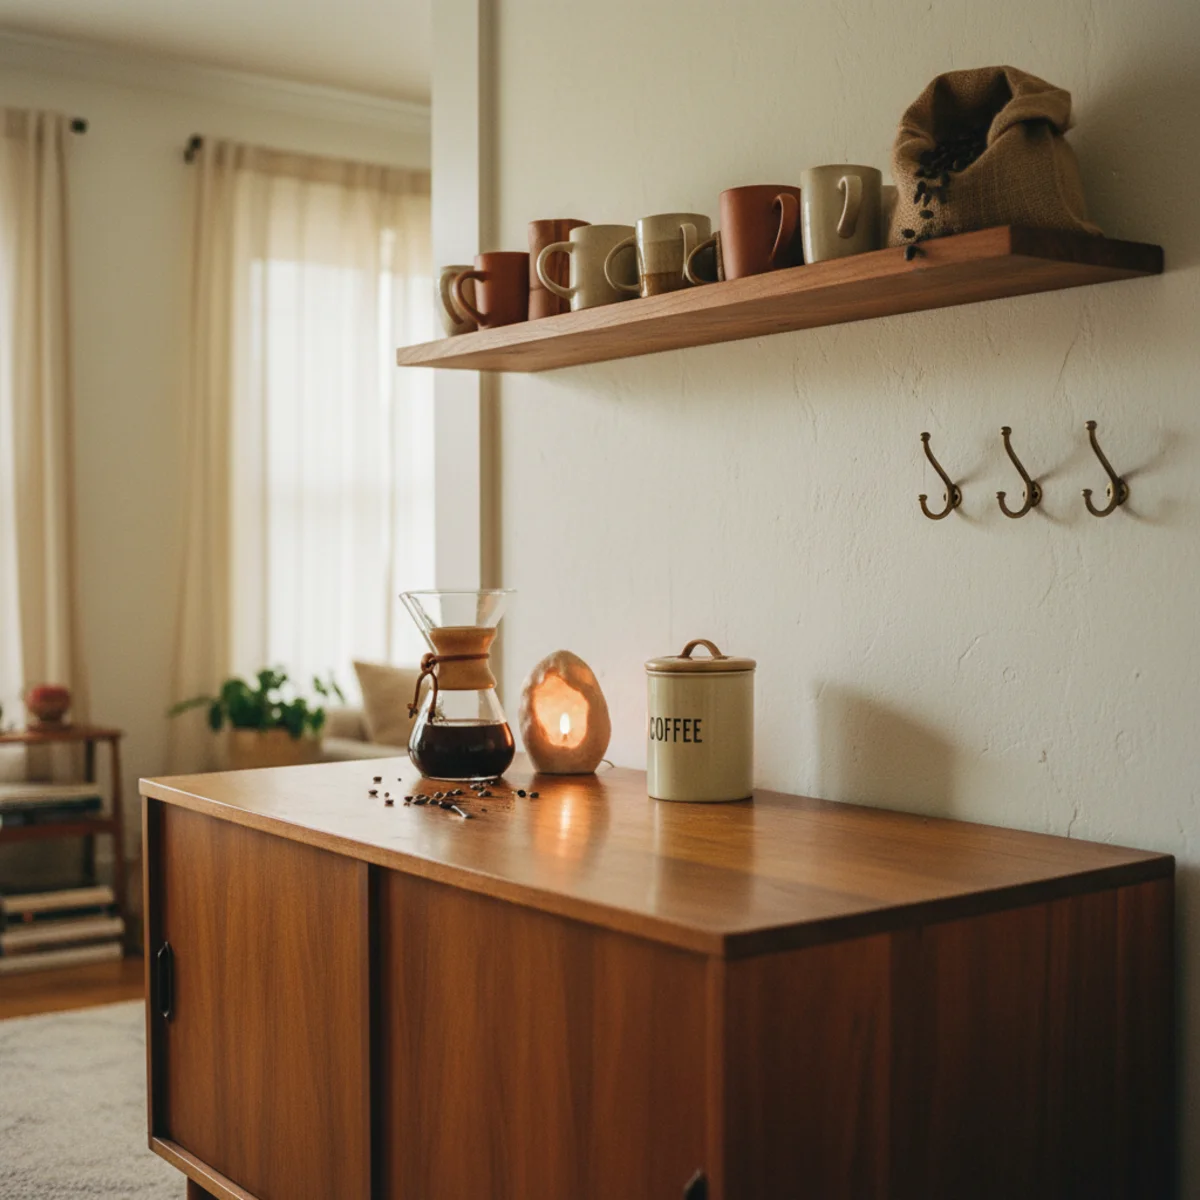
- DIYDIY Coffee Bar: How to Build a Cozy Coffee Station in a Weekend (2026)
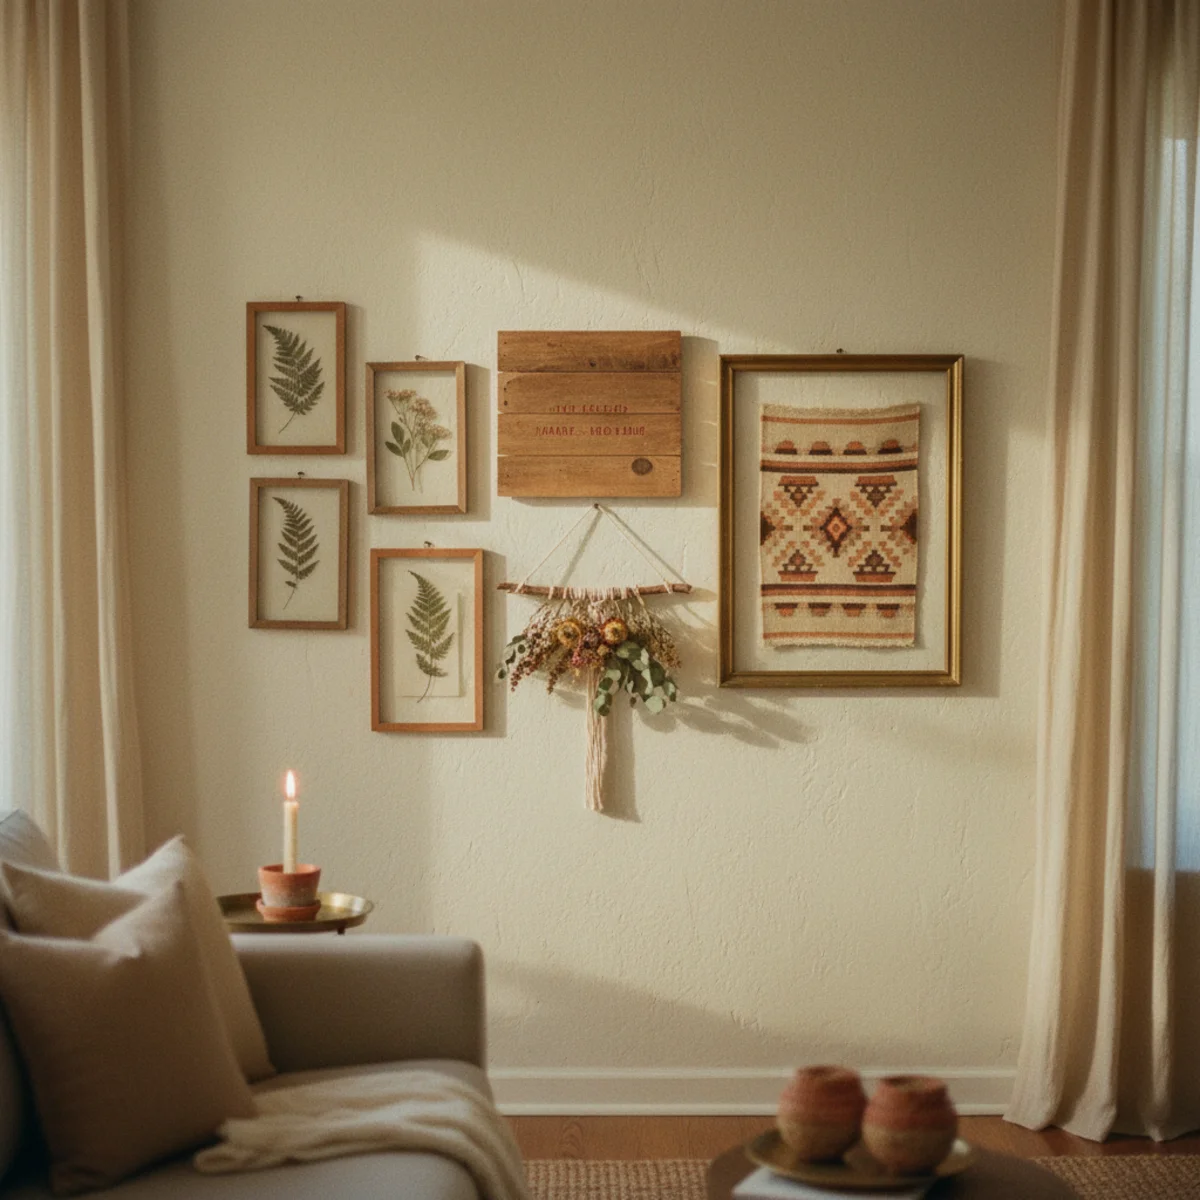
- DIYDIY Farmhouse Wall Art: 18 Warm, Easy Projects for 2026
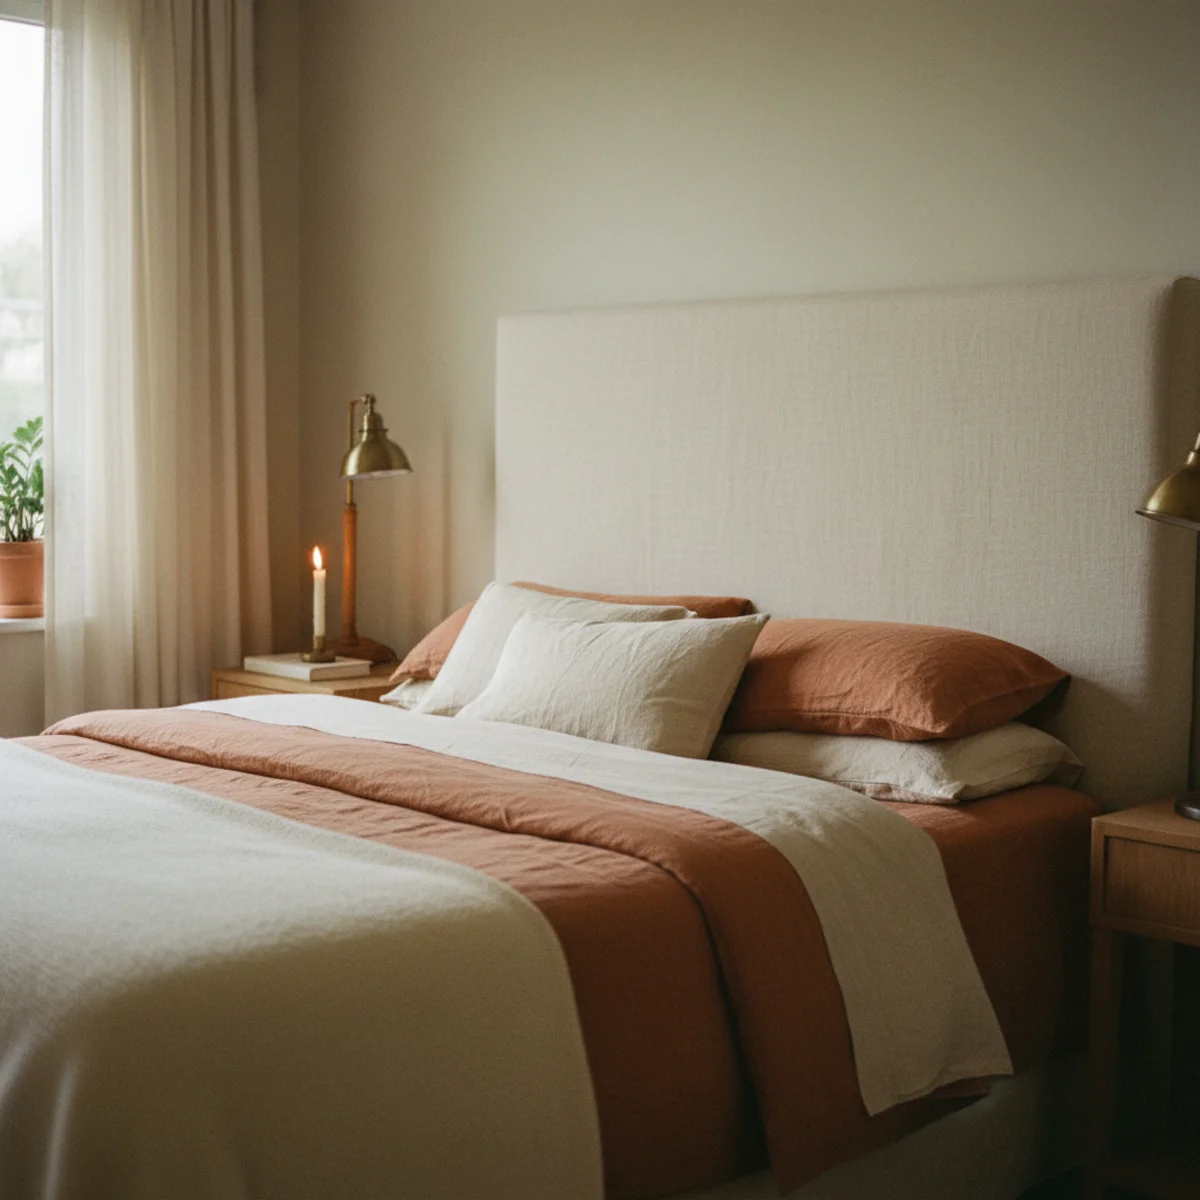
- DIYDIY Headboard Ideas: 18 Warm, Easy Builds for the Bedroom (2026)
- DIYPainted Dresser Makeover: Transform a Thrift Find in a Weekend (2026)
- DIYDIY No-Sew Curtains: How to Make Warm Linen Drapes for Less (2026)
Pick the project that fits the tools you actually own, gather everything before you start, and don't skip the sanding. We'd begin with a painted secondhand dresser or a floating oak shelf — both are cheap, both forgive mistakes, and both deliver that made-not-bought warmth a store piece never will. Start one notch easier than you think you need to; a finished simple project beats an abandoned ambitious one every weekend of the year.