These twelve painted dresser principles apply to solid-wood dressers, sideboards, nightstands, and any case furniture with drawers or doors. Each principle names the specific step, the product, and the why — with particular focus on the preparation steps (cleaning, sanding, priming) that most DIY paint projects rush past and that determine the final result's quality. A painted dresser that was properly prepared and thinly coated reads as furniture; one that was paint-applied-to-unprepared-surface reads as a painted object.
The project succeeds when the dresser is correctly selected (solid wood, not MDF or particleboard), correctly prepared (clean, scuffed, primed), and correctly painted (thin coats, light sanding between, appropriate finish sheen). The hardware choice and the color complete the result. Total time: 2-3 days including drying times. Total cost in paint materials: $60-120 depending on paint brand.
By the end of this guide, you'll know how to execute a professional-quality painted dresser makeover — starting with the right piece, cleaning before anything else, sanding to scuff, priming first, choosing a warm custom color, sanding lightly between coats, applying thin coats, swapping the hardware, sealing for durability, painting the interior, choosing the right sheen, and fixing flaws before painting.
WHAT'S INSIDE
- Why starting with solid wood (not MDF) determines whether the project succeeds
- The clean-sand-prime preparation that separates professional results from amateur ones
- Thin coats not thick — the application principle that prevents the most-common painted-furniture failures
- Hardware swap as the project's final transformation move
Paint can rescue almost any solid-wood piece. The only thing that separates a pro finish from an amateur one is the prep nobody wants to do.
— Studio McGee blog [citation needed — verify before publish]
What makes a good painted-furniture makeover?
A good painted-furniture makeover starts with a solid-wood piece with good bones, then transforms it through proper prep, the right paint, and a careful finish into something that looks custom rather than DIY. The transformation is mostly about color and finish — a dated oak or laminate-look dresser in a warm clay, sage, or charcoal reads completely different — but the durability and the professional look come from the prep.
The single biggest factor is the prep nobody wants to do: cleaning, light sanding, and priming. Skip it and the paint chips and peels within months; do it and the finish lasts for years and looks factory-smooth. The other half is buying the right piece — solid wood takes paint beautifully and is worth refinishing, while cheap particleboard with a damaged veneer usually isn't. Get a good piece, prep it properly, and a weekend of paint does the rest.
More in DIY you may love
See allWhy furniture makeovers are everywhere in 2026
As budgets tightened and secondhand-first decorating spread, the painted-furniture makeover became one of the most popular DIYs — a way to get exactly the color and quality you want for a fraction of new. Pinterest's furniture makeover and painted dresser searches climb every year.
The honest appeal is unbeatable value. A solid-wood dresser secondhand costs a fraction of a new particleboard one, and a coat of the right paint makes it custom — your exact color, in real wood, for the price of a tin and a Sunday. As the warm-home palette moved toward clay, sage, and charcoal that big-box furniture rarely comes in, painting a thrifted piece became the only affordable way to get the color and the quality at once.
12 painted dresser makeover ideas and tips
01Start With a Solid-Wood Piece
The dresser's base material determines whether a painted makeover succeeds or fails. Solid wood or high-quality plywood dressers take paint beautifully, hold hardware replacement securely, and last decades. MDF-core and particleboard furniture takes paint poorly (often requiring special primers), doesn't hold screws well for hardware replacement, and can swell or chip at painted edges. Source solid-wood vintage pieces at estate sales and thrift stores rather than painting flat-pack furniture.
Identifying solid wood for paint projects: VISUAL TESTS — solid wood shows wood grain on all surfaces including the top edges of drawer fronts (not just the face). Plywood shows layered edge construction. MDF shows smooth uniform edges with no grain visible and slightly chalky texture when scratched. WEIGHT TEST — solid wood and quality plywood dressers are significantly heavier than equivalent-size MDF/particleboard pieces. A solid-wood 5-drawer dresser typically weighs 80-150 lbs; MDF equivalent weighs 50-80 lbs. KNOCK TEST — knock on the face. Solid wood produces a dull woody knock; hollow MDF or particleboard produces a slightly hollow sound. BEST SOURCES — estate sales and thrift stores for solid-wood vintage dressers at $50-200. Solid-wood pieces from the 1950s-1980s (mid-century dressers, Victorian dressers, simple colonial-style bureaus) are frequently available and respond beautifully to paint. STYLES that paint well — simple, clean-lined dressers with minimal ornate routing or carved details. Heavy ornate carving is difficult to paint cleanly; simple panel fronts with good bones are the ideal paint project.
AFFILIATE SLOTSELECTIONSolid wood or quality plywood vintage dresser from estate sales ($50-200); avoid MDF and particleboard; 1950s-1980s dressers typically excellent candidatesAdd affiliate URL when configuredWhy it works
Because MDF and particleboard furniture absorbs paint differently than wood, swells at edges when exposed to water-based paint, chips at corners under normal use (the chipboard edge underneath the paint layer is fragile), and cannot hold new hardware screws securely if the original hardware is moved. A solid-wood dresser painted is still fundamentally solid wood with good paint on it; MDF painted is still fundamentally compressed wood fiber with paint on top of a fragile material. The base material is the project's foundation.
Pro tip — Test with a small amount of water on an inconspicuous area — solid wood absorbs water slowly (grain darkens slightly after 30 seconds); MDF absorbs water immediately and visibly swells at the surface. The water-absorption test reveals the material more definitively than any visual inspection.
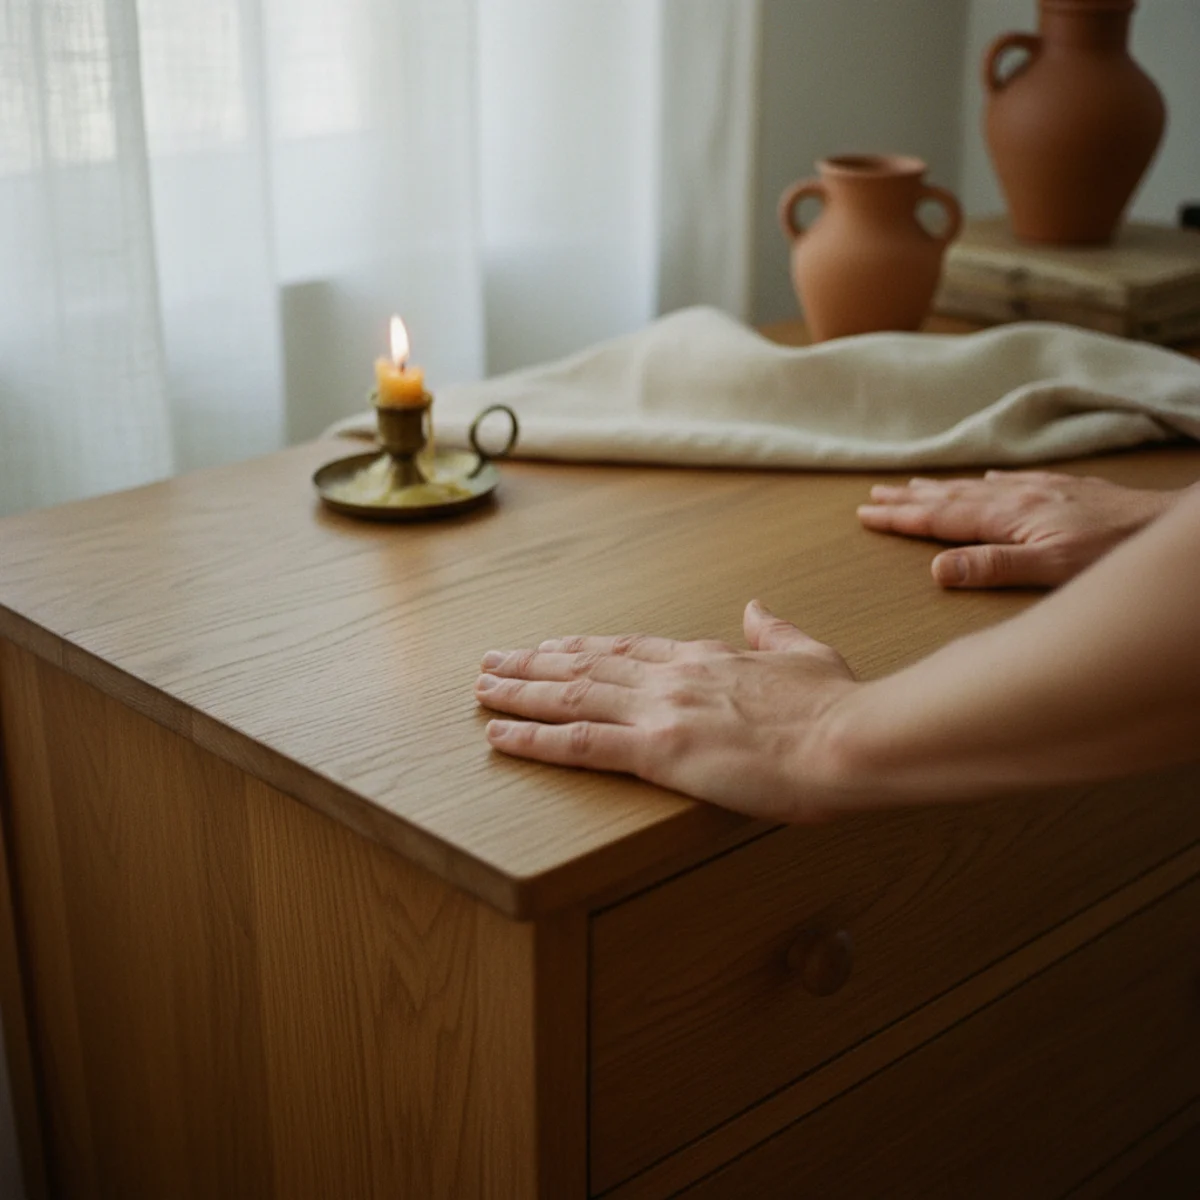
Vintage 1960s solid wood dresser with panel fronts — the simple clean construction that paints beautifully. See also: thrifted-decor-ideas
02Clean Before Anything Else
The single most-skipped and most-important preparation step: thoroughly clean every painted surface before any sanding or priming. Grease, wax, polish, and oils from years of hand contact and furniture polish prevent primer and paint from bonding to the surface. A clean surface is the foundation; everything else builds on it. Cost: $5-10 in cleaning materials.
Pre-paint cleaning protocol: TSP SUBSTITUTE CLEANER — Trisodium Phosphate substitute (TSP-PF or equivalent, $8-15 for a small container) mixed per package directions in warm water. Apply with a sponge or cloth, scrub all painted surfaces, drawers fronts, sides, and top. Rinse with clean water, allow to dry completely (2-4 hours). TSP removes grease, wax, and surface contamination that invisible even after wiping. DEGREASER — alternatively, a spray degreaser (Krud Kutter, $8-12) applied to all surfaces and wiped clean. Less thorough than TSP for waxed or heavily polished surfaces but adequate for typically-used dressers. AREAS TO FOCUS — the top surface (most touched, most accumulation), drawer fronts at the pull locations (finger grease concentration), and any surfaces that feel slightly tacky or slick. DRYING TIME — allow complete dry after washing. Painting on a damp surface causes paint failure. If washing in the morning, paint in the afternoon or the following morning after confirming complete dryness. SKIP THIS AT YOUR PERIL — paint applied over waxed, greasy, or contaminated surfaces peels within weeks. The 30-minute cleaning step prevents the 3-day repaint that contaminated surfaces require.
AFFILIATE SLOTPREPARATIONTSP substitute ($8-15) or Krud Kutter degreaser ($8-12) on all surfaces; scrub, rinse, allow 2-4 hours complete dry before sanding; do not skipAdd affiliate URL when configuredWhy it works
Because sanding a contaminated surface drives the contaminants (wax, oil, grease) into the wood grain and into the sanding dust, distributing them across a wider surface area and making the contamination worse. Sanding a clean surface removes the top material uniformly; sanding a greasy surface embeds the grease in the scratch marks from sanding. Clean first, then sand — this sequence prevents contamination from being driven into the surface by the sanding abrasive.
Pro tip — Wash the dresser with TSP substitute outdoors or in a well-ventilated garage rather than in the bedroom — TSP substitute produces fumes and the washing process creates contaminated runoff that should drain outdoors rather than onto household floors. The outdoor washing also reveals in bright daylight any surface issues (chips, gouges, old repairs) that need attention before painting.
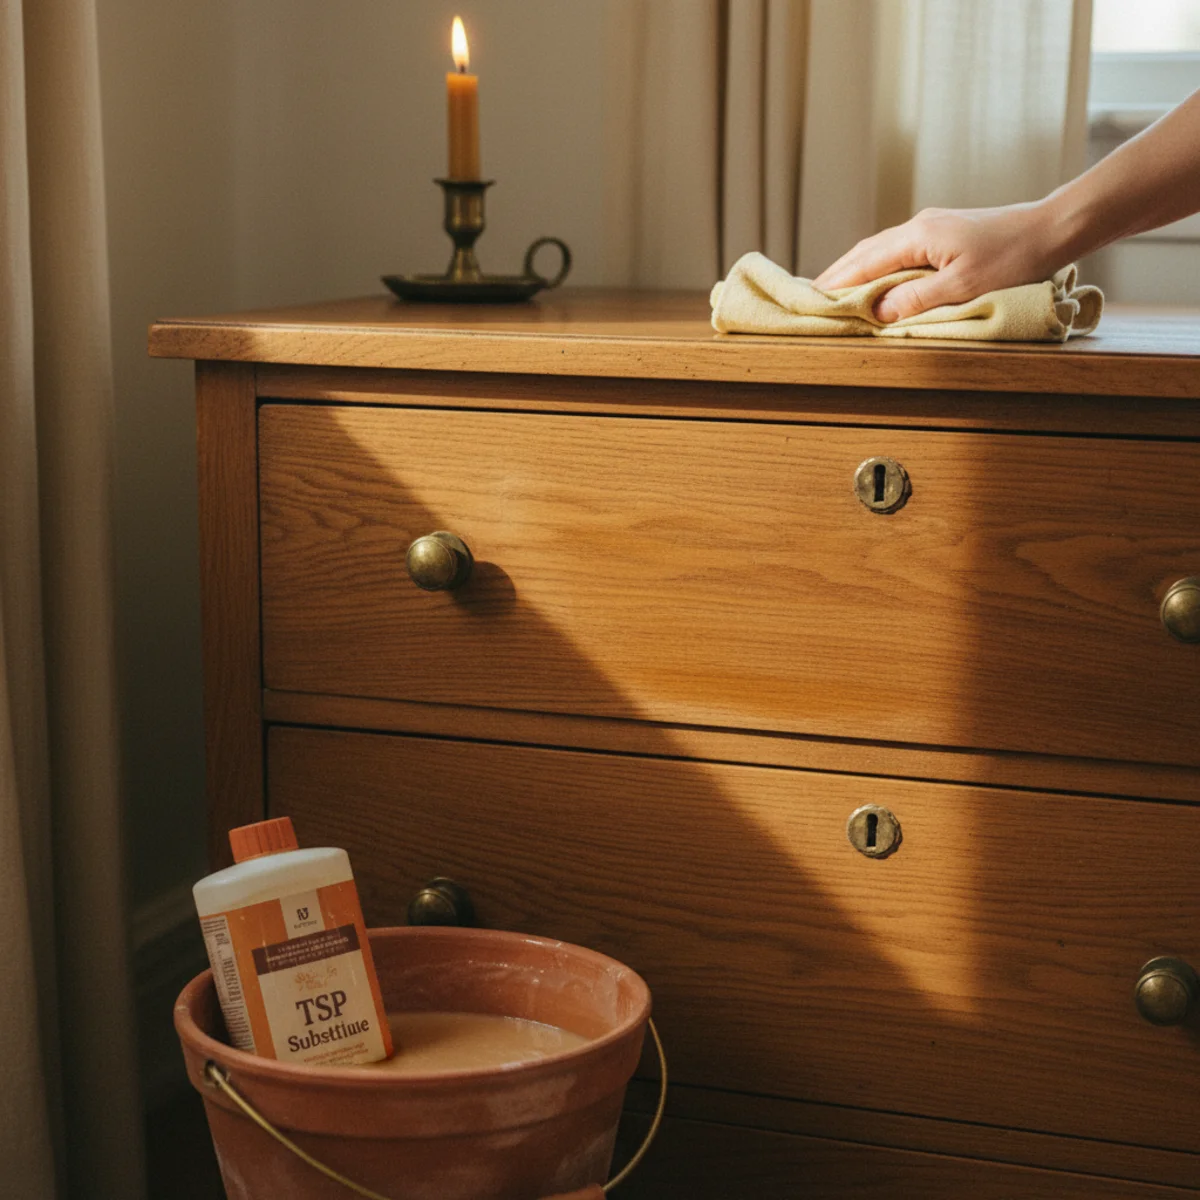
TSP substitute scrubbing the drawer fronts — the 30-minute cleaning that determines whether paint bonds or peels. See also: diy-headboard-ideas
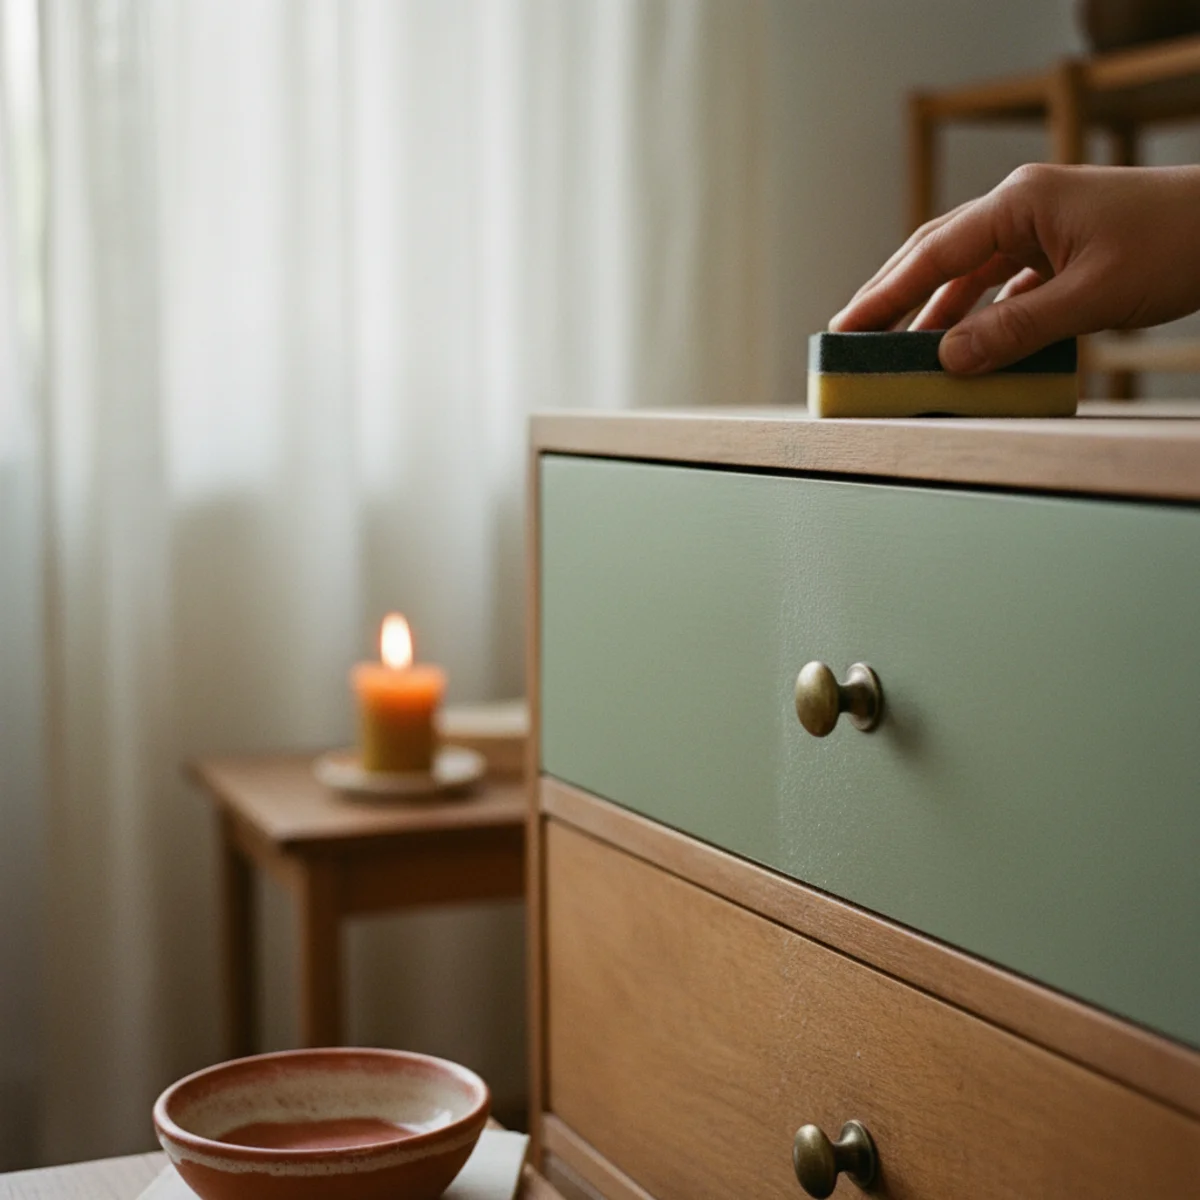
03Sand to Scuff the Surface
After cleaning, a light scuff sand with 120-150 grit sandpaper creates the surface texture that primer adheres to. The goal is not to remove the existing finish completely but to dull the sheen and create microscopic scratches that give the primer mechanical grip. This step takes 20-30 minutes and prevents the paint from peeling off intact existing finish. Cost: $5-10 in sandpaper.
Scuff sanding technique: SANDPAPER GRIT — 120-150 grit for scuff sanding over painted or varnished surfaces. 80 grit if stripping to bare wood (only needed for badly damaged existing finishes). TOOL — a random orbital sander ($30-60, speeds the process dramatically on flat surfaces) or sanding block ($3-5) for flat areas, folded sandpaper for crevices. Sanding by hand without a block produces uneven pressure; the rigid block maintains consistent contact. TECHNIQUE — sand in the direction of the grain (or diagonally across, not against the grain). Light consistent pressure — you're scuffing not stripping. COVERAGE — sand all surfaces that will be painted: all four sides of the dresser, all drawer fronts, the top, the sides. Any unsanded area may have the primer fail to adhere. DUST REMOVAL — after sanding, wipe all surfaces with a tack cloth ($2-5 per pack) or damp lint-free cloth to remove all sanding dust before priming. Sanding dust left on surfaces creates a gritty primer surface; tack cloth picks up the finest particles. WHEN TO SKIP SANDING — if the existing finish is latex paint in good condition, the scuff sand can be very light or skipped in favor of a bonding primer. When in doubt, sand.
AFFILIATE SLOTPREPARATION120-150 grit scuff sand all surfaces with random orbital sander ($30-60) or sanding block ($3-5); wipe with tack cloth before priming; test primer adhesion on one drawer firstAdd affiliate URL when configuredWhy it works
Because primer bonds to surfaces through mechanical adhesion — the primer's liquid penetrates microscopic surface scratches and locks in as it cures. A perfectly smooth existing finish (like varnish or old enamel) provides no mechanical grip; primer applied over it may bond initially but fails under stress (door opening, cleaning, humidity changes). The 120-grit scratches provide exactly the texture the primer needs to lock in without requiring full paint removal.
Pro tip — Test primer adhesion on one drawer front before committing to the full piece — apply primer to one sanded drawer front, allow to cure 24 hours, then test adhesion by pressing and lifting a 2-inch piece of tape against the primed surface. If the primer lifts with the tape, more aggressive sanding or a stronger bonding primer is needed. If it stays, the full piece is ready to prime.
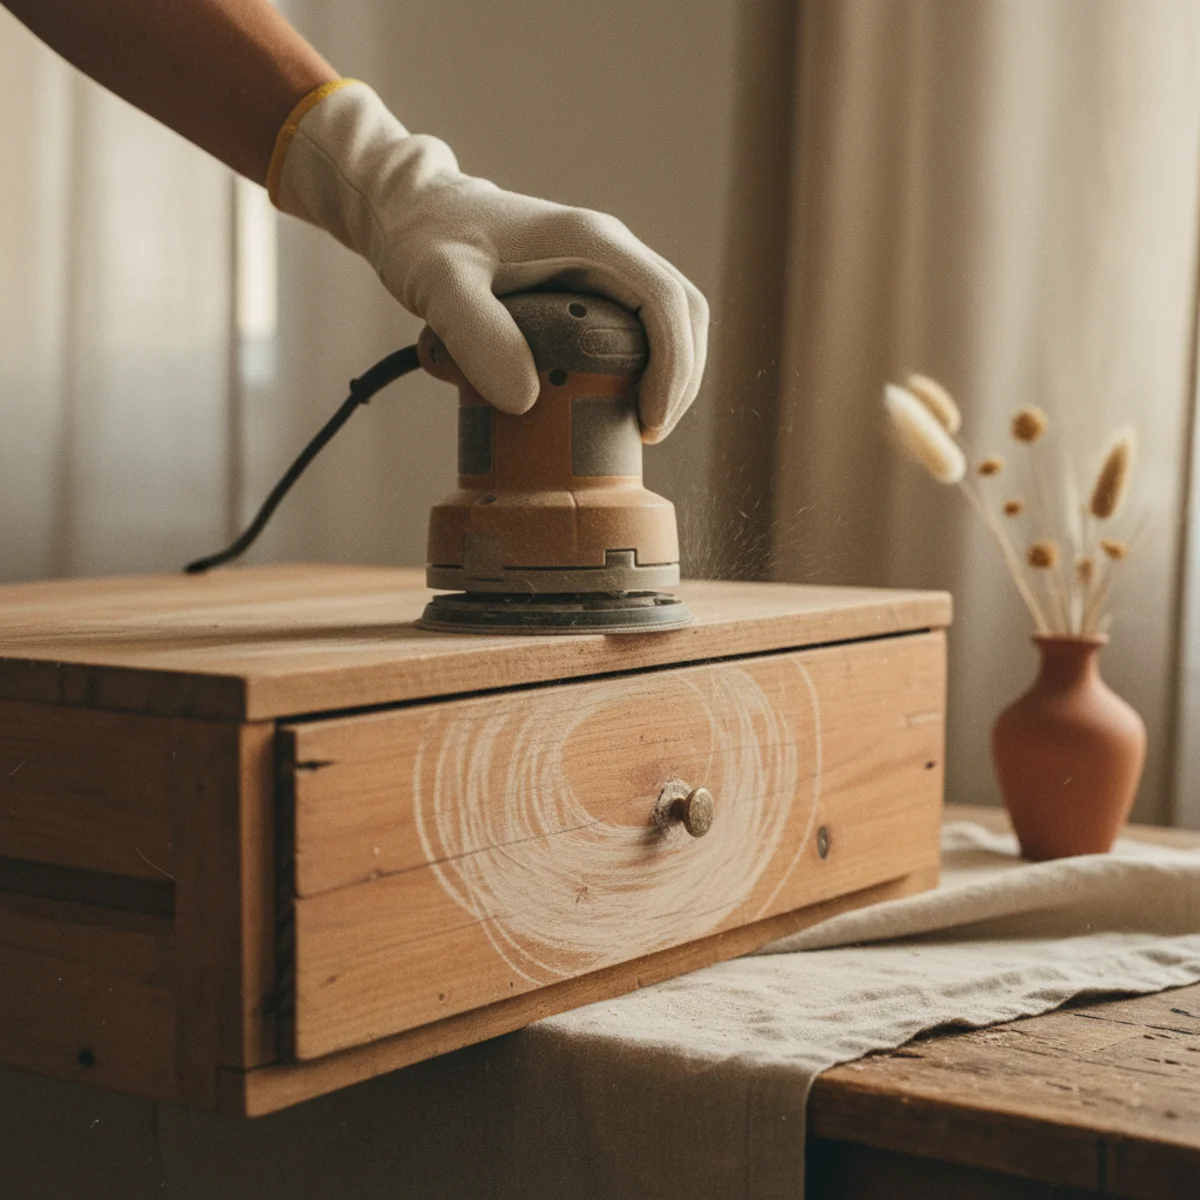
Random orbital sander scuffing the drawer front — mechanical grip for primer at 120 grit, not stripping to bare wood. See also: diy-no-sew-curtains
04Prime First, Always
Primer is not optional for furniture painting — it's the adhesion layer that makes the topcoat bond to the substrate rather than to the existing finish. A quality bonding primer prevents the most-common painted-furniture failure (peeling topcoat) at $15-20 cost and one additional step. Skipping primer saves 30 minutes and risks the entire 3-day project. Cost: $15-25 for a quart of bonding primer.
Primer selection and application: BONDING PRIMER — Zinsser BIN (shellac-based, $20-25 per quart) is the most-aggressive bonding primer for previously-finished wood. Bonds to almost any surface including varnish, polyurethane, and lacquer without sanding. Available in spray form for detailed surfaces. Zinsser Bulls Eye 1-2-3 ($15-20 per quart, water-based) is good for clean sanded surfaces. PRIMER APPLICATION — foam roller for flat surfaces (drawers, top, large side panels), brush for edges, corners, and detailed areas. ONE COAT of primer is typically sufficient after proper sanding. DRYING TIME — 30 minutes to touch for most bonding primers; 1-2 hours before topcoat. Follow package specifications exactly. SANDING AFTER PRIMER — after the primer coat dries, lightly sand with 220-grit to smooth any raised grain or brush marks from the primer. Wipe dust with tack cloth before topcoat. COLOR CHOICE — if painting with a dark color, tint the primer toward the topcoat color (ask the paint counter to tint primer to 50% of the topcoat formula). This reduces the number of topcoat layers required for full coverage. SPRAY PRIMER — spray cans of bonding primer ($8-12 each) cover detailed surfaces (carved details, recessed panels) more uniformly than brush application.
AFFILIATE SLOTPREPARATIONZinsser BIN shellac-based primer ($20-25/quart) for varnished/polyurethaned surfaces; Zinsser 123 water-based ($15-20/quart) for sanded clean surfaces; tint toward topcoat colorAdd affiliate URL when configuredWhy it works
Because the existing furniture finish (varnish, polyurethane, lacquer, old enamel) is specifically designed to be a hard durable surface — and the topcoat paint, applied directly over it without primer, bonds to that slick surface rather than to the raw material underneath. When the topcoat-to-existing-finish bond is stressed (by door opening, cleaning cloth, humidity change), it fails because the bond is between two dissimilar finish materials rather than between paint and primed substrate. The primer acts as the bonding agent between the existing finish and the new paint.
Pro tip — Use Zinsser BIN shellac-based primer specifically for pieces that had any wax or oil polish applied to them — water-based primers have difficulty bonding over wax residue even after TSP cleaning. Shellac-based BIN bonds over wax and seals the substrate, providing a reliable base for any topcoat.
Bonding primer with foam roller — the adhesion layer that determines whether topcoat stays or peels. See also: diy-coffee-bar
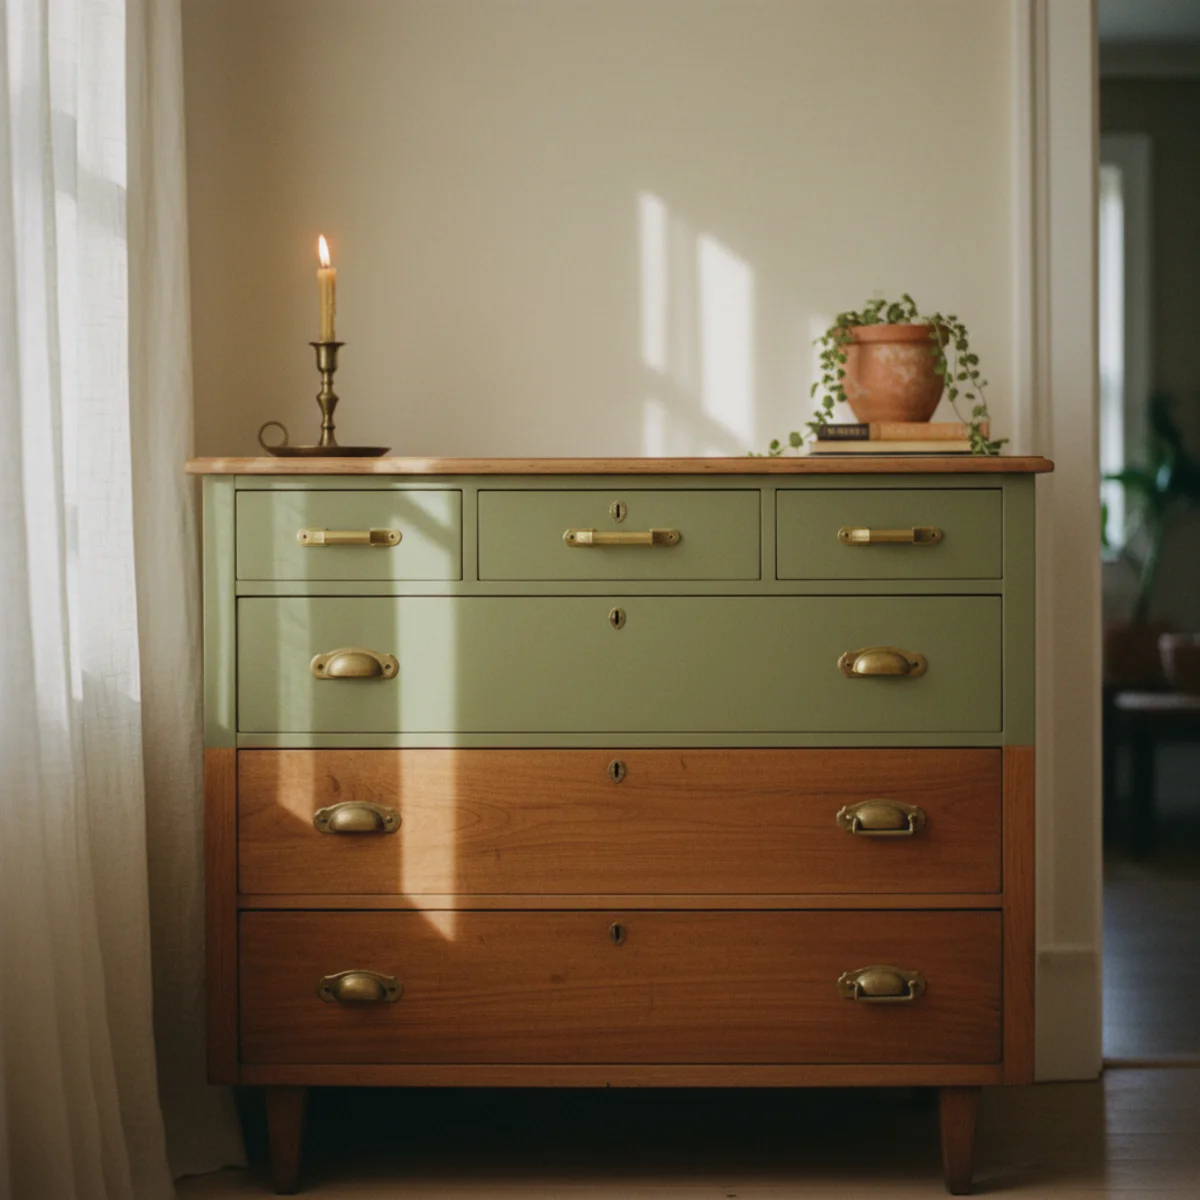
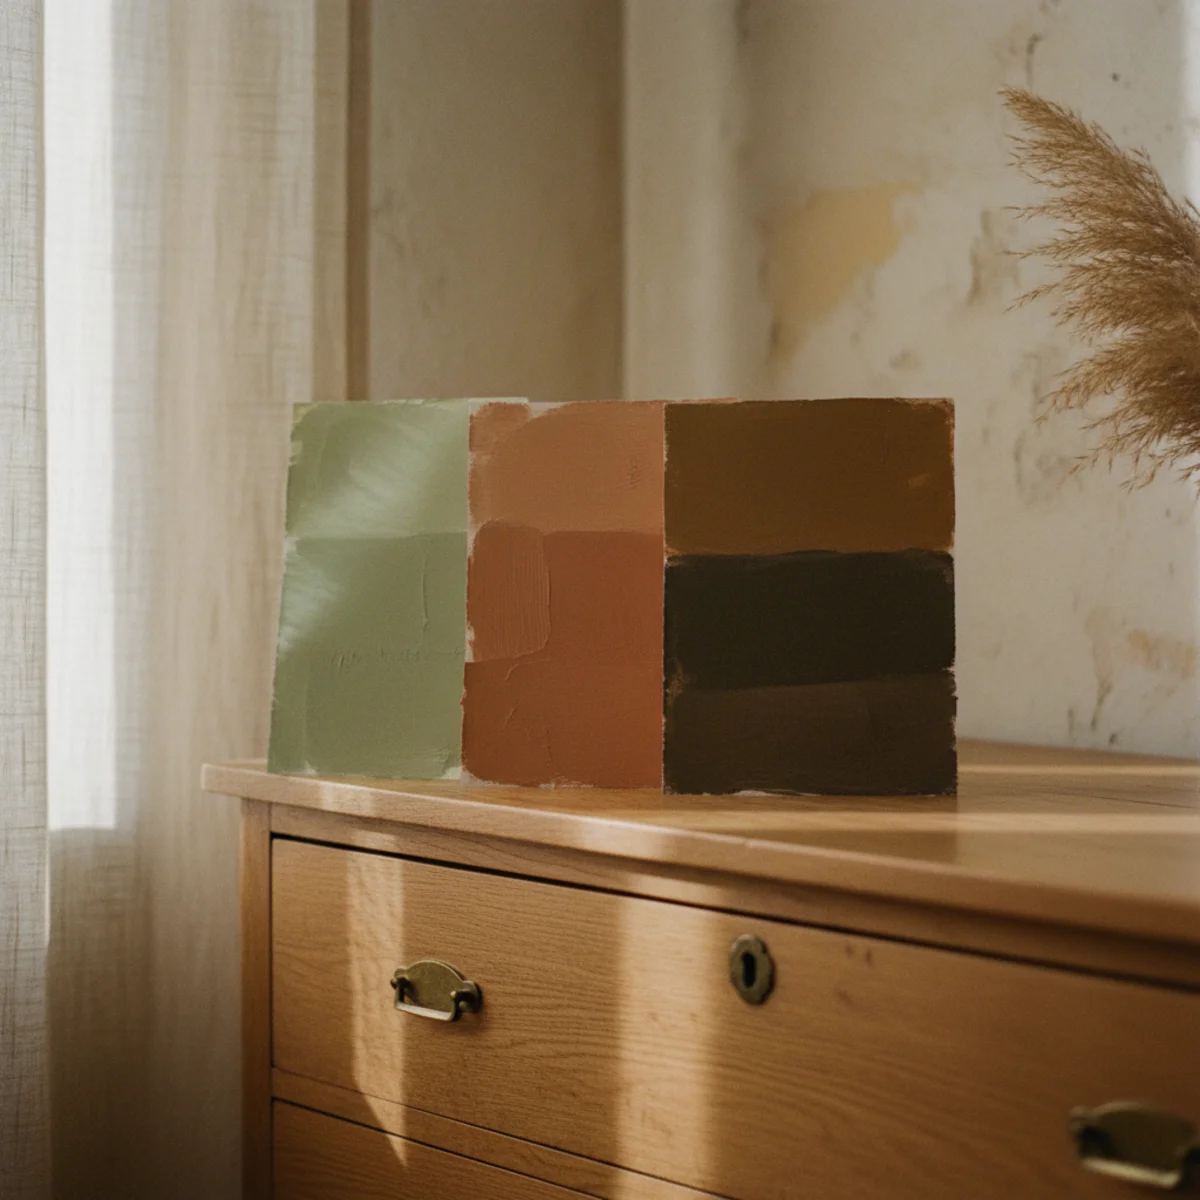
05Choose a Warm, Custom Color
The painted dresser's color should be chosen with the room's specific warm palette in mind rather than from a trend color or a generic 'furniture color.' Sage green, deep terracotta, warm charcoal, deep navy, soft cream, warm taupe — all earn their place in warm rooms. The custom color read is what distinguishes a warm home painted dresser from a commercial-looking painted-furniture-store piece.
Warm dresser color options: SAGE GREEN — F&B Mizzle 266, BM Rosemary 503, or SW Sage Green SW 0025. The most-universally-warm dresser color; reads as foliage-reference in warm rooms. DEEP TERRACOTTA — BM Pottery 1297, F&B Red Earth 64 for a warm earth statement piece. WARM CHARCOAL — F&B Off-Black 57 or BM Kendall Charcoal HC-166 for a sophisticated anchor. SOFT CREAM — F&B Pointing 2003 or BM White Dove OC-17 for a light dresser that reads clean and warm. DEEP NAVY — F&B Hague Blue 30 or BM Van Deusen Blue HC-156 for a rich deep accent piece. MUTED DUSTY BLUE — F&B Lulworth Blue 89 or BM Newburyport Blue HC-155 for subtle vintage character. PAINT TYPE — cabinet and furniture paint in eggshell or satin finish. Benjamin Moore ADVANCE ($55-70 per quart), Sherwin Williams Emerald Urethane Trim Enamel ($55-80 per quart), and Farrow & Ball Full Gloss or Modern Eggshell ($100-115 per quart) are all quality furniture paints. Chalk paint (Annie Sloan $45-55 per quart) requires wax sealing but requires no primer on properly prepared surfaces. SAMPLE TEST — test a paint swatch on the actual dresser in the room's lighting before committing to full coverage.
AFFILIATE SLOTCOLORSage green (F&B Mizzle 266), terracotta (BM Pottery 1297), charcoal (F&B Off-Black 57), or cream (F&B Pointing 2003); BM ADVANCE or SW Emerald Urethane; test in room's lightAdd affiliate URL when configuredWhy it works
Because furniture is read against the room it lives in — a sage dresser that's a perfect match for a specific warm room's palette reads as belonging to that room specifically; the same sage on a dresser moved to a different room might fight the palette completely. Choosing the dresser color in relation to the specific room's existing warm tones (wall color, rug, bedding) produces a piece that reads as intentionally part of the room rather than as a painted dresser placed in the room.
Pro tip — Bring a large paint chip (4x6-inch sample card or a painted test board) of the proposed color home and hold it against the room's wall, rug, and existing furniture for a full day before purchasing paint — the morning light, afternoon light, and evening lamp light all reveal different qualities in the color. The all-day sample test prevents color regret at full project completion.
Sage green, terracotta, and charcoal swatches in the room's light — the test that prevents color regret at project completion. See also: sage-green-decor
06Sand Lightly Between Coats
After each topcoat dries, a very light sand with 220-320 grit sandpaper (or a fine sanding sponge) smooths brush marks, raised grain, and any dust particles that landed in the wet paint. This inter-coat sanding takes 5-10 minutes per coat and is the difference between a glass-smooth painted surface and a visibly textured one. Do not skip.
Inter-coat sanding technique: GRIT — 220 grit for first inter-coat sand (after first topcoat), 320 grit for subsequent inter-coat sands. SANDING SPONGE — a fine sanding sponge ($2-4) is more forgiving than folded sandpaper for inter-coat sanding because it conforms to the surface irregularities without creating new scratches. TECHNIQUE — very light pressure, just enough to feel the texture being leveled. The goal is not to sand through to primer but to skim the high points from brush marks and grit particles. VISIBLE RESULT — after inter-coat sanding, the surface should appear uniformly matte (the sheen of the topcoat is gone, sanded away). Any remaining shiny spots are areas that need more sanding. DUST REMOVAL — wipe with tack cloth after each inter-coat sand before applying the next coat. WHEN SATISFIED — when the final coat (typically coat 3) is smooth to the touch without visible brush marks or texture, the sanding is done. The final coat should not be sanded (it will be sealed instead per item 9).
AFFILIATE SLOTTECHNIQUE220 grit after first coat, 320 grit after subsequent coats; fine sanding sponge ($2-4) for conforming surface; tack cloth after each sand; do not sand final coatAdd affiliate URL when configuredWhy it works
Because water-based paint raises wood grain slightly as it dries, and airborne dust particles land in wet paint inevitably even in controlled environments. These microscopic raises and particles read as texture in the final surface if not removed. Professional furniture painters sand between every coat; amateur projects that skip this step produce the textured 'painted-furniture' look that identifies amateur work from across the room. The 5-10 minute inter-coat sand is the single step that most clearly separates professional and amateur painted furniture results.
Pro tip — Listen for the sand while inter-coat sanding — the 320-grit sponge on a properly cured topcoat should produce a very fine, slightly squeaky sound as it levels high points. When the squeaking stops in an area, that area is leveled. Move on to areas that still squeak.
Fine sanding sponge between topcoats — the 5-minute step that separates professional surface from textured amateur result. See also: diy-farmhouse-wall-art
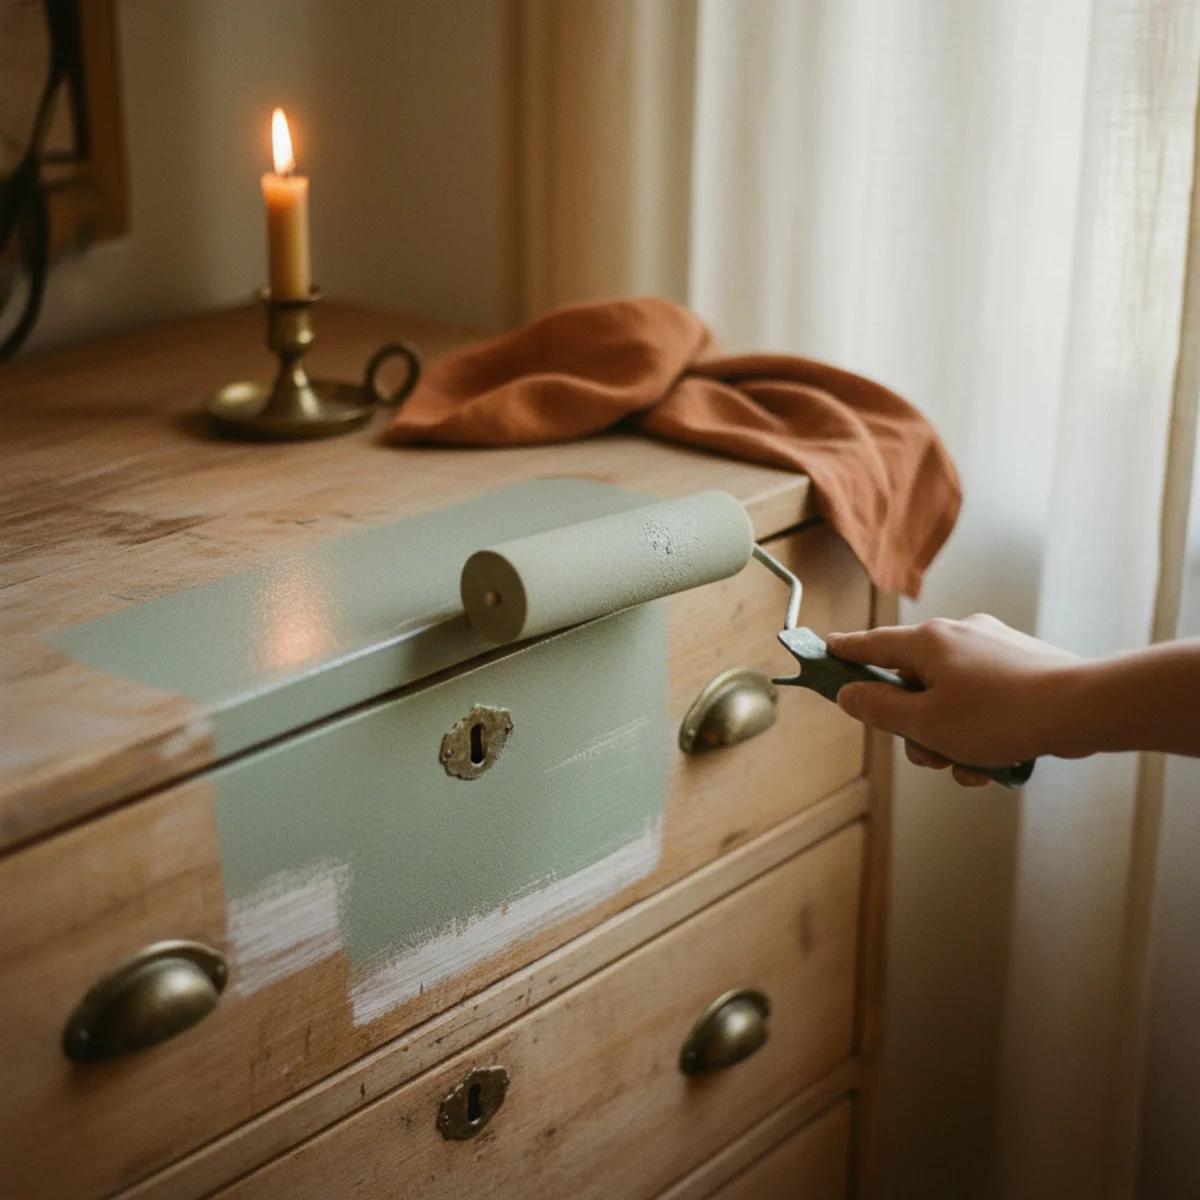
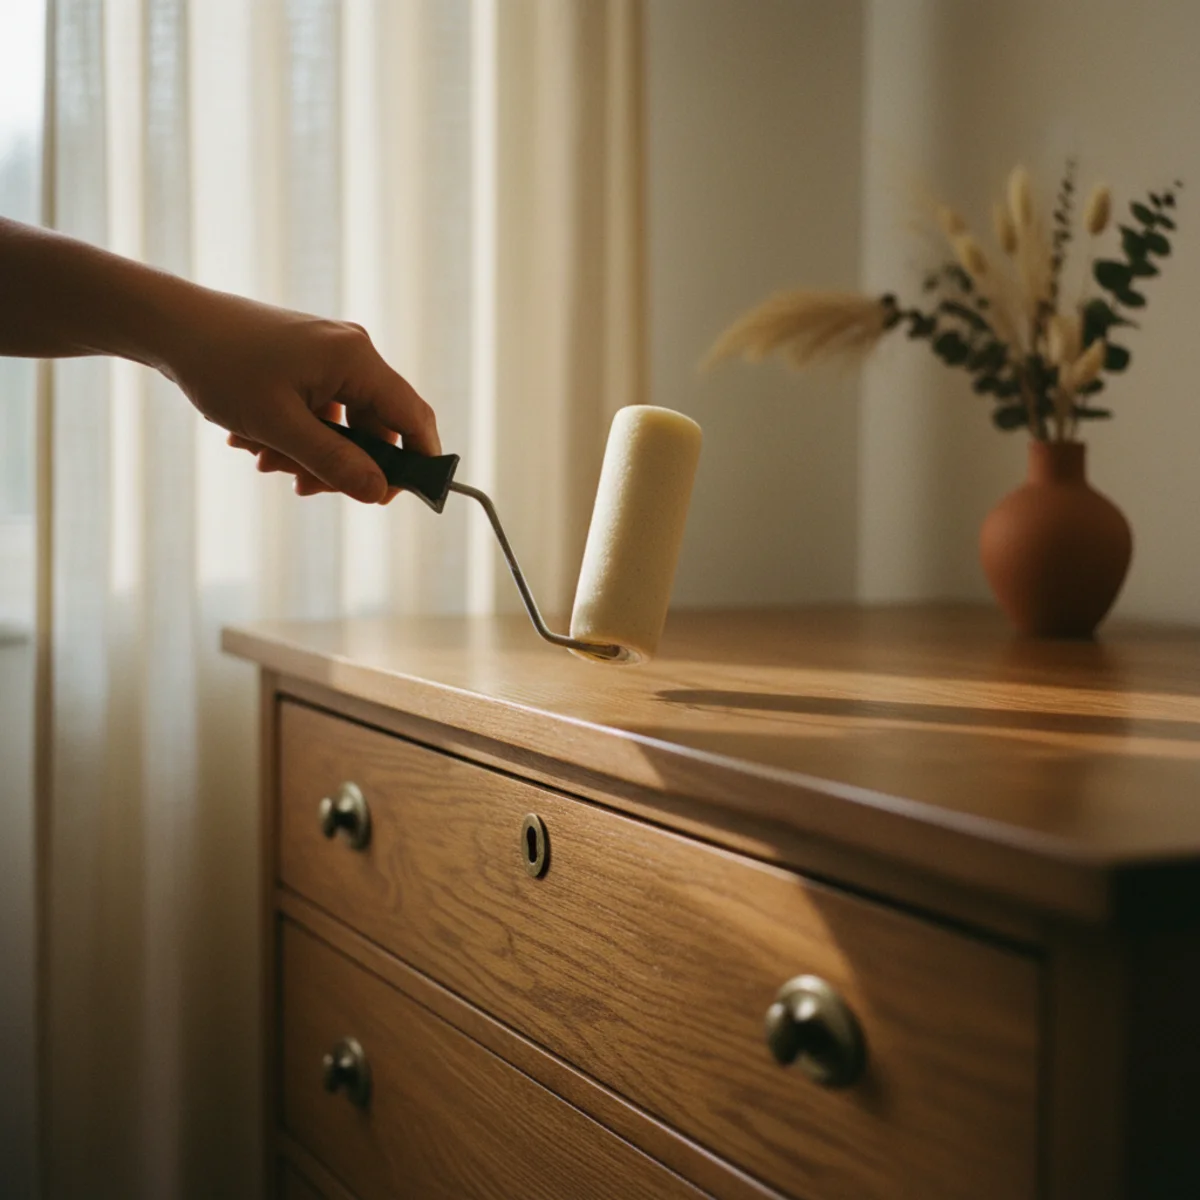
07Use Thin Coats, Not Thick
Every painted furniture guide says thin coats; every painted furniture project ignores it. Thick paint coats sag, drip, take twice as long to cure, and produce textured orange-peel surfaces. Thin coats (each coat barely covering the previous) dry faster, cure fully, sand smooth easily, and stack to produce a hard factory-like finish. Plan for 2-3 thin coats rather than 1-2 thick ones.
Thin coat application technique: WHAT THIN LOOKS LIKE — loaded brush or roller applied at standard pace, with each stroke just overlapping the last. The coat should be thin enough to be somewhat translucent over the primer color — you should be able to see some of the primer or previous coat showing through each thin coat. The coverage builds with subsequent coats. TOOL CHOICE — foam roller for flat surfaces (the smoothest application with fewest brush marks), brush for edges and crevices. High-density foam roller ($2-5 per roller) produces the smoothest flat surface. COVERAGE — if the brush or roller is leaving ridges of thick paint, the application is too thick. Stop, spread the paint to cover a larger area before lifting, and reduce the amount of paint on the tool. BETWEEN DRAWERS — remove all drawers and paint them flat (face up on a workbench) to prevent sag on vertical surfaces. CURING TIME — thin coats cure to recoat-ready in 1-2 hours for most water-based furniture paints; thick coats may need 3-4 hours and may not fully cure before the next coat is applied. THE COUNT — most projects need 2-3 thin topcoats for full opaque coverage over a tinted primer. Deep colors (navy, charcoal, terracotta) may need a third coat on high-contact surfaces.
AFFILIATE SLOTTECHNIQUEThin translucent coats (2-3 coats minimum); foam roller for flat surfaces; remove drawers to paint face-up; 1-2 hour recoat time for water-based; decant into small cupAdd affiliate URL when configuredWhy it works
Because paint cures by solvent evaporation — the liquid carrier (water in water-based paint) needs to escape from the paint film as it dries. A thin coat allows full evaporation from the entire depth of the coat; a thick coat traps solvent in the lower layers, producing a paint film that's cured on the surface but soft underneath. The surface-cured-but-soft-underneath condition is what produces the 'paint scratches easily' failure in rushed painted-furniture projects. Thin coats cure fully and completely at every layer.
Pro tip — Decant furniture paint into a small disposable cup for working rather than dipping from the main can — the small cup limits the amount of paint on the brush or roller at any time, making over-application less likely and keeping the main can sealed and uncontaminated by dust from the sanding process.
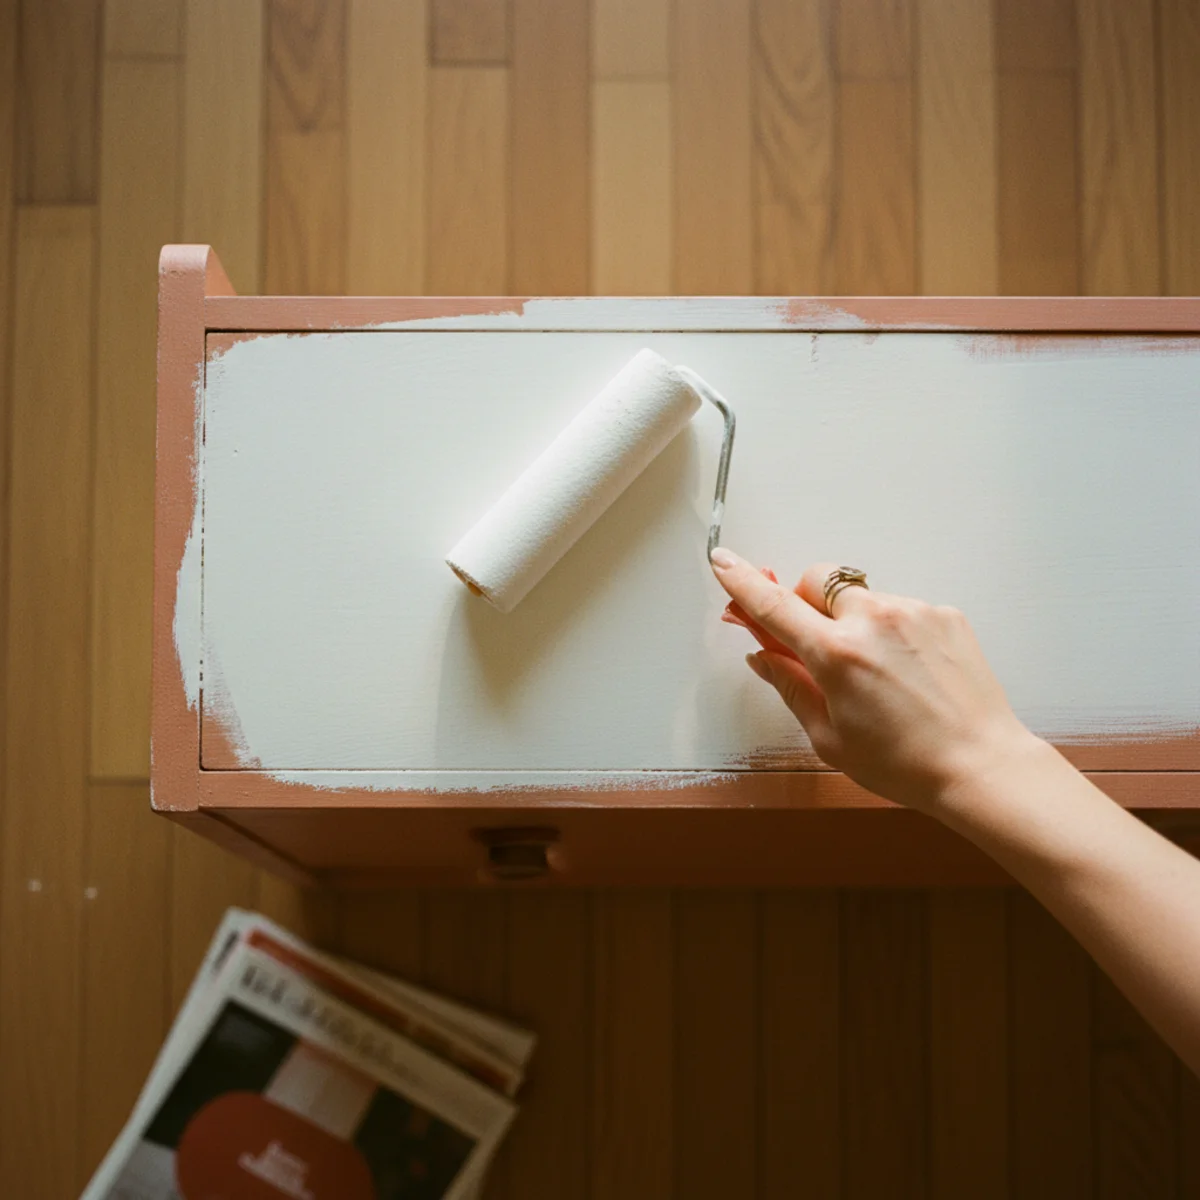
First thin coat showing primer slightly through — translucent coverage that stacks to full opacity without sagging or orange peel. See also: diy-headboard-ideas
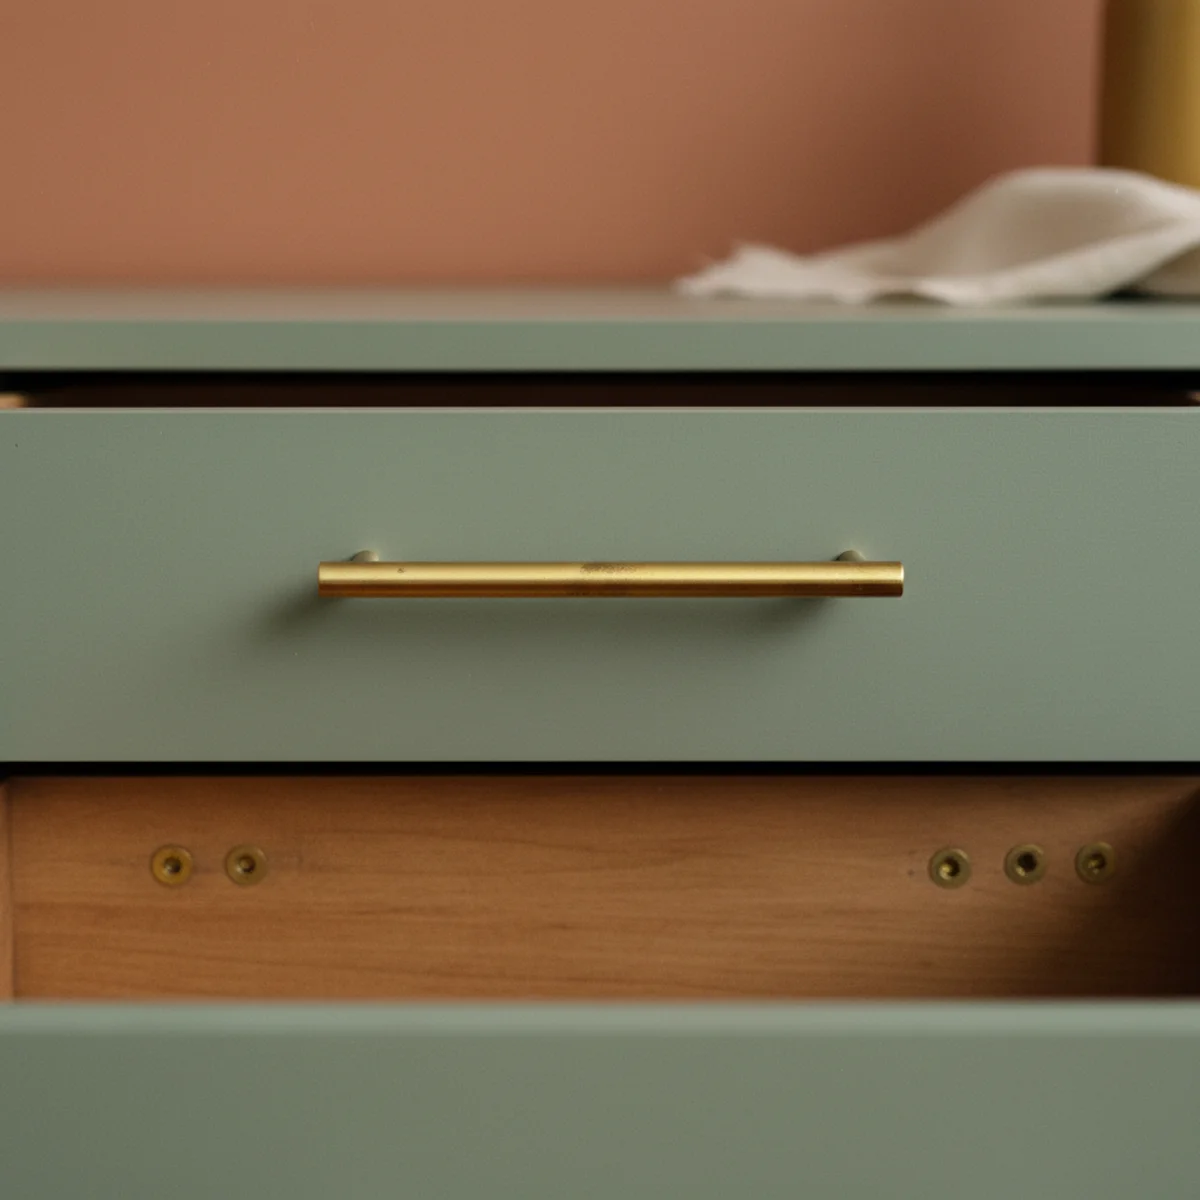
08Swap the Hardware
The hardware swap is the final transformative move — replacing original hardware (whatever era it came from) with aged or unlacquered brass knobs and pulls that fit the warm home palette. The hardware replacement takes 30 minutes, costs $40-120 for a full dresser, and produces a more immediate visual impact than any paint color change. Hardware is the dresser's jewelry.
Hardware sourcing and installation: AGED BRASS KNOBS — $4-12 each for 1.25-1.5 inch round knobs from House of Antique Hardware, Rejuvenation, or Schoolhouse. A 6-drawer dresser needs 6 pulls or 12 knobs (if two knobs per drawer). UNLACQUERED BRASS PULLS — bar pulls or bail pulls in unlacquered brass, $8-20 each. Bar pulls at 3-5 inch length for drawer fronts. VINTAGE BRASS HARDWARE — original vintage brass hardware from estate sales ($0.50-3 per piece) develops the most-authentic aged patina of any option. Match hole spacing for direct replacement. HOLE SPACING — measure the existing hardware hole spacing (center-to-center distance for bar pulls) before purchasing. Standard spacings: 3-inch, 3.75-inch, 4-inch on center for bar pulls. Round knobs use single center hole. INSTALLATION — standard Phillips-head screwdriver for most hardware. New hardware using existing hole positions requires no new drilling. Different hole spacing or new knob placement requires drilling new holes (3mm pilot hole prevents wood splitting). HARDWARE-TO-COLOR MATCH — aged brass hardware with warm color paint (sage, terracotta, cream) reads as collected-antique-warm. Dark charcoal dresser with aged brass reads as sophisticated. Navy with unlacquered brass reads as crisp-warm.
AFFILIATE SLOTHARDWAREAged or unlacquered brass knobs ($4-12 each) or bar pulls ($8-20 each) from Rejuvenation, House of Antique Hardware, or estate sales; measure existing hole spacing before purchasingAdd affiliate URL when configuredWhy it works
Because hardware is both seen and touched — it's the element guests look at closely when examining the dresser (the knob or pull is the most-detailed element at close range) and the element their hand touches every time a drawer is opened. The tactile quality of a solid brass pull versus a plastic or chrome hardware reads at every drawer opening. Hardware signals material commitment at the point of closest contact.
Pro tip — Test unlacquered brass hardware with Brasso ($5-10) before installing to begin the aging process — a brief polishing then allowing to oxidize produces a warmer patina than fresh-from-package unlacquered brass. Or simply let it age naturally with use; unlacquered brass develops beautiful warm patina within 3-6 months of regular handling.
Sage dresser with unlacquered brass pulls — hardware as the dresser's jewelry, completing the warm character. See also: diy-coffee-bar
09Seal It for Durability
After the final topcoat cures (minimum 24 hours, ideally 48-72 hours), apply a clear topcoat sealer on high-contact surfaces — the top surface, drawer fronts, and door edges. The sealer adds a hard protective layer over the paint that prevents the wear and scratching that painted furniture without sealer shows within months. Cost: $15-25 for a quart of water-based polycrylic.
Sealing specifications: PRODUCT — Minwax Polycrylic (water-based, $15-20 per quart, non-yellowing). NOT oil-based polyurethane on water-based paint (can yellow and compatibility issues). SHEEN — satin or semi-gloss polycrylic for durability with appropriate sheen. Flat/matte polycrylic exists but provides less hard surface protection. APPLICATION — foam roller or high-quality brush, very thin coat. Same thin-coat principle as topcoat: thin and even over entire surface. CURING TIME — polycrylic is touch-dry in 2 hours; fully cured to usable hardness in 24-48 hours; maximum hardness in 30 days. Avoid placing objects on the dresser top for 48 hours. THREE-COAT SEAL on dresser top (the highest-wear surface); ONE-TWO COATS on drawer fronts and door edges. CHALK PAINT ALTERNATIVE — chalk-painted dressers use Annie Sloan Chalk Paint Wax ($25-30 per tin) instead of polycrylic. Apply with a brush or cloth, buff after 30 minutes. Wax provides a softer protective layer than polycrylic; re-wax annually for maintenance.
AFFILIATE SLOTFINISHINGMinwax Polycrylic water-based satin ($15-20/quart); 3 coats on top surface, 1-2 on drawer fronts; 48-hour dry before placing objects; OR Annie Sloan Chalk Paint Wax for chalk-painted piecesAdd affiliate URL when configuredWhy it works
Because furniture paint (even high-quality enamel) is relatively soft compared to the hard-cure surfaces it's applied to — keys, rings, coins, and objects placed on the dresser top all create micro-scratches in the paint over time. A polycrylic topcoat is harder than the paint and takes the initial impact of these interactions, protecting the paint layer underneath. Unsealed painted furniture shows wear at contact points within 3-6 months of regular use; sealed furniture shows minimal wear for years.
Pro tip — Allow the full 30-day cure period before placing anything heavy or potentially staining on the dresser top — polycrylic reaches maximum hardness after 30 days of ambient-temperature curing. Items placed during this period can leave impressions or cause adhesion between the item and the not-fully-cured sealer.
Polycrylic seal on the dresser top — the hard protective layer that extends painted furniture from months to years. See also: diy-farmhouse-wall-art
10Paint the Inside or Drawers Too
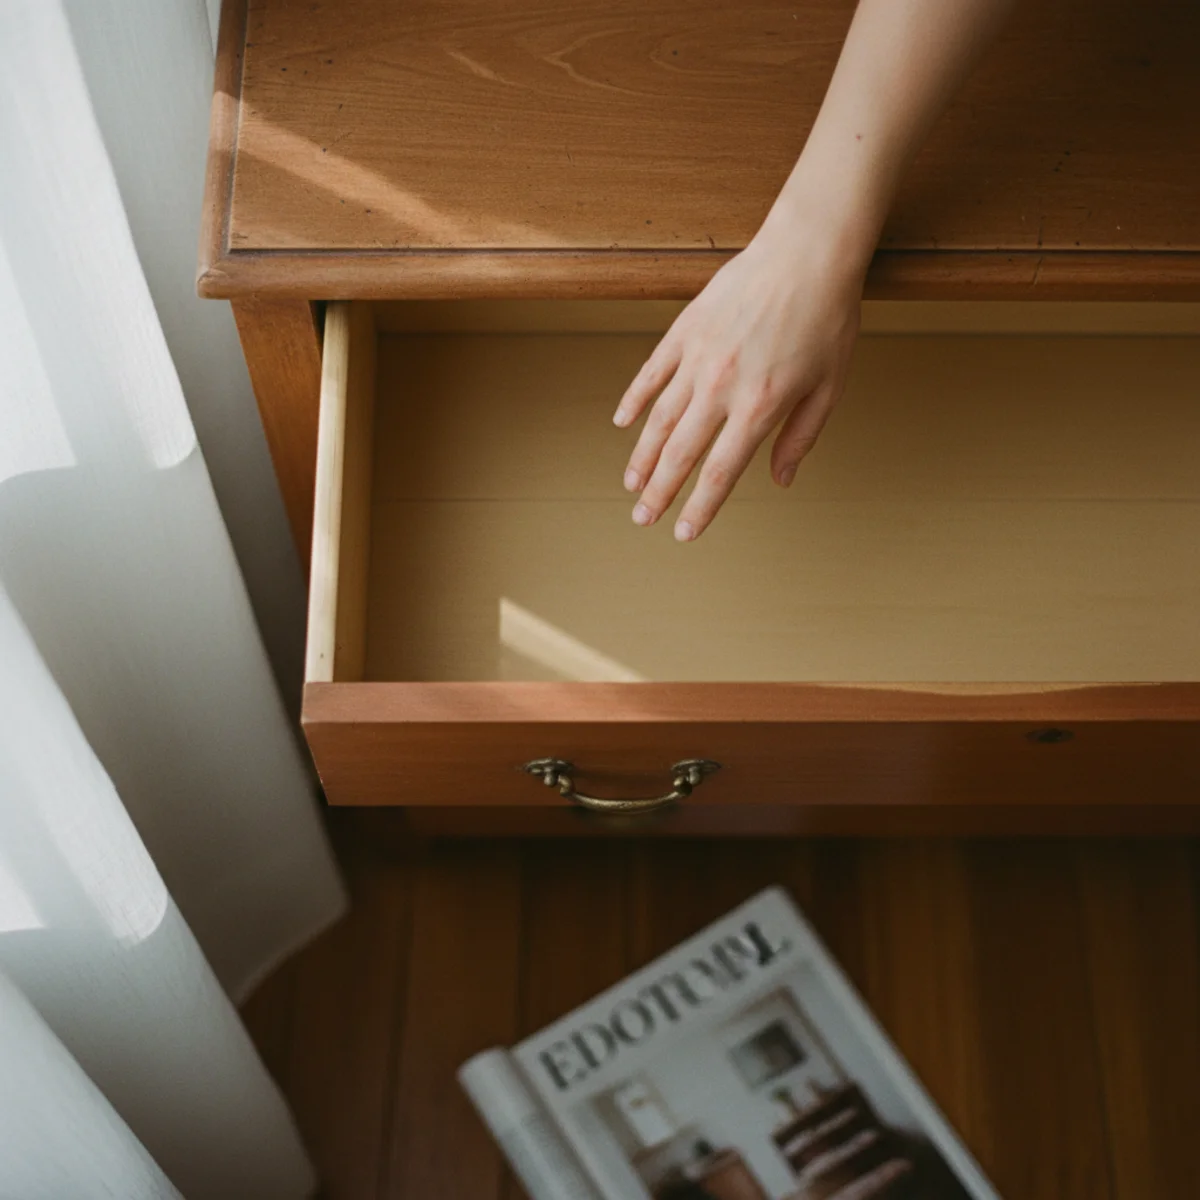
Painting the interior of the dresser — the inside walls and the interior drawer faces — extends the project's warm character to the private interior that opening reveals. A deep forest green or deep terracotta exterior dresser with a pale cream interior reads as designed; the same dresser with an unpainted dark original-wood interior reads as incomplete. Cost: $0 extra paint if you have enough from the exterior, or $10-15 for a small amount of a lighter tone.
Interior painting options: SAME COLOUR INSIDE AND OUT — fully unified look; the interior reads as an extension of the exterior. Works best for lighter colors (cream, sage) where the interior doesn't feel cave-dark. CONTRASTING INTERIOR COLOUR — the more-interesting option. A navy exterior with warm cream interior reads as jewel-box effect when drawers open. A sage exterior with deep terracotta interior creates the warm surprise. A charcoal exterior with natural linen-white interior is maximally dramatic. WHAT TO PAINT — interior side walls of the carcass (the main body), the interior back wall, and the interior face of the drawers (the hidden part that reads when you open the drawer). DRAWER INTERIOR — paint the drawer interior sides and bottom (what you see when the drawer is open and filled) with a warm neutral that references the exterior. This affects daily experience: opening a drawer with a beautiful interior is a small daily pleasure. TECHNIQUE — same preparation (clean, light sand, prime) for interior surfaces. Interior paint doesn't need the durability layer (polycrylic) that exterior surfaces require.
AFFILIATE SLOTDETAILPaint interior carcass walls and drawer interior faces; contrast interior (warm cream) against deep exterior for jewel-box effect; same prep as exterior; no polycrylic on interiorAdd affiliate URL when configuredWhy it works
Because the dresser interior is seen at every use — every drawer opening reveals the interior. The interior that's been painted reveals care and completeness at the private discovery moment; the unfinished interior reveals an incomplete project. The warm interior is seen exclusively by the household in private moments; it's a daily personal aesthetic pleasure rather than a visual element for display.
Pro tip — Paint the drawer interiors in a warm neutral even if the exterior is a deep color — having both a dramatic exterior color AND a dark interior color can make the drawers feel cave-dark at opening. Warm cream or oat interior provides the warm-light contrast that makes opening a deep-colored dresser a pleasant rather than dark experience.
Sage exterior, warm cream interior — the jewel-box contrast seen at every drawer opening as daily private aesthetic pleasure. See also: bedroom-cozy-ideas
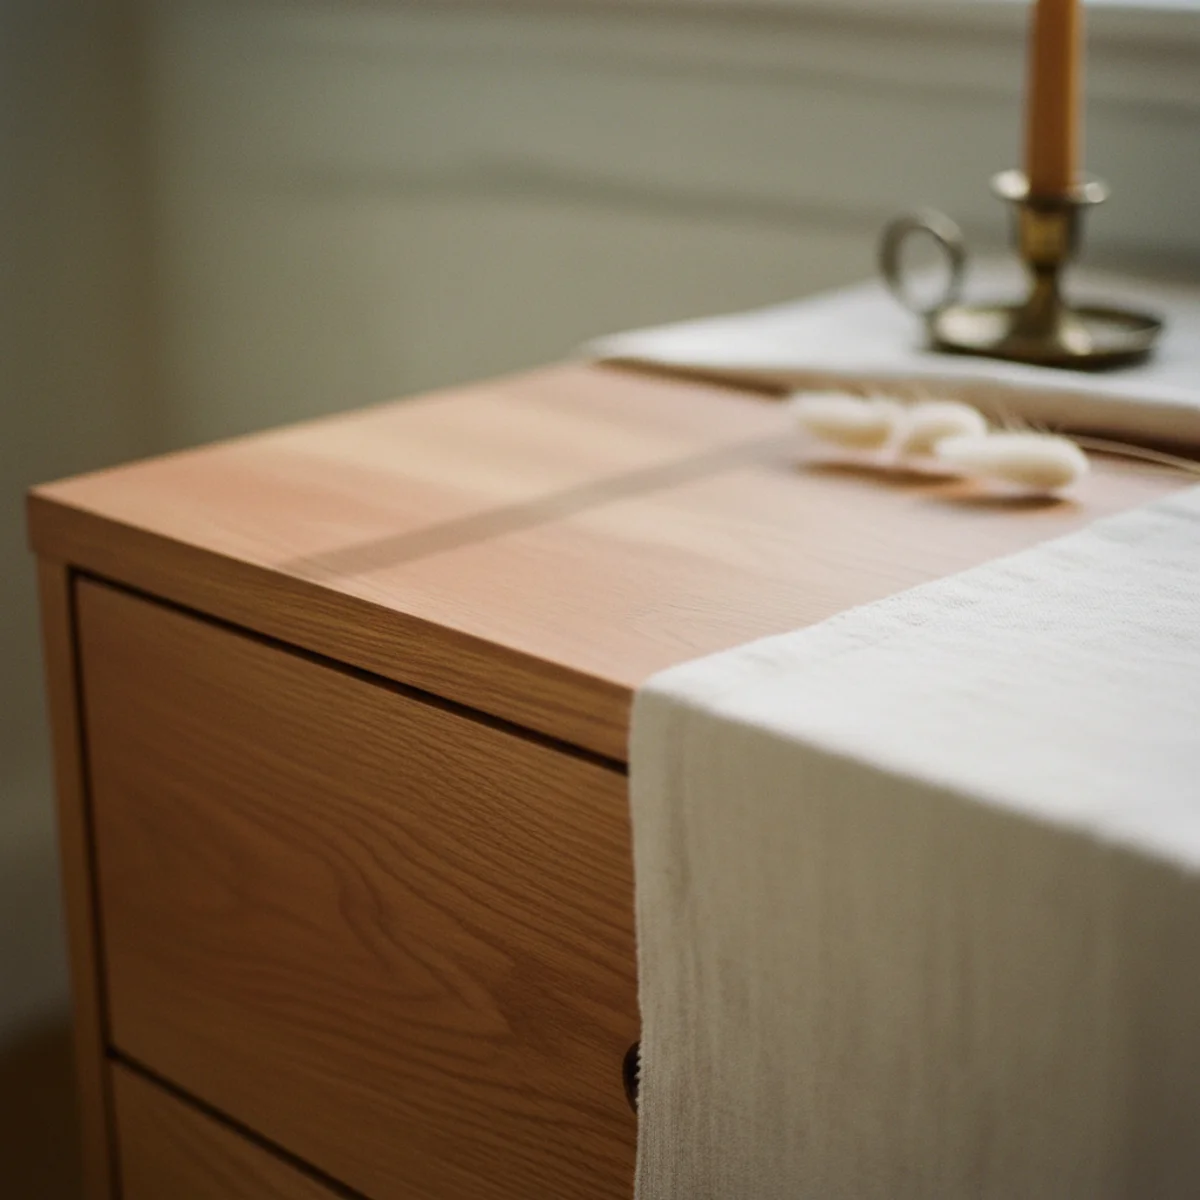
11Choose the Right Finish Sheen
Paint sheen (flat, eggshell, satin, semi-gloss, gloss) affects both durability and visual character on painted furniture. Flat paint chips at edges and scratches easily; gloss shows every fingerprint and imperfection. For most dresser makeovers, eggshell or satin is the right range — durable enough for furniture use, warm enough for warm home character.
Sheen guide for furniture paint: FLAT (no sheen) — looks beautiful on walls; not appropriate for furniture (not durable, chips at edges, difficult to clean). EGGSHELL (slight sheen, 10-25% reflectance) — the warmest sheen for painted furniture. Looks closest to a natural matte finish. Durable enough for most dresser applications if sealed with polycrylic. SATIN (medium sheen, 25-35% reflectance) — slightly more durable than eggshell without sacrificing warmth. The most-commonly recommended sheen for furniture and cabinets. Good for drawer fronts and doors that receive daily contact. SEMI-GLOSS (35-55% reflectance) — noticeably shiny, best reserved for high-contrast pieces where sheen is the aesthetic intention. Shows more fingerprints than satin; more durable. FULL GLOSS (above 55%) — the most durable finish, reads as lacquered furniture. Bold aesthetic choice for specific pieces. For typical warm home painted dresser: eggshell for the primary body, satin for drawer fronts and doors (higher contact areas), polycrylic seal on top surface regardless of sheen.
AFFILIATE SLOTTECHNIQUEEggshell for body panels (warmest, hides imperfections), satin for drawer fronts and doors (more contact durable), polycrylic seal on top surface regardless of paint sheenAdd affiliate URL when configuredWhy it works
Because high sheen reflects more light and reveals more surface imperfections — brush marks, dust particles, grain texture — than lower sheen. On walls, you can stand 8 feet back and not notice these imperfections; on furniture, you're examining it at arm's length and imperfections read clearly. Lower sheen (eggshell) hides imperfections better and produces the warmer, more-matte character that warm home furniture specifically benefits from. Higher sheen reads as high-style lacquered furniture; lower sheen reads as warm artisan-painted furniture.
Pro tip — Test the sheen choice on an unpainted area — apply small patches of eggshell and satin to the same surface and assess them in the room's specific lighting over 24 hours. The difference between eggshell and satin reads differently in warm lamplight than in bright daylight; the room's actual lighting conditions reveal which sheen reads warmer.
Eggshell (left) and satin (right) finish comparison in lamp light — eggshell warmth versus satin durability for the specific surface choice. See also: warm-paint-colors
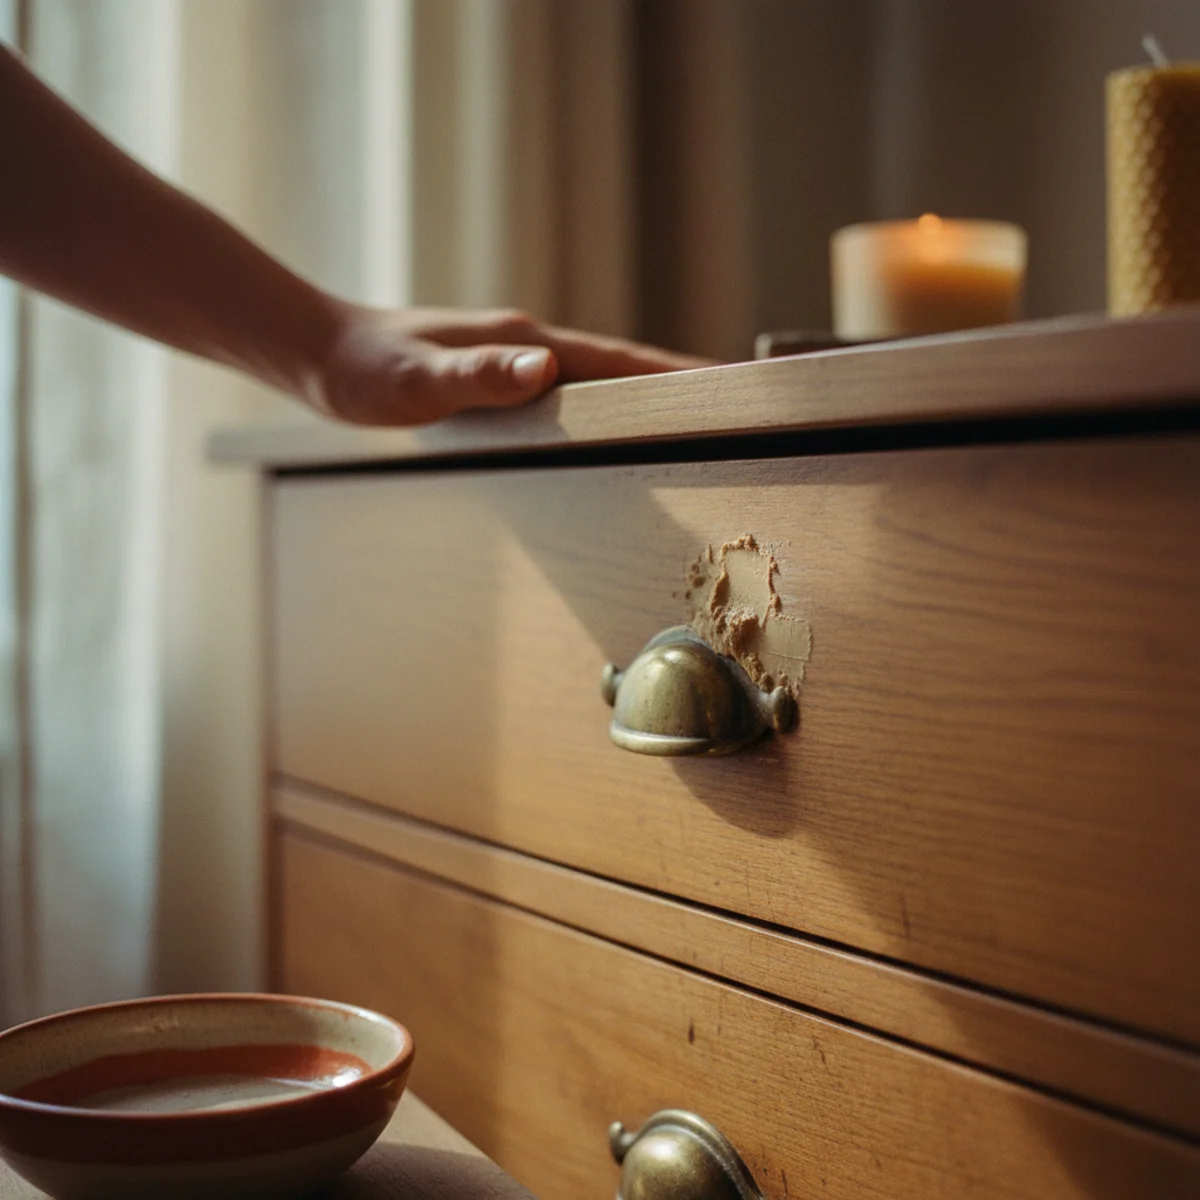
12Fix Flaws Before Painting
Surface flaws — gouges, missing veneer edges, deep scratches, loose joints, missing hardware holes — should all be repaired before painting begins. Painting over flaws makes them more visible rather than less visible: paint fills gouges partially and creates shadows around them. The flaw-repair step takes 30 minutes to 2 hours and produces a dresser surface that reads as quality furniture rather than as a patched-and-painted object.
Common flaw repairs before painting: SMALL GOUGES AND HOLES — wood filler (Elmer's Wood Filler or Minwax Wood Filler, $5-8) in the correct base color applied with a putty knife, pressed into the void, overfilled slightly, allowed to dry (30-60 minutes), then sanded flush with 120-grit. For deep fills, apply in two layers with complete drying between (shrinkage prevents a single thick fill from curing flush). LOOSE JOINTS — wood glue (Titebond Original, $5-10) applied into the joint, clamped for 30-60 minutes. Scrape excess glue before it dries. Test all drawer joints, back corners, and structural connections before painting. VENEER LIFTING — contact cement ($5-10) applied to both surfaces of lifting veneer, allowed to become tacky (5-10 minutes), then pressed together with firm hand pressure for 60 seconds. Tape or clamp if needed during cure. MISSING HARDWARE HOLES — wood filler in the old hardware hole location if the new hardware won't cover it; allow to dry and sand flush before priming. SURFACE SCRATCHES — light sanding with 120-grit removes most surface scratches; deep scratches may require spot-fill with wood filler.
AFFILIATE SLOTPREPARATIONWood filler ($5-8) for gouges and holes; Titebond glue for loose joints; contact cement for lifting veneer; inspect in raking light to find all flaws before primingAdd affiliate URL when configuredWhy it works
Because paint's liquid consistency creates slight surface tension that pools in low areas (gouges) and bridges over edges of raised areas (loose veneer). The pooled paint in a gouge creates a slightly deeper indentation after drying; the bridged paint over a loose edge creates a visual line around the loose section. Both are more visible with paint on them than without. The only reliable approach is to repair first so the paint is applied over a flat, sound surface.
Pro tip — Do the full flaw inspection in bright raking light — angle a work lamp at 10-15 degrees to the surface and slowly move it across the dresser, which makes every surface irregularity cast a shadow and become visible. The raking-light inspection reveals flaws that straight-on lighting completely hides, ensuring you find and fix everything before the paint goes on.
Wood filler sanded flush in a gouge — the repair that prevents paint from making flaws more visible rather than less. See also: diy-farmhouse-wall-art
How to paint a dresser step by step
The prep is the whole game. Do it properly and the paint is easy.
- 1Clean and repair
Remove hardware and drawers, wipe everything with a degreaser, and fill any dings and tighten loose joints. Paint won't bond to grime.
- 2Sand and prime
Lightly scuff-sand all surfaces, wipe off the dust, and apply a bonding primer. This is what makes the finish durable and even.
- 3Paint in thin coats
Apply two or three thin coats of your warm color, scuff-sanding lightly between each. Thin coats dry even and avoid drips.
- 4Seal and reassemble
Add a protective topcoat, swap in new or vintage hardware, and reassemble. The sealer and hardware finish the professional look.
Quick tips
- Buy solid wood; knock on the piece — dense means solid, hollow means veneer.
- Clean off decades of polish and grease before anything, or the paint won't bond.
- Always prime; it's what makes the finish durable and even.
- Sand lightly between coats — the skipped step that makes it factory-smooth.
- Use thin coats, not thick, to avoid drips and brush marks.
- Swap the hardware; new or vintage pulls transform a painted piece for a few dollars.
Furniture makeovers by piece
A solid-wood dresser in a warm clay or sage with swapped vintage hardware — the classic makeover.
A small, quick makeover to match or complement the dresser; ideal for a first try.
A larger piece in a deep warm tone; doubles as a coffee bar base — see our DIY coffee bar guide.
A durable satin or semi-gloss finish that wipes clean and survives wear.
Paint can rescue almost any solid-wood piece. The boring prep is the only thing between an amateur finish and a pro one.
Frequently asked questions
How do I paint a dresser?+
Do I need to sand a dresser before painting?+
What kind of paint is best for a dresser?+
What color should I paint a dresser?+
How long does it take to paint a dresser?+
A painted dresser makeover is the highest-return DIY there is — the cheapest route to a custom-color, solid-wood piece, and forgiving because paint hides almost everything. Start with a solid-wood thrift find, and then do the boring prep: clean, sand, prime. We'd never skip the prep again after watching a rushed first attempt chip within a month; that unglamorous cleaning and priming is the entire difference between a finish that survives years and one that peels by spring. Forty dollars, a Sunday, and the basement reject becomes the warmest piece in the room.