These twelve DIY farmhouse wall art projects are tested across real homes and real skill levels — beginners with no prior craft experience, intermediate DIYers comfortable with basic tools, and households that want the result without the build. Each project below names the specific materials with sourcing and costs, the exact process steps, the skill level required, the time investment, and what makes that particular project worth doing versus simply buying an equivalent piece. The goal is art that looks genuinely personal rather than generically farmhouse-styled.
Most DIY farmhouse wall art fails because it reproduces commercial farmhouse aesthetics (shiplap signs with 'gather' painted on them, mass-produced typography on barn wood) rather than personal farmhouse character. The twelve projects below all start from personal or natural sources — pressed flowers from your own yard, vintage textiles from estate sales, botanical prints from real scientific books, reclaimed wood from actual construction salvage — and produce art that reads as personally meaningful rather than as trend participation.
By the end of this guide, you'll know how to make twelve specific farmhouse wall art projects — from 30-minute pressed botanicals and quick thrifted-frame gallery walls to weekend-build reclaimed wood signs and woven textile hangings — all using personal or natural sources that produce genuinely warm art rather than commercial farmhouse imitation.
WHAT'S INSIDE
- Pressed botanicals from your own yard in thrifted frames — 30 minutes, under $20
- The reclaimed-wood plank sign built with found lumber — weekend project, $20-60
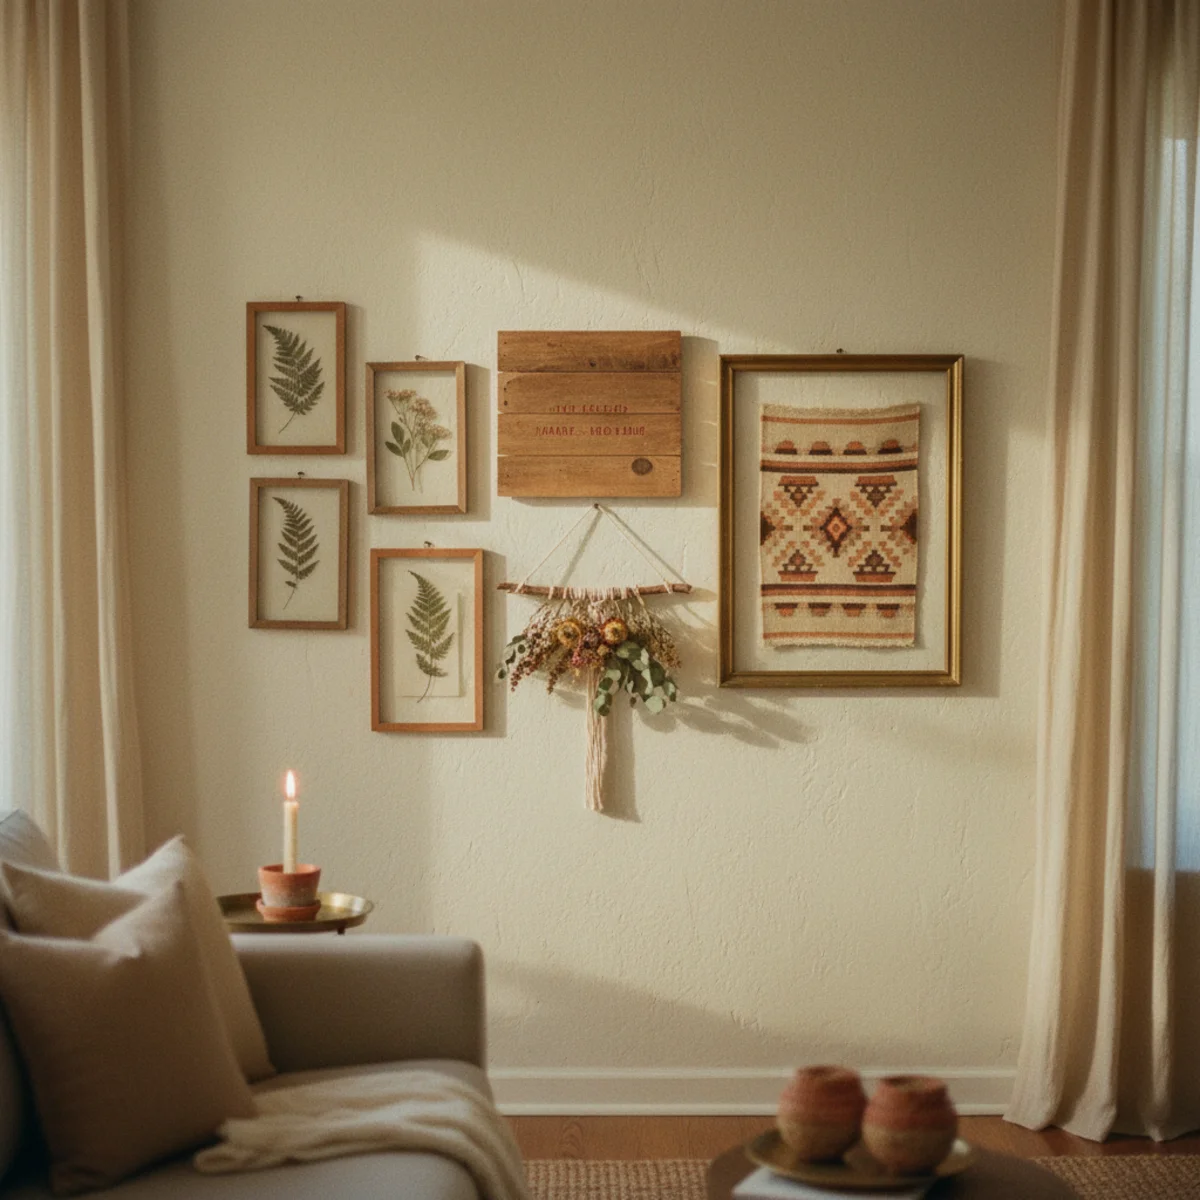
- Dried floral wall hanging that doubles as botanical display — 1-2 hours, $15-40
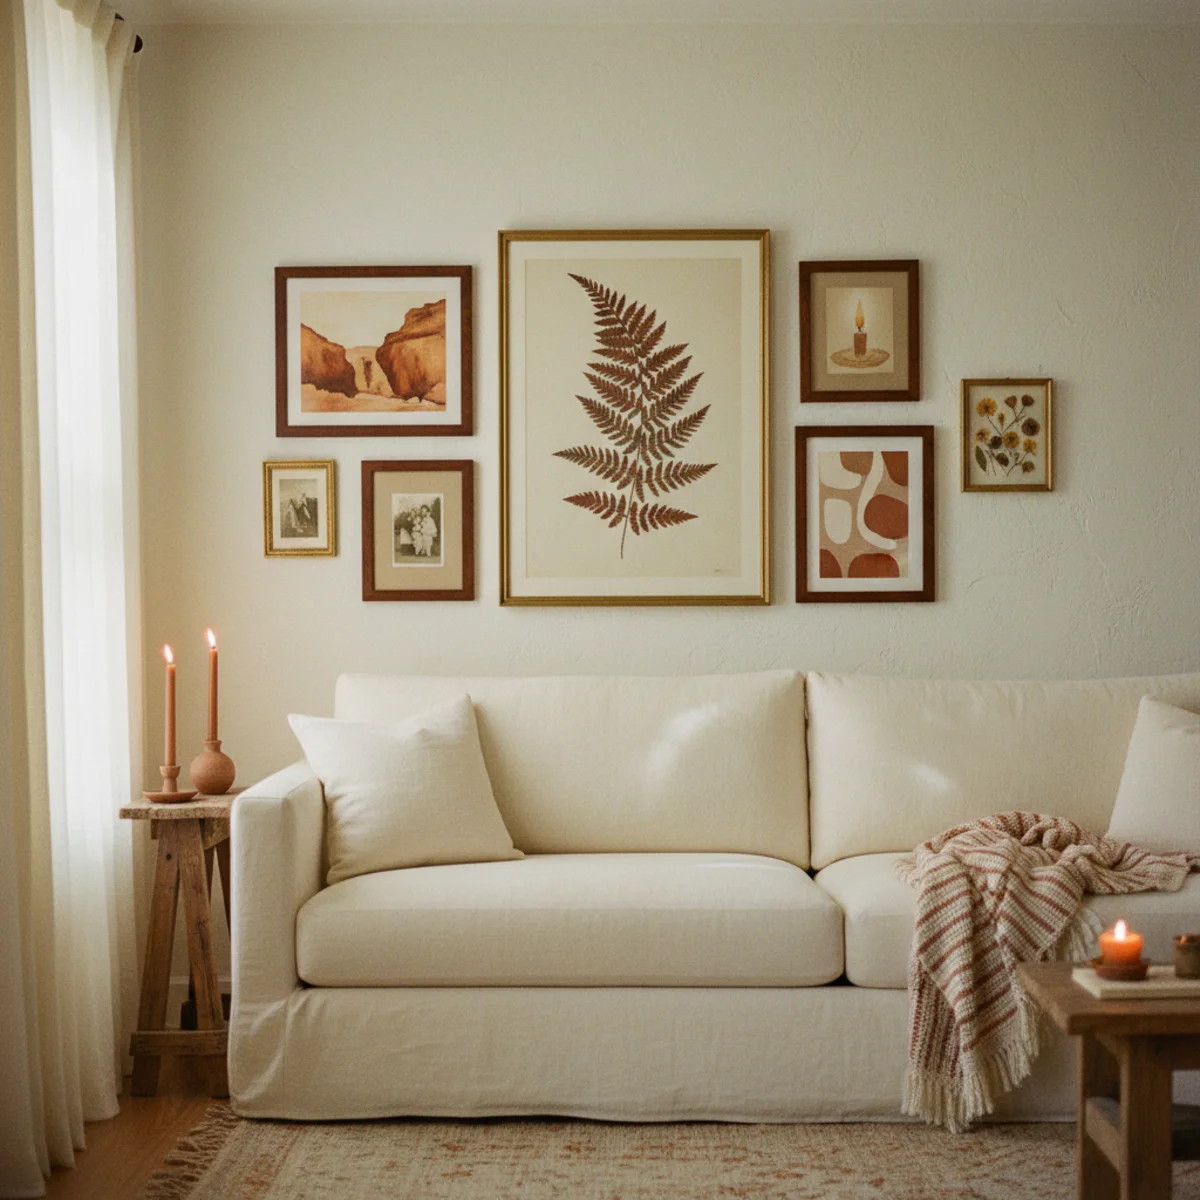
- The thrifted-frame gallery wall that reads as curated collection rather than retail display
The most characterful walls are made, not bought. A pressed leaf in a real frame beats a printed canvas every time.
— Cup of Jo home feature [citation needed — verify before publish]
What is farmhouse wall art?
Farmhouse wall art is decor for the wall that leans on natural, rustic, and handmade elements — reclaimed wood, pressed botanicals, vintage textiles, simple framed prints, and woven pieces — in a muted, earthy palette. It's defined by warmth and texture rather than polish, which is exactly why so much of it is achievable as DIY.
The unifying thread is honesty of material. A piece of weathered barn wood, a pressed flower, an old grain-sack textile, or a botanical print in a thrifted frame all carry the lived-in, gathered-over-time quality the look depends on. DIY suits it perfectly because the small imperfections of handmade work — a slightly crooked frame, a hand-lettered sign — are the character, not flaws to hide.
More in DIY you may love
See allWhy DIY farmhouse wall art is everywhere in 2026
The modern-farmhouse and warm-rustic aesthetics stayed strong, and the DIY-decor wave made wall art the most accessible way into them. Pinterest's DIY farmhouse wall art and farmhouse gallery wall searches climb every year, especially around reclaimed wood and pressed-botanical projects.
The appeal is cost and personality. Wall art from a store is expensive and impersonal; a wall of made and found pieces is cheap and entirely yours. As the secondhand-first, slow-living movement grew, people leaned toward filling walls with pressed flowers from the garden, frames from the thrift store, and textiles with a history — all of which a weekend and a few dollars can deliver.
18 DIY farmhouse wall art projects
01Pressed Botanicals in Thrifted Frames
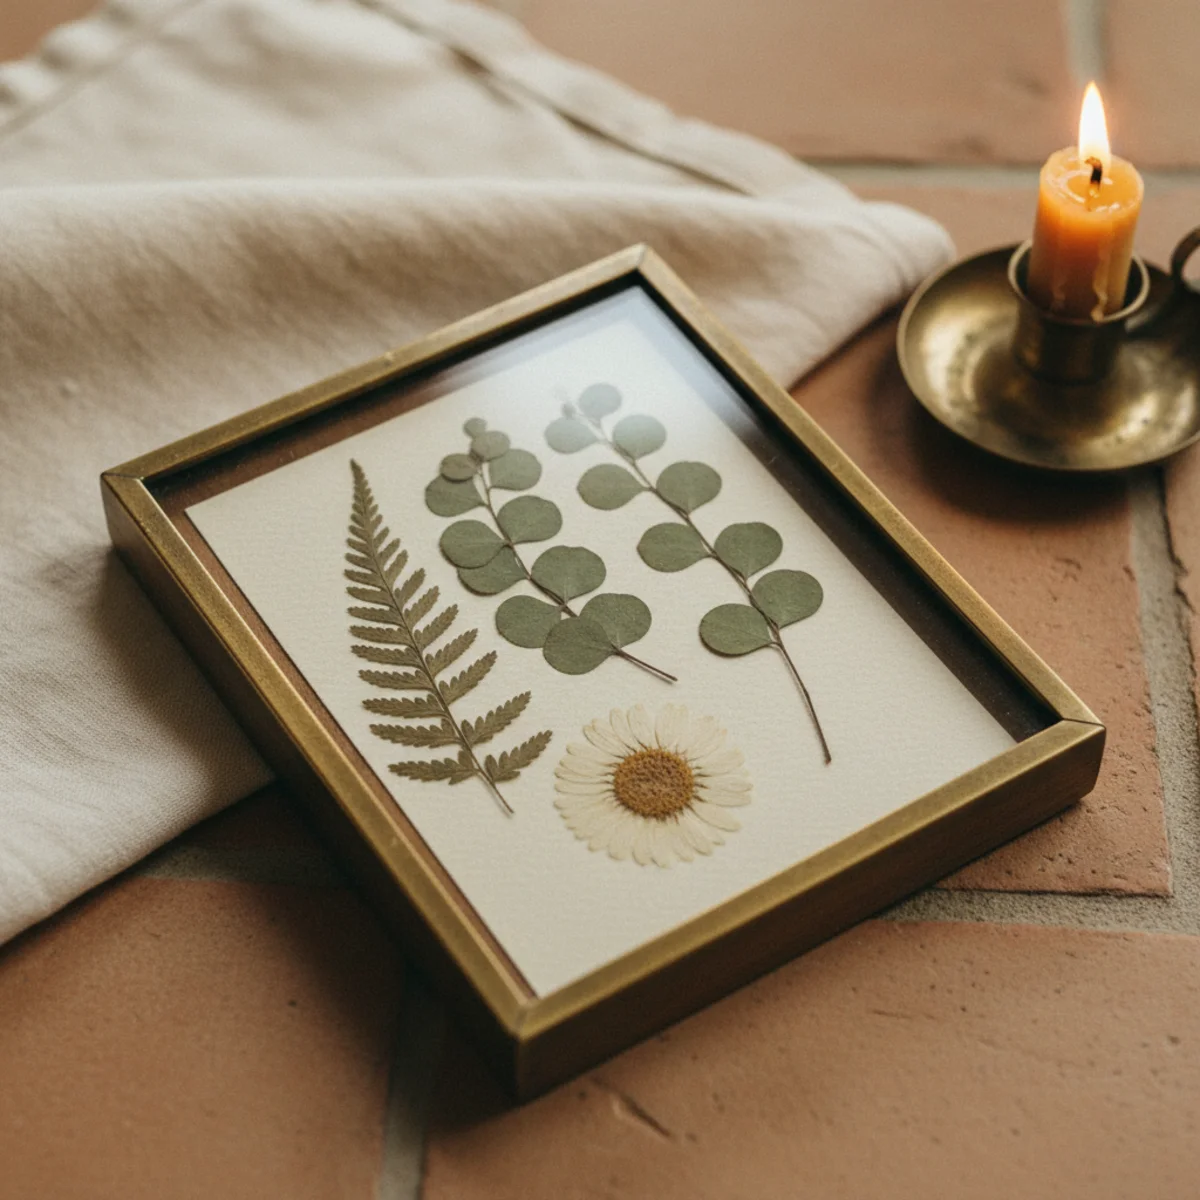
The fastest high-impact DIY farmhouse wall art project: press flowers, leaves, or ferns from your yard between heavy books, then frame them in simple thrifted frames. Each piece takes 30 minutes of active work (plus 1-2 weeks pressing time). Cost: $0 for botanicals + $2-15 per thrifted frame. A grouping of 4 to 6 pressed botanical frames becomes a gallery wall for $10-60 total.
Pressed botanical process: PRESSING — collect flowers, leaves, ferns, or herbs at peak condition. Lay flat between two sheets of parchment or printer paper. Place inside a heavy book (or between two large books with weight stacked on top). Press for 1-2 weeks until completely flat and dry. BEST BOTANICALS TO PRESS — ferns and foliage (press consistently, retain color well), flat flowers like pansies, violas, cosmos, Queen Anne's lace (press easily), leaves in fall color (press beautifully), herb stems with flowers (lavender, rosemary in bloom). FRAMING — remove pressed botanical carefully from parchment. Position on white, cream, or kraft paper backing inside frame. Can be secured with small dot of acid-free glue or simply positioned and the glass holds it. FRAME SOURCES — thrift stores ($2-8 per frame), estate sales ($1-5 per frame), craft stores for simple wood frames ($8-15 per frame). Mix frame styles and sizes slightly (same era, same material, slight size variation) rather than matching sets. ARRANGEMENT — grouping of 3, 5, or 6 pieces in related but varied frames creates gallery wall. Arrange on floor before hanging. ALTERNATIVE — combine pressed botanicals with pages torn from vintage botanical books (see item 8) in the same gallery wall for mixed print-and-real-pressed composition.
AFFILIATE SLOTPROJECTPressed yard botanicals framed in $2-15 thrifted simple frames; grouping of 4-6 creates gallery wall for $10-60 totalAdd affiliate URL when configuredWhy it works
Because actual pressed flowers and leaves are real objects rather than reproductions — they carry the physical presence of the actual plant material, the specific character of the specimen that was pressed, and the personal connection of having come from your own yard or neighborhood. A printed botanical illustration is beautiful; a pressed cosmos from the garden is meaningful. The distinction is visible to viewers even when they can't articulate it: real pressed botanicals read as intentionally personal; printed reproductions read as stylistic choices.
Pro tip — Press botanicals in multiples — press 6-10 specimens at once during peak season, use the best 4-6 for framing, keep extras as backup replacements or future projects. The cost of pressing more is zero; the cost of trying to find identical specimens later is significant.
Pressed ferns, cosmos, and leaves in thrifted frames — 30-minute project producing genuinely personal art. See also: diy-home-decor-ideas
02A Reclaimed-Wood Plank Sign
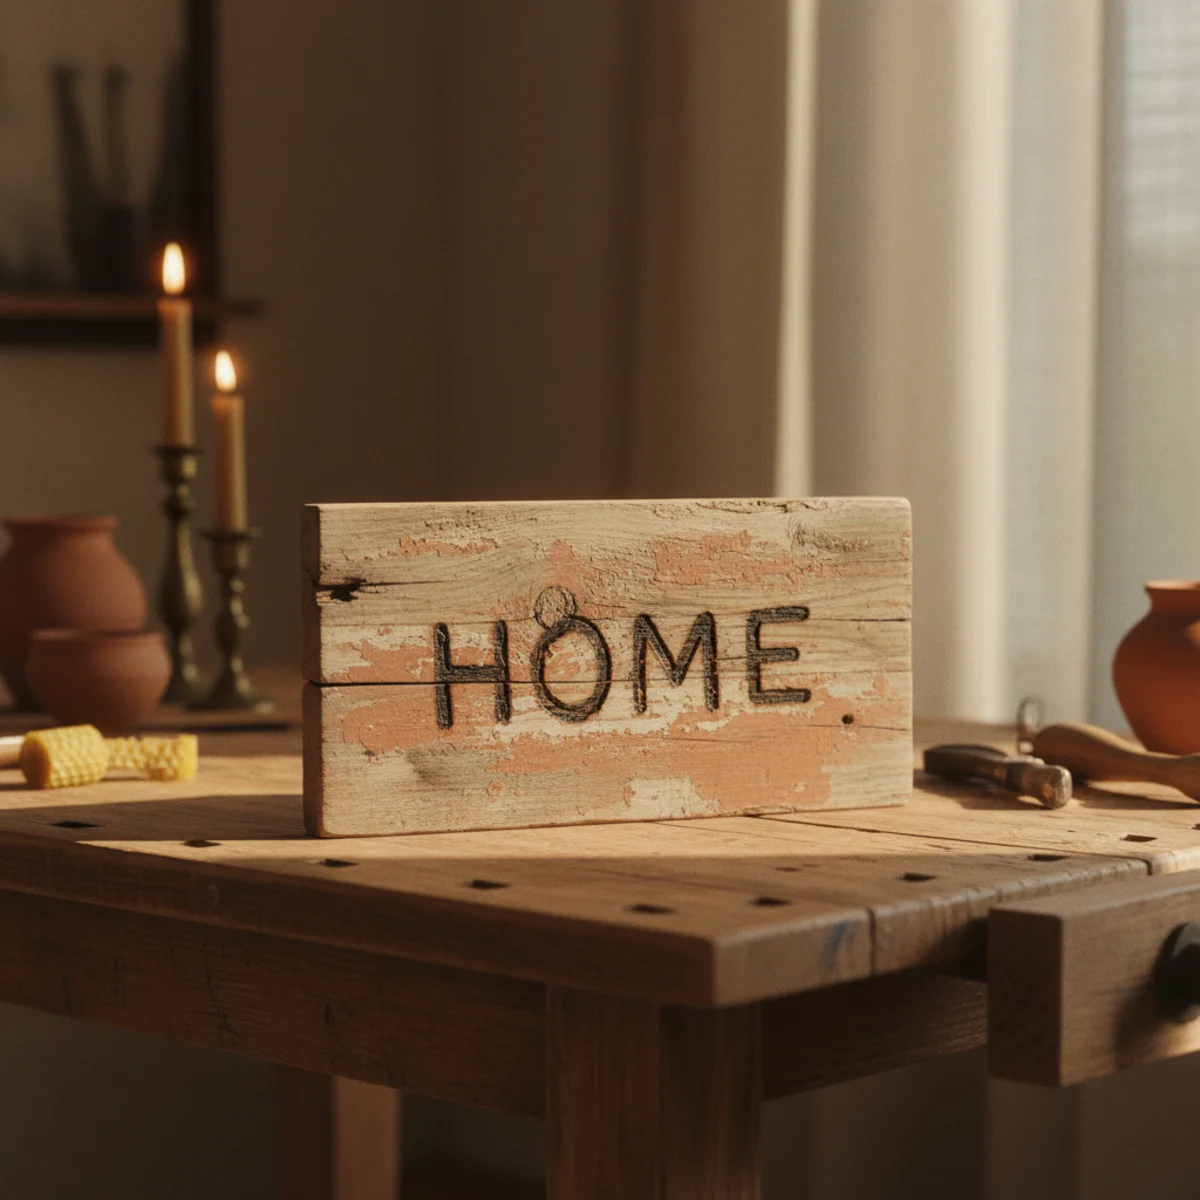
A reclaimed wood plank sign — using actual salvaged barn wood, pallet wood, or construction lumber rather than new wood distressed to look old — has the authentic aged character that commercial barn-wood products cannot replicate. The build takes 3 to 6 hours across one weekend and costs $20 to $60 in materials. The result reads as genuinely reclaimed rather than as manufactured reclaimed.
Reclaimed wood sign process: WOOD SOURCING — actual salvaged lumber from: barn demolitions (check Craigslist 'free' section and renovation notices), construction site scrap piles (ask permission), old wooden pallets (hardware stores, garden centers, manufacturing companies often give these away free), fence boards from replacement projects, old flooring from home renovations. Target: weathered grey, brown, or silver-toned planks 5-8 inches wide. PREPARATION — lightly sand any rough splinters (not smooth — you want texture). Cut to width with circular saw or handsaw if needed. LETTERING OPTIONS: OPTION A — wood burning ($20-40 for basic wood burning kit from craft stores), trace pencil letters first then burn. OPTION B — stencil + paint (print stencil letters from computer, cut from cardstock, tape to wood, paint with chalk paint). OPTION C — vinyl letter transfer ($5-15 at craft stores). OPTION D — hand-painted with round artist brush and chalk paint (requires practice). CONTENT — simple single word or short phrase ('gather,' 'home,' 'family') OR a meaningful personal phrase, coordinates of meaningful place, or simply nothing and let the reclaimed wood be the art. MOUNTING — D-ring mounting hardware ($3-5 at hardware store) on the back, or natural jute twine for hanging.
AFFILIATE SLOTPROJECTActual salvaged barn/pallet/construction lumber + wood burning or chalk paint lettering; 3-6 hours, $20-60Add affiliate URL when configuredWhy it works
Because actual weathering produces grain raising, color variation, nail holes, weathering checks, and surface character that sanding and painting techniques cannot replicate. The real thing looks different than the simulation because it IS different — decades of sun, rain, freeze-thaw cycles, and use produce specific aging that distressing tools approximate but don't match. Viewers who've seen both know the difference immediately. The sourcing effort (finding actual salvaged lumber) is the project's main challenge, but the result justifies it every time.
Pro tip — Contact local barn renovation or demolition companies directly for the best reclaimed wood sourcing — many are willing to let you take specific planks for free or minimal cost rather than hauling all material to the landfill. Search 'barn demolition [your city]' annually for current projects.
Actual barn wood with authentic weathering — real reclaimed character that distressed new wood cannot replicate. See also: modern-farmhouse-decor
03Dried Floral Wall Hanging
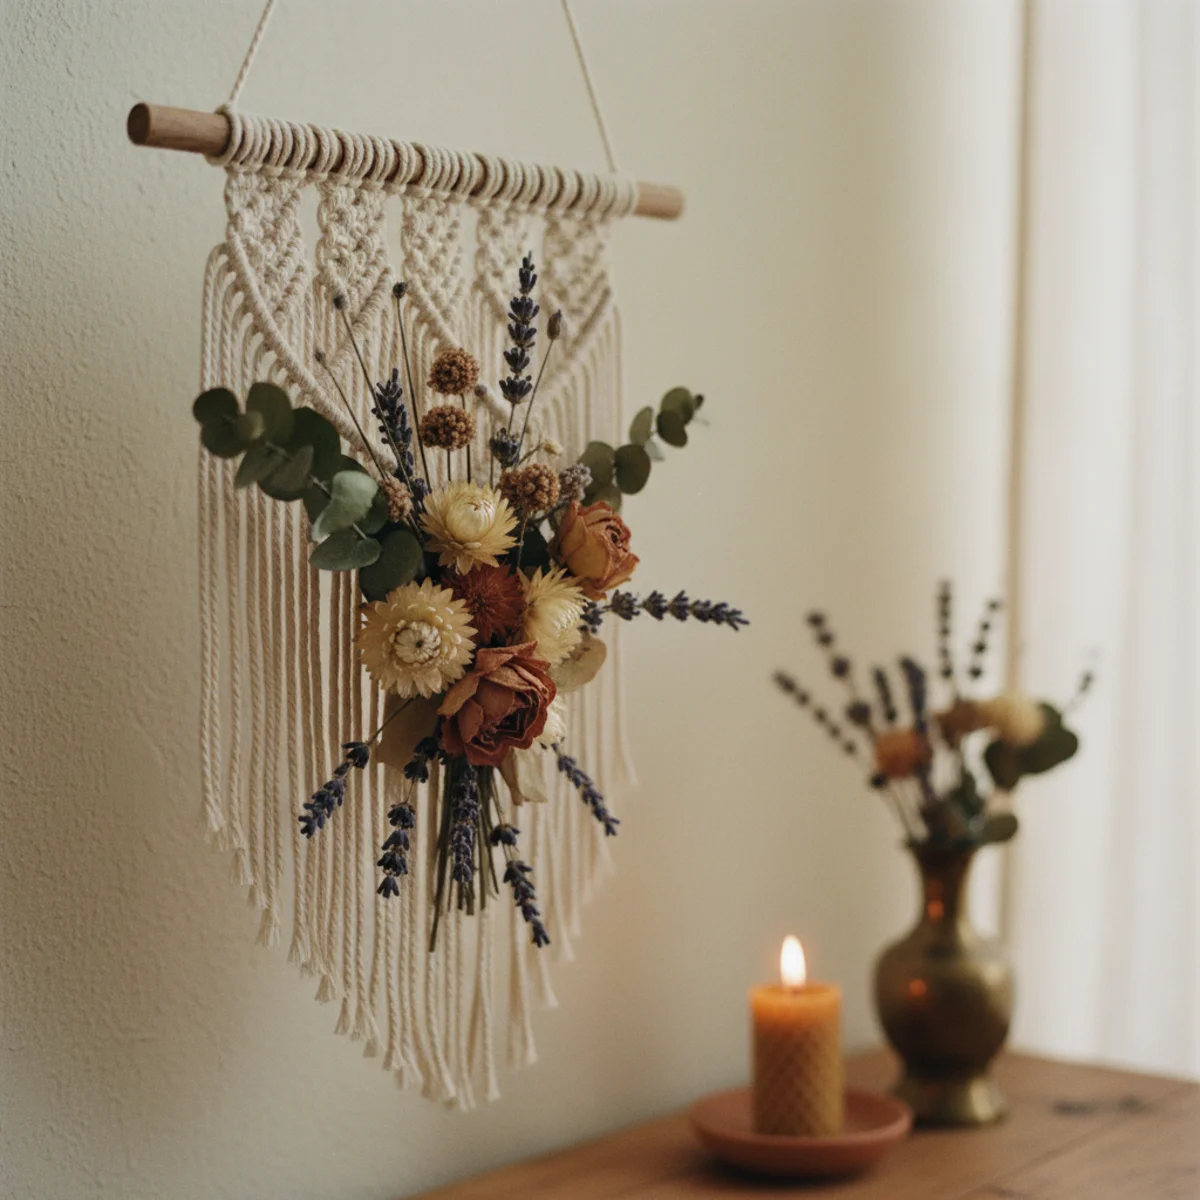
A dried floral wall hanging — bundles of dried lavender, dried grasses, dried eucalyptus, or mixed dried botanicals tied to a wooden dowel or branch with natural twine — takes 1 to 2 hours and costs $15 to $40 in materials. It doubles as both wall art and botanical display, changing naturally as the botanicals age over 6 to 12 months.
Dried floral wall hanging process: SUPPORT — 12 to 24-inch wooden dowel ($2-5 at craft stores) OR 12 to 20-inch forked branch from yard (free, more character than smooth dowel). BOTANICALS — 3-5 types of dried botanical material: dried lavender bunches ($8-15 per large bunch from Etsy or Trader Joe's), dried pampas grass stalks ($10-25 per stalk), dried wheat or oat bunches ($10-20 per bunch), dried eucalyptus ($10-20 per bunch), dried yarrow or statice ($8-15 per bunch). Total botanical investment: $30-60 for a substantial hanging, OR free if foraging from yard. BINDING TWINE — natural jute twine ($3-8 per roll) or natural cotton twine. ASSEMBLY — cut botanicals to lengths varying from 8 to 24 inches (graduated lengths for visual interest). Create small bundles of each botanical type (3-5 stems per bundle). Tie each bundle to the dowel or branch with twine, spacing evenly across the width, varying heights. Use additional twine to secure loose stems and create an overall tied appearance. MOUNTING — tie a length of natural twine or leather cord to each end of the dowel for hanging. Hang from a single nail or two nails. VARIATIONS — add dried orange slices ($5-10 DIY: slice oranges, dry at 200°F for 4-6 hours), small pinecones tied in, dried rosebuds for color variation.
AFFILIATE SLOTPROJECTDried lavender, pampas, eucalyptus, wheat tied to wooden dowel or branch with jute twine; 1-2 hours, $15-40 (or free if foraging)Add affiliate URL when configuredWhy it works
Because dried botanicals are functional-decorative objects rather than purely decorative — they have fragrance (lavender, eucalyptus), seasonal connection, and natural aging that purely-visual wall art cannot provide. The same dried lavender hanging on the wall is also the source of the scent in the room; the same dried eucalyptus can be snipped for flower arrangements. The dual function reinforces the farmhouse-household-self-sufficiency aesthetic. The aging also works in the hanging's favor rather than against it — a 6-month-old lavender hanging has developed soft grey-purple tones that a fresh one doesn't have.
Pro tip — Make dried floral hangings from your own yard cuttings in late summer for free botanical material — early September timing yields the most-colorful dried results. Cut stems 30-40 inches, bundle with rubber band, hang upside down in dry warm spot for 2-3 weeks until fully dry, then assemble into wall hanging.
Dried lavender, pampas, and eucalyptus on forked branch with jute twine — botanical display doubling as wall art. See also: cottagecore-decor
04A Thrifted-Frame Gallery Wall
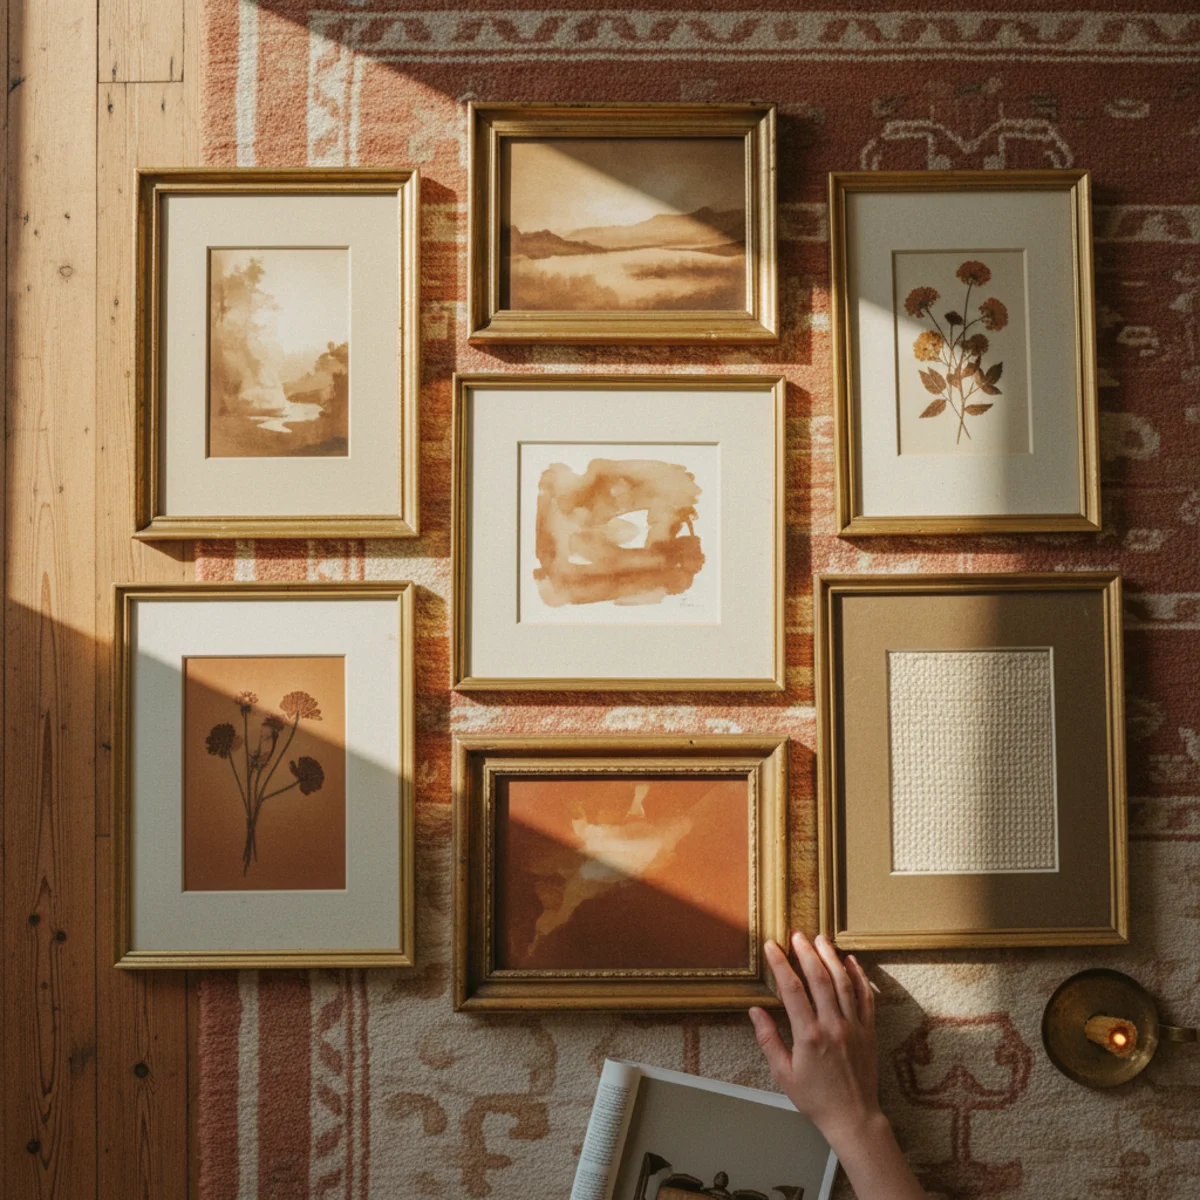
A gallery wall assembled from thrifted frames in coordinated (but not matching) styles — same era, same material, varied sizes — reads as curated collected artwork rather than retail display. The art inside the frames can be anything personal: family photos, vintage postcards, pressed botanicals, book pages, handwritten letters, small prints. Cost: $2-8 per frame from estate sales and thrift stores; art: often free.
Thrifted gallery wall process: FRAME SOURCING — spend 2-3 estate sale or thrift store visits collecting 6-12 frames in related style (all simple wood frames, or all vintage gilded frames, or all mixed with same-era character). Target $2-8 per frame. Aim for varied sizes (4x6, 5x7, 8x10, 11x14, plus maybe one larger accent piece). COORDINATING PRINCIPLE — frames should share one quality (all wood, all gilded, all black) while varying in other ways (sizes, slight style differences, some with mats and some without). ART SOURCES — personal photographs printed at pharmacy ($0.10-0.50 per photo), vintage postcards from estate sales ($0.50-3 each), pages torn from vintage botanical or nature books ($5-20 per book that provides 6-12 pages), scanned and printed old family letters or handwriting, pressed botanicals (per item 1), printed vintage maps, recipe cards in grandmother's handwriting. ARRANGEMENT — cut kraft paper templates matching each frame size, tape to wall with painter's tape to plan arrangement before hanging. The classic gallery wall arrangement: largest piece off-center, smaller pieces radiating around it with roughly 2-3 inches between frames. Maintain same bottom edge alignment OR center alignment across the wall. HANGING — use hammer and nails for simple frames, picture-hanging strips for frames without hanging hardware.
AFFILIATE SLOTPROJECT6-12 thrifted frames ($2-8 each) in coordinated style with varied sizes; personal photos, vintage postcards, pressed botanicals, book pagesAdd affiliate URL when configuredWhy it works
Because thrifted frames have actual age and irregularity (slight patina, period-appropriate hardware, genuine wear) that retail gallery kits specifically eliminate for commercial consistency. The personal art inside (family photos, vintage postcards, pressed yard flowers) also adds meaningful dimension that retail prints cannot provide. The combination produces a wall that reads as 'accumulated over years with meaning' where retail gallery kits read as 'assembled to look like accumulated.' Viewers who don't consciously recognize the difference still register it.
Pro tip — Arrange frames on the floor in multiple configurations before committing to wall placement — photographing several arrangements and comparing on your phone reveals which layout works best without driving unnecessary nail holes. The floor-arrangement step takes 30 minutes and prevents the most-common gallery wall frustration of misaligned holes.
Eight thrifted frames with personal art — curated collected appearance from $20-60 in materials. See also: gallery-wall-ideas
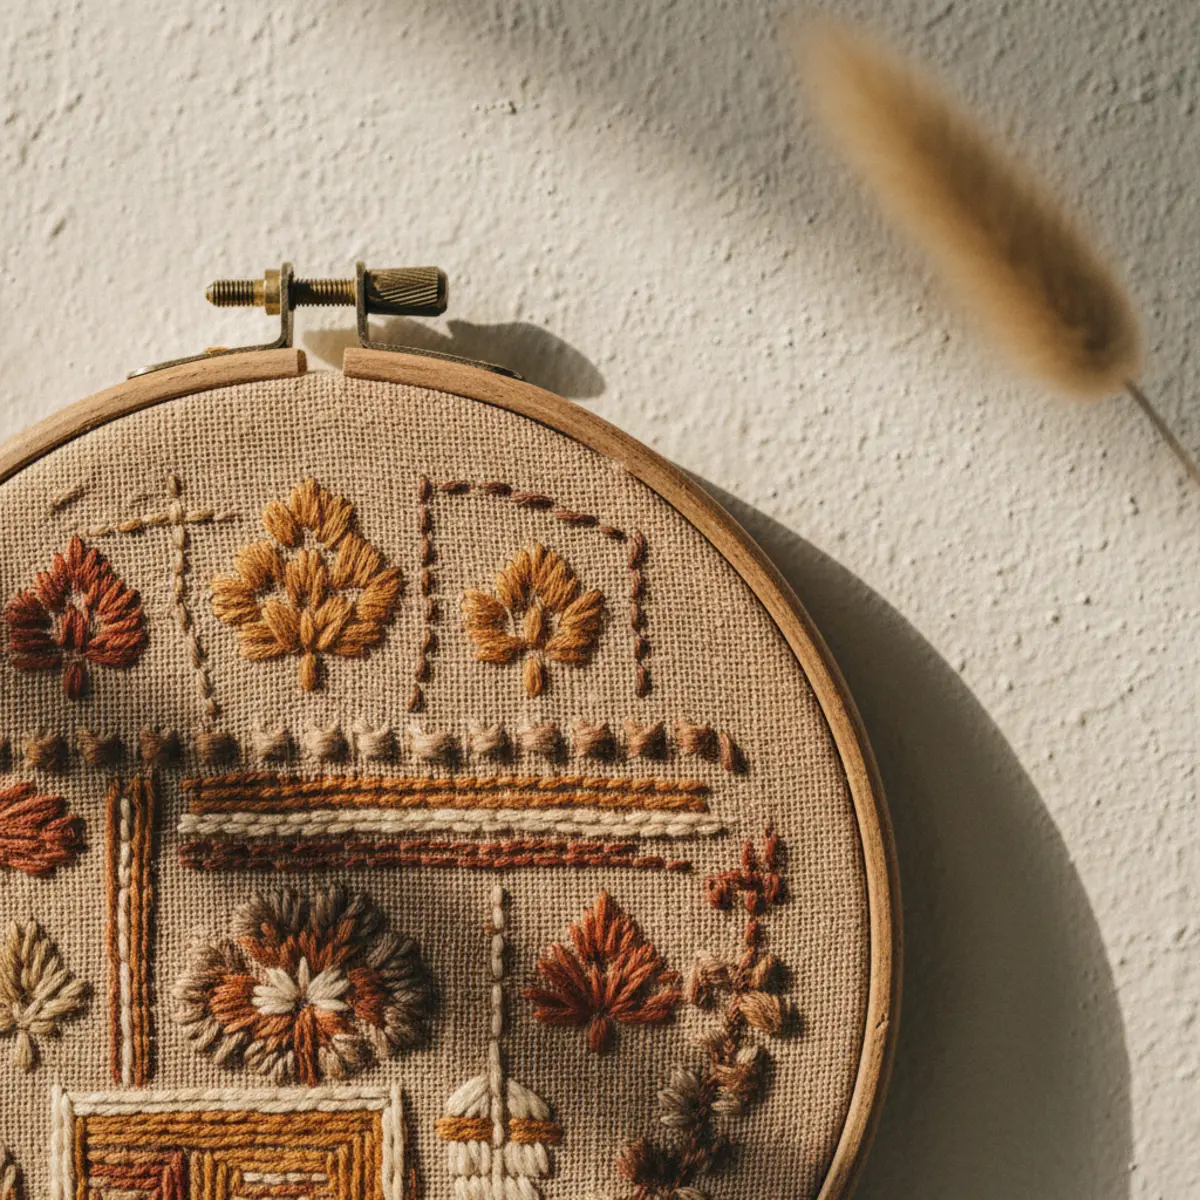
05Vintage Textile in a Frame
Framing a vintage embroidered piece (sampler, tea towel, pillowcase edge), a vintage linen grain sack, or a piece of vintage fabric in a large simple frame creates textile wall art with inherent warmth and history. The framed textile reads as museum-quality display of household life rather than as wall decoration — a fundamentally different aesthetic register.
Framed vintage textile process: TEXTILE SOURCES — estate sales for embroidered samplers ($5-30), vintage tea towels ($3-15), vintage grain sacks with original stamp and stripe ($30-80), vintage quilt squares ($10-40), vintage embroidered pillowcase edges ($5-20). FRAME SELECTION — simple wood frame or thin-profile shadow box frame sized to show the textile with small amount of breathing room (the textile should not fill the frame edge-to-edge). Standard frames: 11x14, 16x20, 18x24 for most vintage textiles. MOUNTING METHOD — iron the textile flat. Mount on white, cream, or natural linen backing using pins (temporary, reversible) OR fabric-safe adhesive on corners. Place in frame. For thick textiles (thick grain sacks, thick embroidered pieces), shadow box frames ($20-60 at craft stores) provide depth accommodation. BACKING FABRIC — if using a patterned textile, mount against simple cream or natural linen backing that doesn't compete. If using a neutral textile (cream grain sack), can mount directly without additional backing. PLACEMENT — single large framed textile on a wall reads as statement piece; 2-3 grouped smaller framed textiles read as collected series. Pairs especially well with pressed botanical groupings for mixed-media gallery wall.
AFFILIATE SLOTPROJECTVintage embroidered sampler, grain sack, tea towel, or quilt square in simple wood frame or shadow boxAdd affiliate URL when configuredWhy it works
Because vintage embroidered and woven textiles carry visible hand-work — each cross stitch in a vintage sampler represents physical time invested by a specific person, which creates emotional resonance that printed reproductions cannot provide. Framing the textile elevates it from utility to display, treating the hand-work as worthy of exhibition. The aesthetic register is 'this household values the labor of previous household members' which is precisely what farmhouse aesthetic is built around.
Pro tip — Look specifically for vintage embroidered samplers from 1900 to 1950 at estate sales — these often contain house mottos, alphabets, or household scenes stitched by women of the household, and carry the most specific personal history of any textile category. Prices typically $10-40 at estate sales versus $80-200 at antique dealers.
1920s embroidered sampler in oak frame — visible hand-work carrying personal history no print can replicate. See also: thrifted-decor-ideas
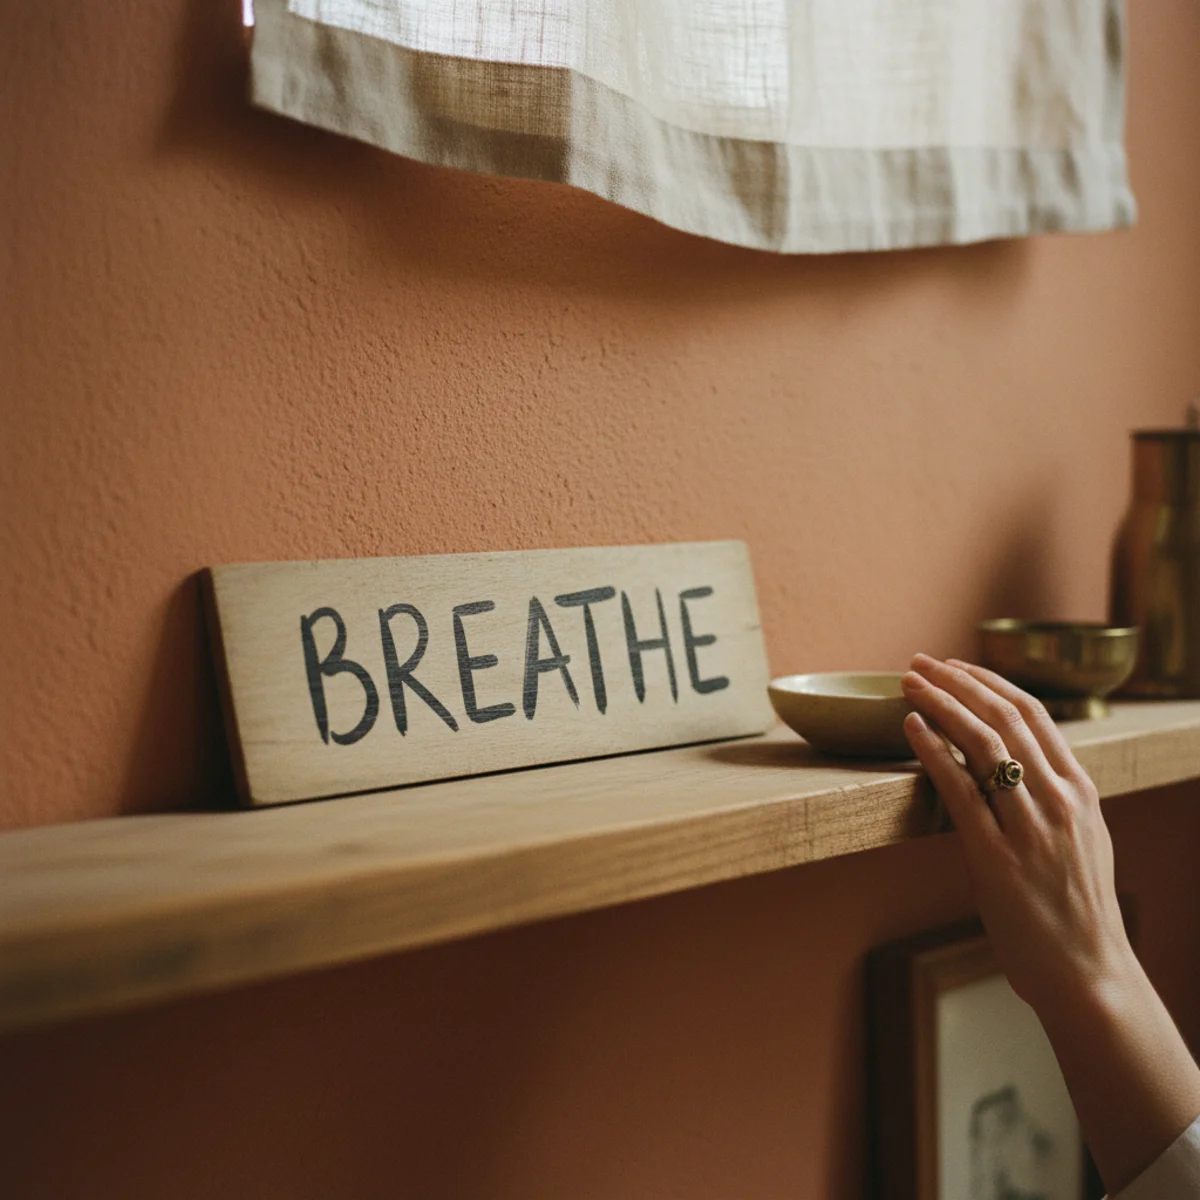
06A Hand-Lettered Wood Sign
A hand-lettered wood sign — painted directly on a planed wood board with simple lettering and chalk or milk paint — takes 2 to 4 hours and costs $20 to $40. Unlike commercially-produced wood signs, hand-lettering shows the actual maker's hand (slight variation in brush strokes, personal letterform choice) that distinguishes personal farmhouse art from manufactured farmhouse decor.
Hand-lettered wood sign process: WOOD — smooth-planed pine board (1x8 or 1x10, 24-36 inches long from hardware store at $8-20) OR smooth section of actual reclaimed wood, lightly sanded. BACKGROUND TREATMENT — apply 1-2 coats of chalk paint in warm white, cream, or natural tone. Let dry 2-4 hours. LETTERING TECHNIQUE: BEGINNER — print chosen text in large simple font (Futura, Garamond, simple serif), cut into stencil with scissors, trace onto wood with chalk, paint over with artist brush. INTERMEDIATE — brush lettering directly with round watercolor brush and chalk paint, using alphabet practice sheet to guide. ADVANCED — freehand brush lettering without guides. LETTER STYLES that work for farmhouse — simple serif letters, block letters, a mix of printed and cursive. AVOID — overly ornate scripts that require advanced skill to execute neatly; stick to letterforms within your actual skill level. TEXT CONTENT — short and personal beats long and generic: a family name, meaningful coordinates (latitude/longitude of a meaningful place), the year of something meaningful, a single meaningful word in your native language, a phrase meaningful to your household. SEALING — apply 1-2 coats of clear matte wax or matte mod podge over finished lettering to protect.
AFFILIATE SLOTPROJECTSmooth pine board + chalk paint background + hand-painted lettering with family name, coordinates, or meaningful phrase; 2-4 hours, $20-40Add affiliate URL when configuredWhy it works
Because visible hand-work carries personal investment signal that perfect machine-produced lettering cannot replicate. The slight variation in brush strokes, the letterforms shaped by your actual hand rather than a font designer's decisions, the specific word choice that means something to your household — these qualities are visible in the finished piece even to viewers who can't articulate what they're seeing. Commercial signs with perfect typography announce 'this was manufactured to look personal'; hand-lettered signs announce 'someone made this specifically.' The distinction reads immediately.
Pro tip — Practice the letterforms on large sheets of paper 4 to 5 times before lettering on the actual wood board — the practice removes the anxiety that produces stilted letters, and the rehearsal usually reveals that your hand-lettering is better than you expected. Chalk paint can be painted over if needed (re-apply background coat), so mistakes on the real board aren't permanent.
Hand-lettered family name on chalk-painted pine board — visible brush strokes carrying personal investment. See also: diy-home-decor-ideas
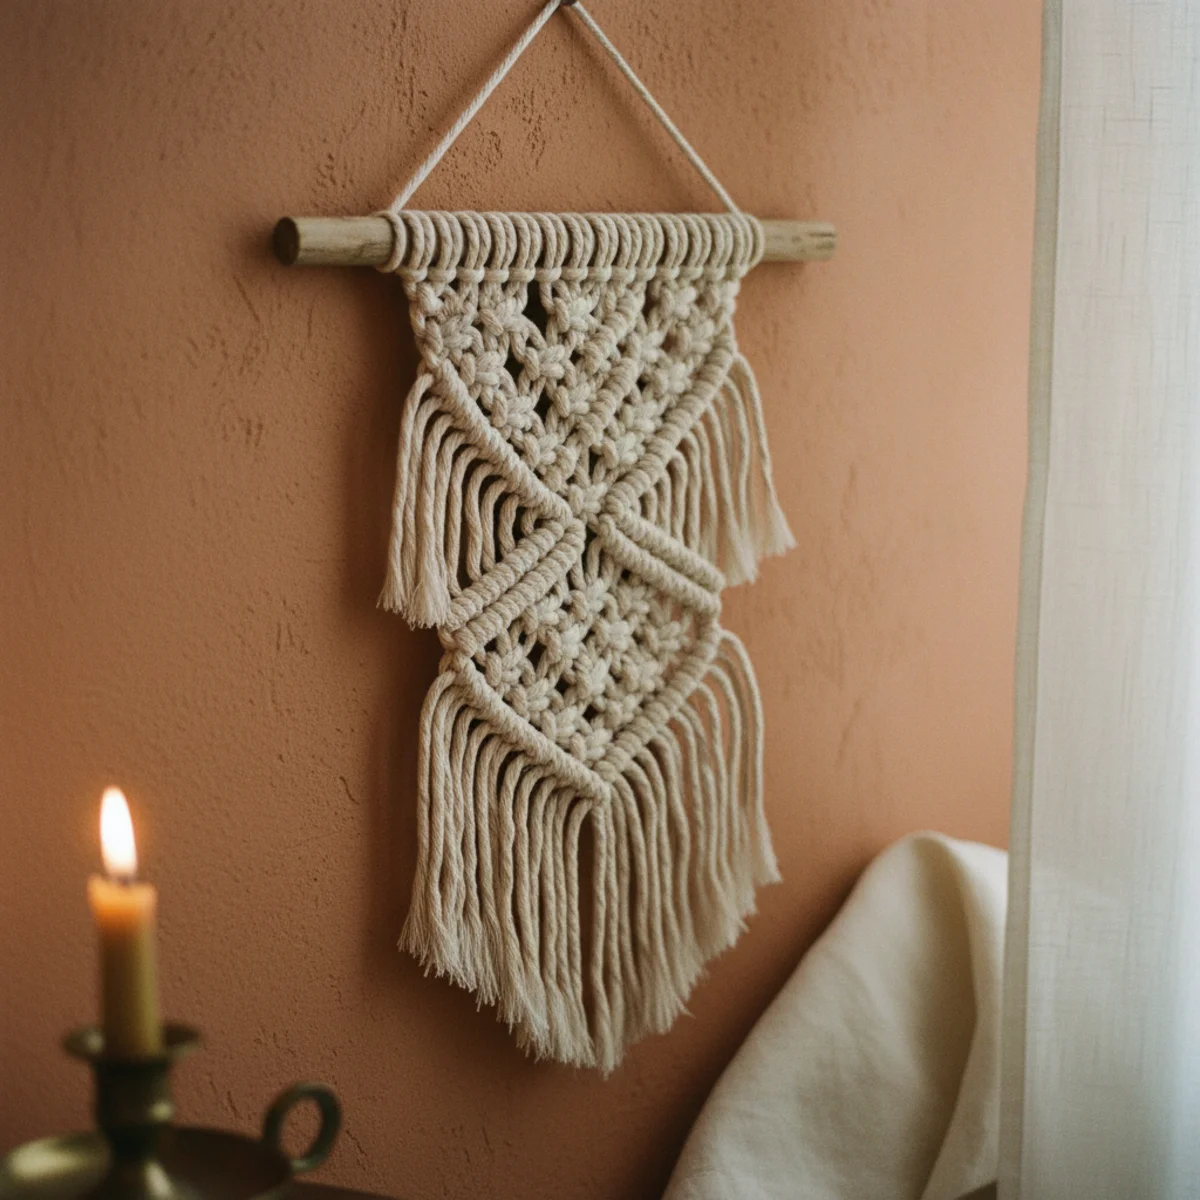
07Woven or Macramé Hanging
A simple woven or macramé wall hanging — even at beginner level — adds textile depth and natural fiber texture to farmhouse walls. Basic macramé square-knot patterns require no prior experience and produce substantial-looking pieces in 4 to 8 hours. Cost: $20 to $50 in cotton rope. Alternatively, source vintage woven hangings from estate sales and thrift stores at $10-40.
Simple macramé wall hanging process: MATERIALS — 100% natural cotton rope (3mm braided cotton, 200-300 feet for a 20-inch wide hanging at $15-30 per roll), 14-18 inch wooden dowel or branch ($2-5 for dowel, or free branch), jute twine for securing. BASIC TECHNIQUE — square knot macramé requires only two knot types. Square knot: take 4 strands, bring outer-left across middle two strands and under outer-right, then bring outer-right under middle two and through the loop on the left. Repeat alternating for pattern. Lark's head knot: fold cord in half, loop over dowel, bring both ends through the loop. SIMPLE HANGING PATTERN — mount 16-20 folded cords onto dowel with lark's head knots (creates 32-40 working strands). Work 6-8 rows of alternating square knots for the main body. Then divide into sections and work each section separately (creating the V-shapes typical of simple macramé). Finish with fringe by unraveling the rope ends below the last knots. TOTAL TIME — 4-8 hours for a beginner's first 20-inch hanging. VINTAGE ALTERNATIVE — thrift stores and estate sales frequently have 1970s woven wall hangings at $5-25, which are genuinely vintage and highly suitable for warm farmhouse aesthetic.
AFFILIATE SLOTPROJECT100% natural cotton rope + wooden dowel + square knot macramé; 4-8 hours, $20-50. Or thrift 1970s vintage woven hanging at $5-25.Add affiliate URL when configuredWhy it works
Because natural fiber wall hangings add tactile texture and organic shape that flat-surface art (prints, paintings) cannot provide. The dimensional quality of macramé creates actual shadow and depth on the wall surface; the natural cotton or jute fibers add warmth and craft signals. A woven or macramé piece is also clearly hand-made in a way that most wall art is not — the visible knots and woven structure announce 'a person did this one knot at a time,' which produces the personal investment reading that farmhouse art benefits from.
Pro tip — Use un-dyed natural cotton rope rather than bleached white cotton for the most-authentic farmhouse result — natural cotton rope has a creamy yellow-white tone that reads warmer and more authentic than bright white bleached rope. Natural is typically the same price or marginally less than bleached white.
Natural cotton macramé on wooden dowel — visible knot-by-knot handwork carrying craft signal. See also: reading-nook-ideas
08A Botanical Print Set
Pages torn from vintage botanical books (or printed from public domain sources) in simple matching frames create a botanical print set that costs $10 to $60 total for a grouping of 4 to 6 pieces. The vintage-publication source gives the prints inherent historical character; the matching simple frames create gallery cohesion.
Botanical print set process: SOURCE A — VINTAGE BOTANICAL BOOKS from estate sales and used bookstores. Look for books published before 1960 with botanical illustrations (Curtis's Botanical Magazine, Gray's Botany, old garden encyclopedias, vintage nature guides). Price: $5-20 per book yielding 6-20 usable illustration pages. Remove pages carefully with bone folder ($3) along the spine — pages come out cleanly with the fold-and-pull technique rather than tearing. SOURCE B — FREE PUBLIC DOMAIN DOWNLOADS. The Biodiversity Heritage Library (biodiversitylibrary.org) has thousands of high-resolution vintage botanical illustrations for free download. Print at home on cream-toned printer paper (80 lb cardstock) for $0.25-0.50 per page, or at pharmacy ($0.30-1 per print). FRAMING — matching simple wood frames from craft store ($5-12 each) OR matching thrifted frames in same size. Mat the prints in cream mat board (pre-cut mats at $2-4 each) if frames have mat windows. ARRANGEMENT — grouping of 4-6 prints in matching frames, evenly spaced (3 inches between frames), in a horizontal row OR 2x2 or 2x3 grid. BOTANICAL SUBJECTS — prefer illustrations with warm earth-tone palette (autumn leaves, dried seed pods, root vegetables) for most warm-home applications; brighter florals work for cottagecore and spring aesthetics.
AFFILIATE SLOTPROJECTVintage botanical book pages ($5-20 per book, 6-20 pages) OR free public domain downloads, framed in matching simple frames; 4-6 piece groupingAdd affiliate URL when configuredWhy it works
Because actual vintage publication pages have age — yellowed edges, slight foxing, period typography, historical printing quality — that reproduction prints specifically don't have. A page from an 1890 botanical publication looks different from a reprint of the same illustration because the original paper, ink, and age are present in the former and absent in the latter. The historical printing quality also has character that modern digital printing doesn't replicate. At $5-20 for a book yielding 6-20 pages, vintage books also deliver better cost-per-piece than single retail botanical prints at $15-40 each.
Pro tip — Photograph potential botanical book illustrations at the estate sale or used bookstore BEFORE purchasing — use your phone to photograph several pages, then decide later which ones to frame. The in-situ photography prevents buying books for one illustration and discovering the rest don't suit the wall once you're home.
Vintage botanical book pages in matching oak frames — historical paper and printing quality no reproduction print has. See also: cottagecore-decor
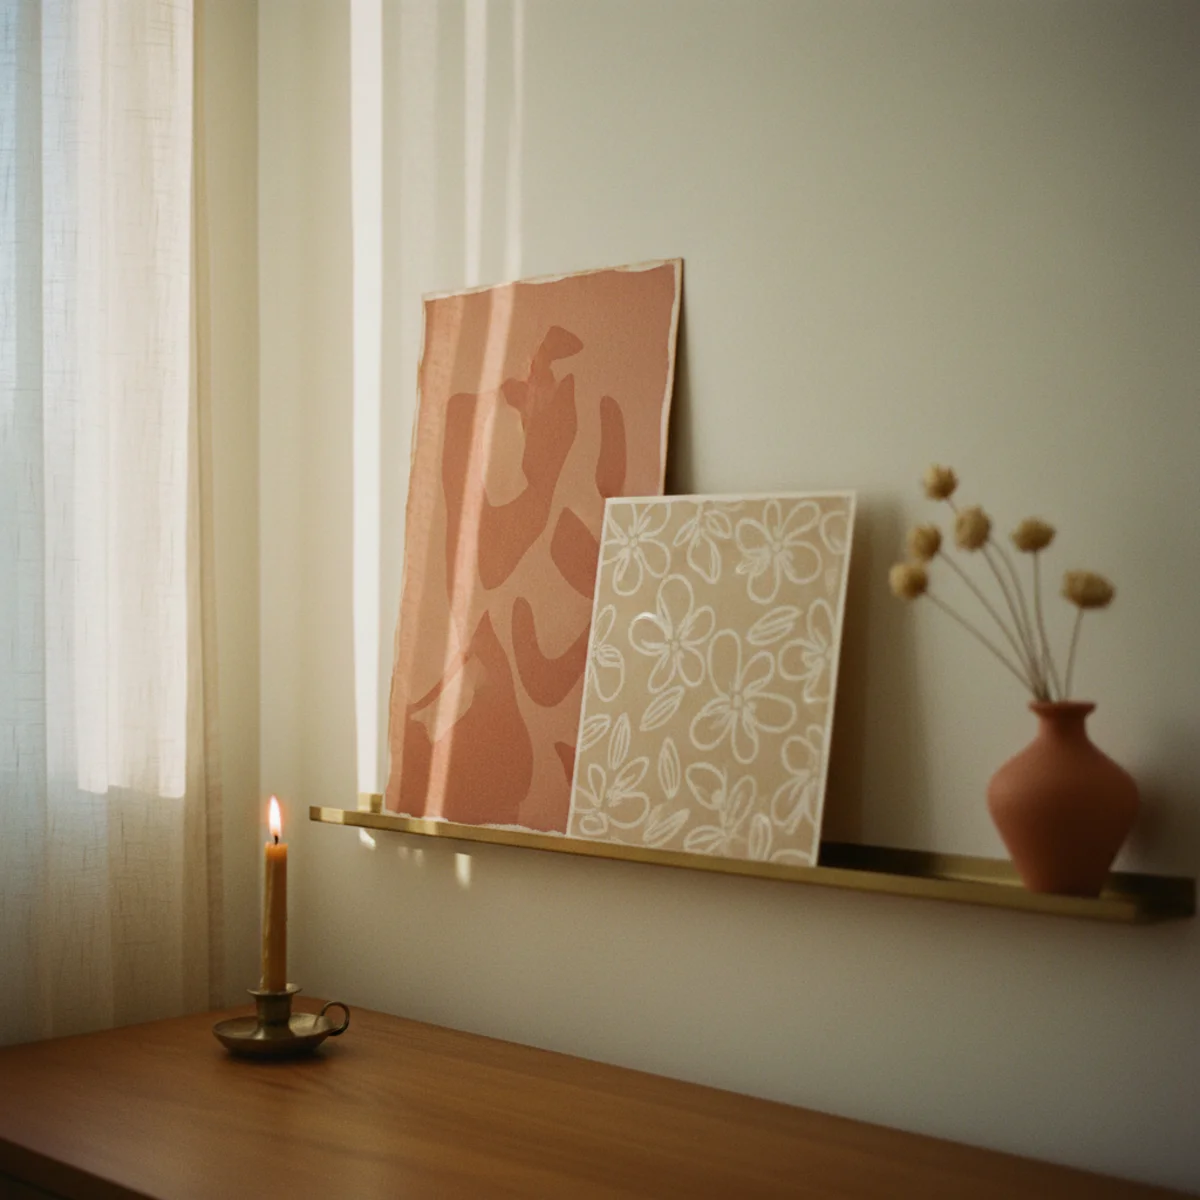
09Floating Shelf as Art Ledge
A floating shelf used as an art ledge (leaning small framed pieces against the wall from the shelf surface) creates a flexible layered art installation that can be changed without re-hanging. The shelf-as-ledge approach also allows mixing art and small objects (ceramic vessels, small plants, books) for dimensional arrangement. Cost: $20-60 for the shelf; frames and objects variable.
Art ledge shelf specifications: SHELF — 3-5 inch deep picture ledge shelf (narrower than standard shelves, specifically designed for leaning frames) OR standard 6-8 inch deep floating shelf. LENGTH — 24 to 48 inches for most wall applications. SOURCES — IKEA MOSSLANDA picture ledge at $10-15 per 43-inch shelf (budget option that works well), or build DIY from 1x4 lumber and floating shelf brackets at $15-30. FINISH — natural oak or paint in cream or warm white to match wall. MOUNTING — into studs or with drywall anchors, perfectly level (laser level recommended at $20-40). ARRANGEMENT ON SHELF — lean 3-5 small to medium frames (4x6 to 11x14) of varied sizes against the wall. Layer slightly (second frame in front of first by 1 inch) for depth. Add one small ceramic vessel, one small book, one small plant between the frames for dimensional variety. ROTATING THE DISPLAY — the ledge's main advantage is zero re-hanging required when swapping frames. Update seasonally or when you find new pieces; the swap takes 5 minutes.
AFFILIATE SLOTPROJECTIKEA MOSSLANDA or DIY picture ledge shelf with 3-5 leaned frames of varied sizes; ceramic, plant, book mixed between framesAdd affiliate URL when configuredWhy it works
Because the leaning posture reads more casual and collected than precisely-hung frames — it suggests that the art has been recently placed, could change, isn't permanently installed. The casual posture matches warm-home aesthetic better than the formal-hung-arrangement posture. The shelf also enables mixing objects (ceramics, small plants, books) with frames for the dimensional composition that purely-hung walls can't achieve. And the zero-effort swap ability makes the display genuinely change over time rather than staying static for years because re-hanging is too much work.
Pro tip — Use IKEA MOSSLANDA picture ledges for the most-affordable art ledge build — the 43-inch ledge at $10-15 is purpose-designed for frame leaning and mounts easily. Buy two or three for a wall-length ledge arrangement; the matching lengths and profiles create gallery-quality display at minimal cost.
Picture ledge with leaned varied frames, ceramic vessels, and small book — flexible layered display that changes in 5 minutes. See also: shelf-styling-ideas
10A Framed Map or Document
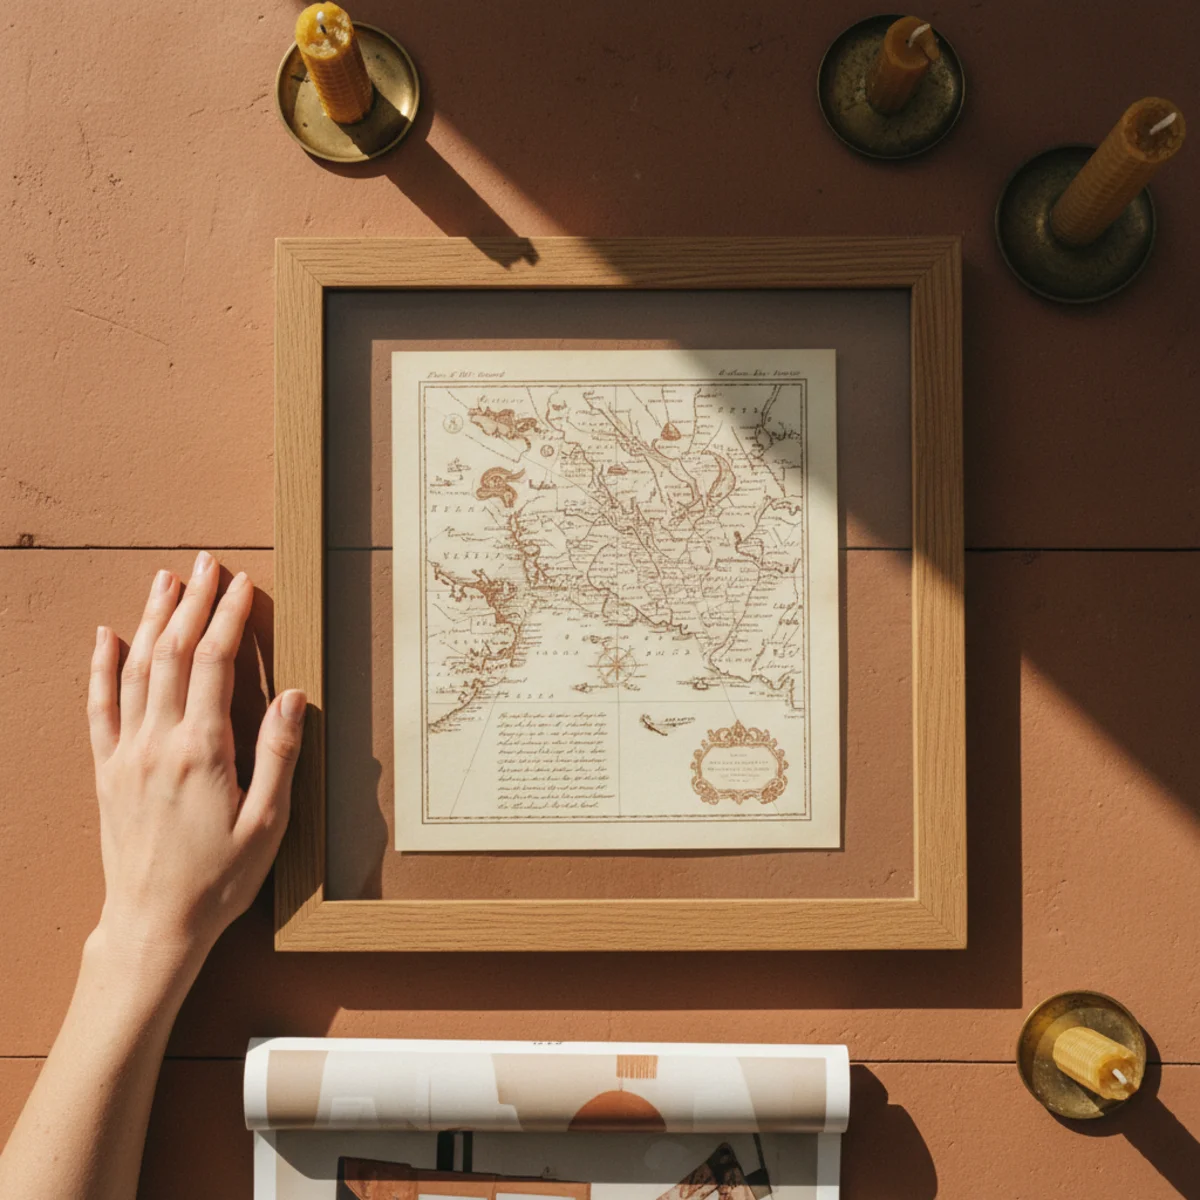
A large framed vintage map (county map, old topographic map, antique city map) or meaningful document (vintage handwritten letter, antique recipe in grandmother's writing, family document) makes significant statement wall art at $10-80 total depending on sourcing. The historical document or map carries inherent narrative dimension that decorative prints cannot provide.
Framed map and document specifications: VINTAGE MAPS — antique county maps or topographic maps from estate sales ($10-30 for unframed originals), old National Geographic maps from $2-5 at used bookstores, vintage city maps from antique stores or Etsy ($20-100 for significant pieces), scanned and reprinted family-specific maps (location of family land, ancestral town in European country, etc.) printed at large-format copy shops ($10-30 for 24x36 inch print). DOCUMENTS — vintage handwritten letters from estate sale letter boxes ($2-5 per letter, beautiful when framed), handwritten family recipes scanned and enlarged to 11x14 or 16x20 ($5-10 to print), old deeds or property documents (meaningful or decorative), vintage seed catalog pages, vintage newspaper front pages for meaningful dates ($10-30 from historic newspaper archives). FRAMING — simple thin wood or metal frame, no ornate gilding for maps (let the map be the statement). Large maps benefit from oversize frames (24x36 or 30x40) that require professional framing ($60-150) or DIY with floating frame from craft store. POSITIONING — large maps work as single statement pieces on a prominent wall. Document groupings work as intimate gallery on smaller walls.
AFFILIATE SLOTPROJECTVintage county/topographic/city map at $10-30 unframed OR meaningful handwritten family document; simple thin frameAdd affiliate URL when configuredWhy it works
Because maps and documents are primary sources — they contain real information about real places and real people, which makes them inherently more interesting than decorative equivalents designed purely for visual appeal. A county map from 1890 shows the actual farm boundaries, the original road names, the settlements that no longer exist; a decorative 'vintage-style map' shows nothing but aesthetic. The specific informational content creates conversation and engagement that decorative art doesn't. Viewers linger at a genuine old map in a way they don't at a reproduction.
Pro tip — Frame family-specific maps — the actual topographic map of the county where grandparents lived, the city map of the town where parents grew up, the neighborhood map from the city where you met your partner — at meaningful scale (16x20 to 24x36). The personal geographic connection transforms a map from interesting to deeply meaningful.
1890 county map in thin wood frame — primary-source information creating conversation no decorative map print can. See also: gallery-wall-ideas
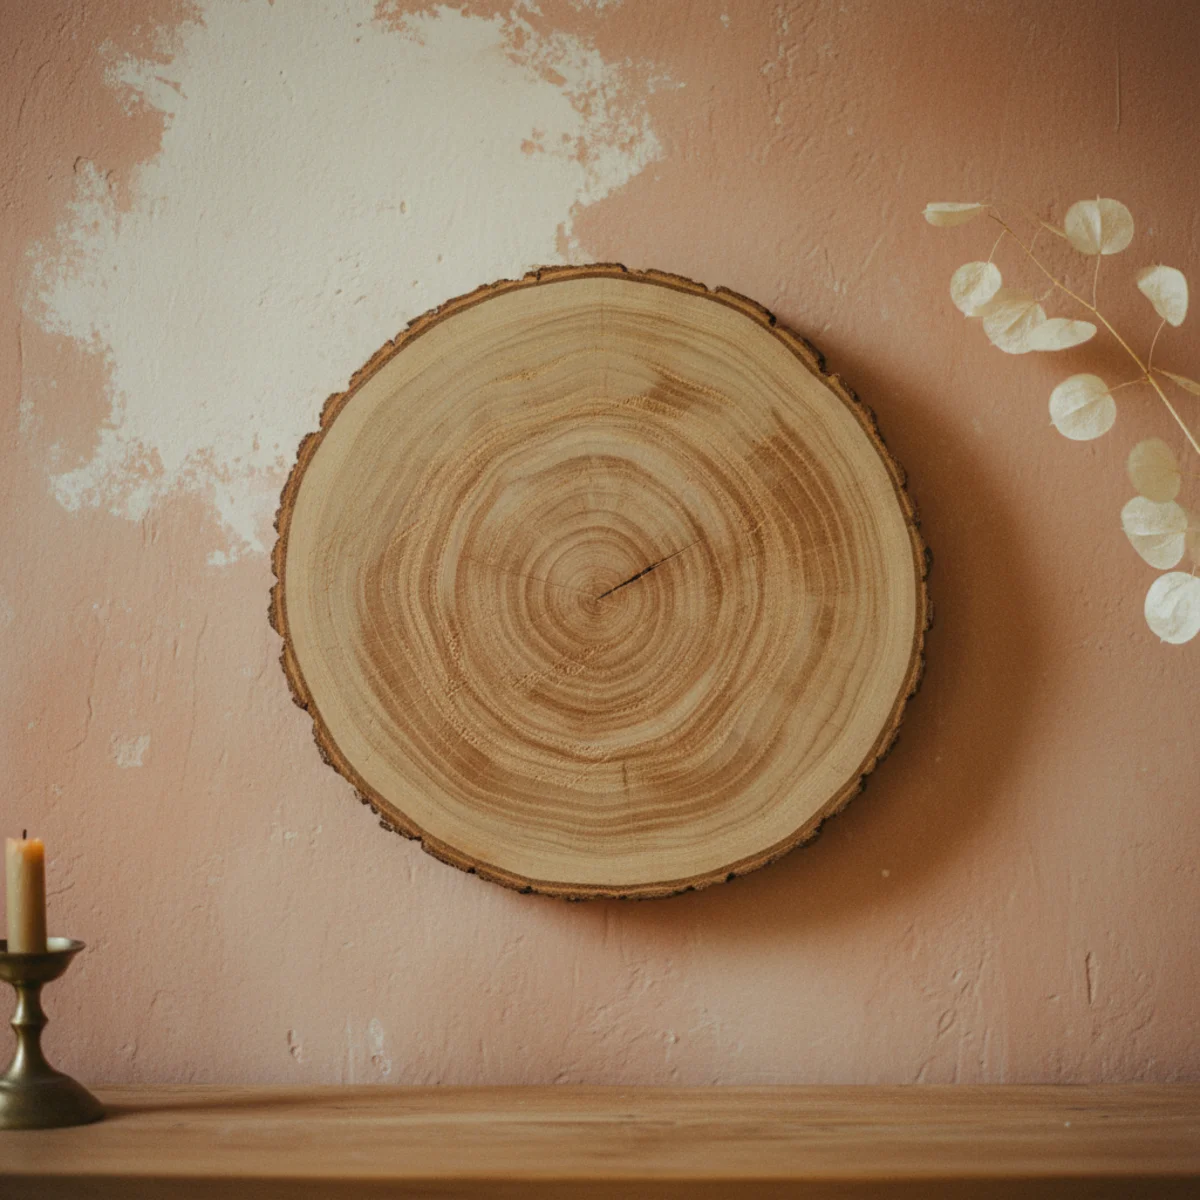
11Wood-Slice or Branch Art
Sliced cross-sections of wood rounds (from a tree branch, log, or fallen tree) finished naturally and hung as wall art add organic texture and natural material dimension to farmhouse walls. Cost: $0 if sourcing from your own yard, $5-30 per slice. Can be used alone, in groupings, or combined with other wall art elements.
Wood slice wall art process: SOURCING WOOD SLICES — fallen branches from yard (2-6 inch diameter at $0), cut sections from firewood pile ($0 if you have one), purchase from Etsy or craft stores ($2-10 per slice, $15-40 per set of 5-10), from lumber yards that have log-end rounds ($5-20 for larger pieces). DRYING — fresh-cut wood must dry before finishing. Lay flat for 2-4 weeks minimum (longer for larger slices, up to 3-6 months for slices over 4 inches diameter). FINISHING — light sand with 120-grit to smooth cut face and edges. Apply Danish oil or clear matte varnish for protection and to enhance natural color. Let dry 24-48 hours. OPTIONAL ADDITIONS — pressed botanicals or small illustrations glued onto the wood face, wood-burned design or date or initials, natural preserved moss attached to the surface, small hook screwed into face for hanging a small object. MOUNTING — drill a single hole near the top edge, thread jute twine through, tie for hanging. Or mount D-ring hardware to the back. ARRANGEMENTS — single large slice (8-12 inch diameter) as standalone statement, grouping of 5-9 varied sizes arranged as organic cluster on the wall, mixed with framed pieces in a larger gallery wall.
AFFILIATE SLOTPROJECTCross-section slices of branch or log (2-12 inch diameter) finished with Danish oil, hung in grouping of 5-9 or as single statementAdd affiliate URL when configuredWhy it works
Because actual wood cross-sections reveal the tree's actual growth rings, actual texture, actual color variation from heartwood to sapwood — all of which are inherently interesting and natural. Each slice is completely unique (no two trees have the same ring pattern); no reproduction can replicate the specific individual tree section. The tactile dimension is also significant — wood slices have three-dimensional surface texture (raised grain, visible rings) that flat art cannot provide. They're also the most-directly 'brought in from nature' of any wall art category, which reinforces the farmhouse connection-to-natural-world premise.
Pro tip — Source wood slices from a specific meaningful tree when possible — a branch from the family property, a section from a tree that came down in a significant storm, a slice from the first tree your children climbed. The specific provenance transforms a decorative natural object into a meaningful one.
Seven wood slice cross-sections with visible growth rings — unique natural objects no reproduction can replicate. See also: diy-home-decor-ideas
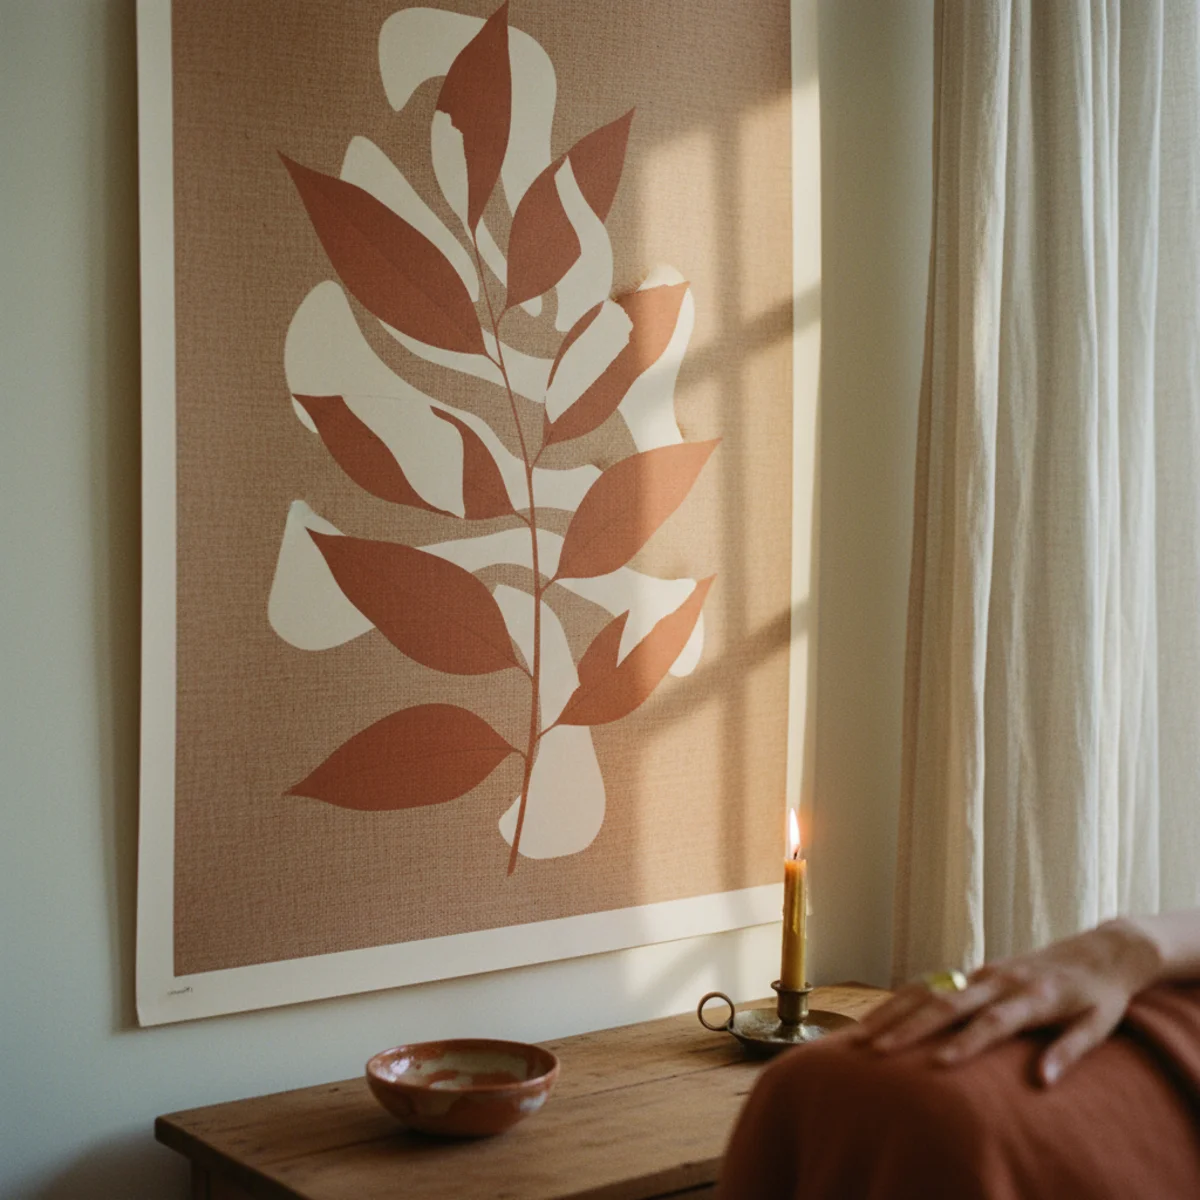
12A Single Oversized Piece
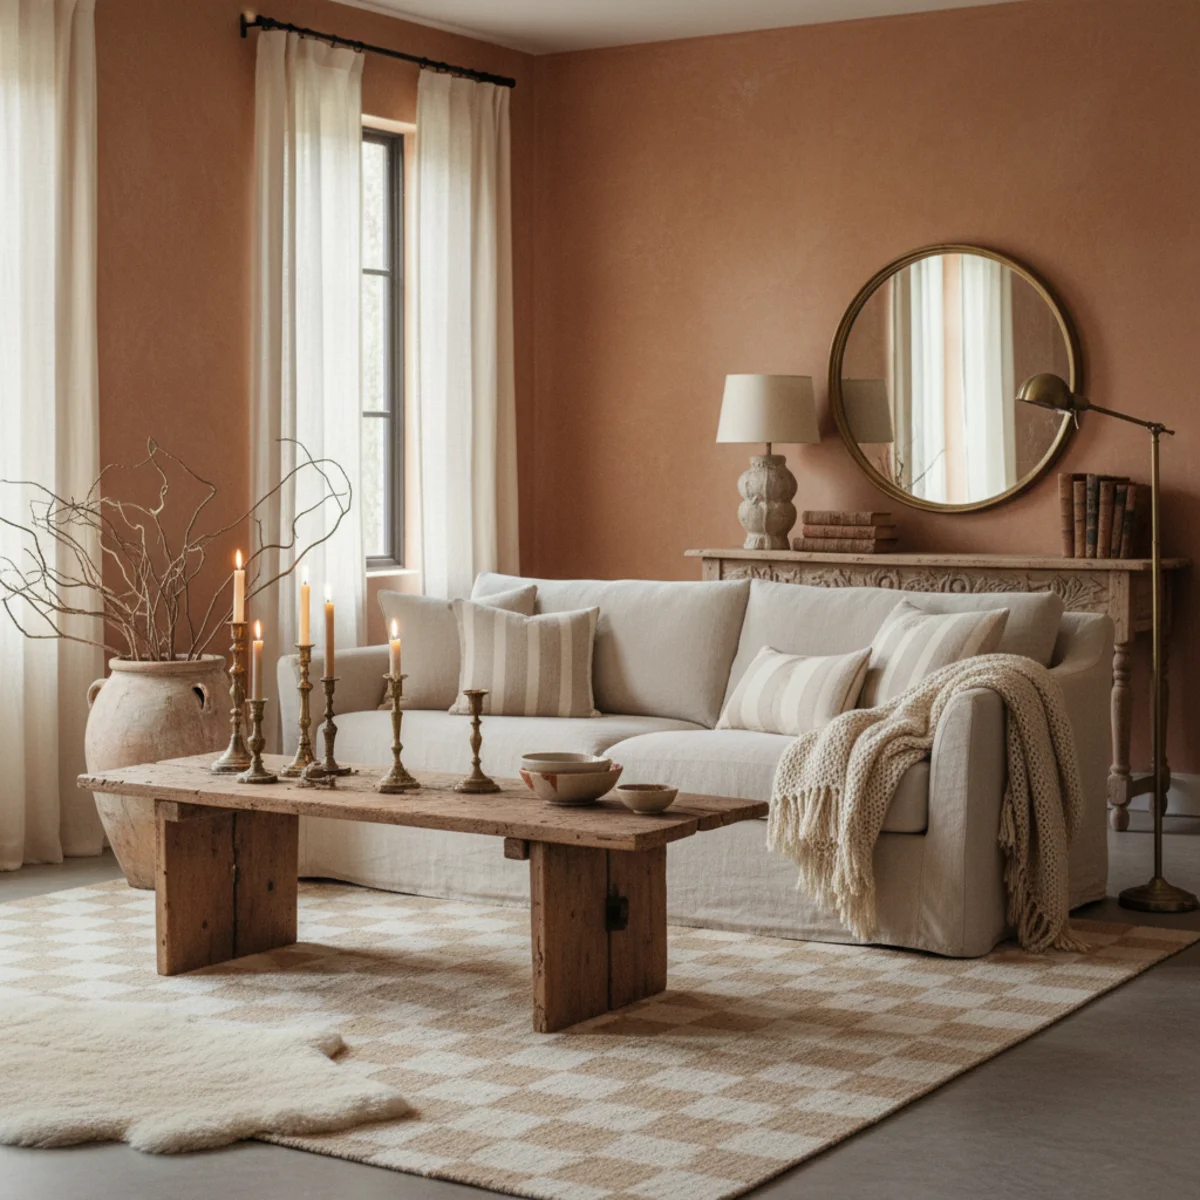
One large piece of art (30 to 60 inches in a major dimension) hung or leaned alone on a primary wall makes more visual impact than 8 to 10 smaller pieces in the same space. The oversized single piece requires the confidence to leave surrounding wall space intentionally empty — and rewards that confidence with clarity of focus and dramatic visual presence.
Oversized single piece options: LARGE VINTAGE OIL PAINTING — look for unsigned or amateur oils at estate sales (30x40 to 40x50 inches) in warm tonal palette at $30-200. These are often the best-priced large pieces available. LARGE ARCHITECTURAL SALVAGE PANEL — decorative carved panel, antique door section, or architectural fragment at $40-200 from salvage yards or Marketplace. LARGE VINTAGE MAP OR BOTANICAL PRINT — printed at large-format copy shop at 24x36 or 30x40 inches from public domain source at $15-30, framed simply. LARGE TEXTILE PIECE — vintage grain sack at full size (typically 24x40 to 30x48 inches) in shadow box or mounted on artist canvas. LARGE MIRROR with vintage frame — gilded or wood frame at 36 to 60 inches in a dimension, leaned against wall or hung ($60-300 vintage from estate sales). DIY PAINTED CANVAS — 30x40 or larger artist canvas ($20-50) painted with simple abstract or botanical in warm earth tones (no painting experience required for abstract wash in 2-3 earth tone colors). MOUNTING GUIDANCE — for very large pieces over 20 lbs, use two-point hanging into studs. Always test stud location before driving nails for large art. Professional art installation services ($50-150) worth it for pieces over $200 or over 50 lbs.
AFFILIATE SLOTPROJECTSingle piece 30-60 inches in a major dimension: vintage oil, architectural salvage, large botanical print, textile, painted canvas, or mirrorAdd affiliate URL when configuredWhy it works
Because scale creates visual authority — a 40-inch piece commands the eye's attention in a way that a 5x7 grouping cannot even at equivalent total coverage area. The eye processes single large pieces as statements while processing many small pieces as accumulation. The surrounding empty wall space also works differently for large single pieces: the emptiness becomes intentional negative space (Japanese-style composition) rather than unfilled area. One well-chosen large piece with confident empty surroundings consistently reads more sophisticated than clustered smaller pieces that fill the same total area.
Pro tip — Try the leaning option before committing to hanging for large pieces — lean the frame or artwork against the wall at the intended position for several days before deciding to hang permanently. The leaning period reveals whether the scale, placement, and visual balance work in the actual room before driving hardware. Large art leaned against a wall is also a valid permanent display option for certain pieces.
Single 36×48 inch vintage oil leaned with confident surrounding emptiness — scale and negative space producing visual authority. See also: fireplace-mantel-decor

How to make pressed-botanical wall art step by step
The most reliable farmhouse-art project there is. Four steps, two weeks of waiting.
- 1Gather and press the botanicals
Pick flat ferns, leaves, or flowers, lay them between parchment inside a heavy book, and weight it down. Wait two full weeks.
- 2Source thrifted frames
Find glass frames at the thrift store — mismatched is fine if the tones relate. Clean the glass thoroughly.
- 3Float the botanical
Center the pressed plant on a neutral backing or between two panes of glass so it appears to float, and close the frame.
- 4Arrange and hang or lean
Lay the finished pieces on the floor to plan the grouping, then hang into studs or lean on a ledge to avoid extra holes.
Quick tips
- Press botanicals for a full two weeks under real weight; rushing it ruins the color and shape.
- Lay any gallery arrangement on the floor before putting a single hole in the wall.
- Use a wide mat to make a small or humble piece look gallery-grade.
- Wire-brush and oil reclaimed wood to raise the grain and deepen the tone.
- Mount textiles on a backing board so they stay flat behind glass.
- Lean art on a ledge instead of hanging when you want to rotate the display.
Farmhouse wall art by room
One oversized piece — a large framed textile or a single botanical — scaled to the sofa below.
A calm pair of pressed botanicals or a soft fiber hanging above the bed, low and tonal.
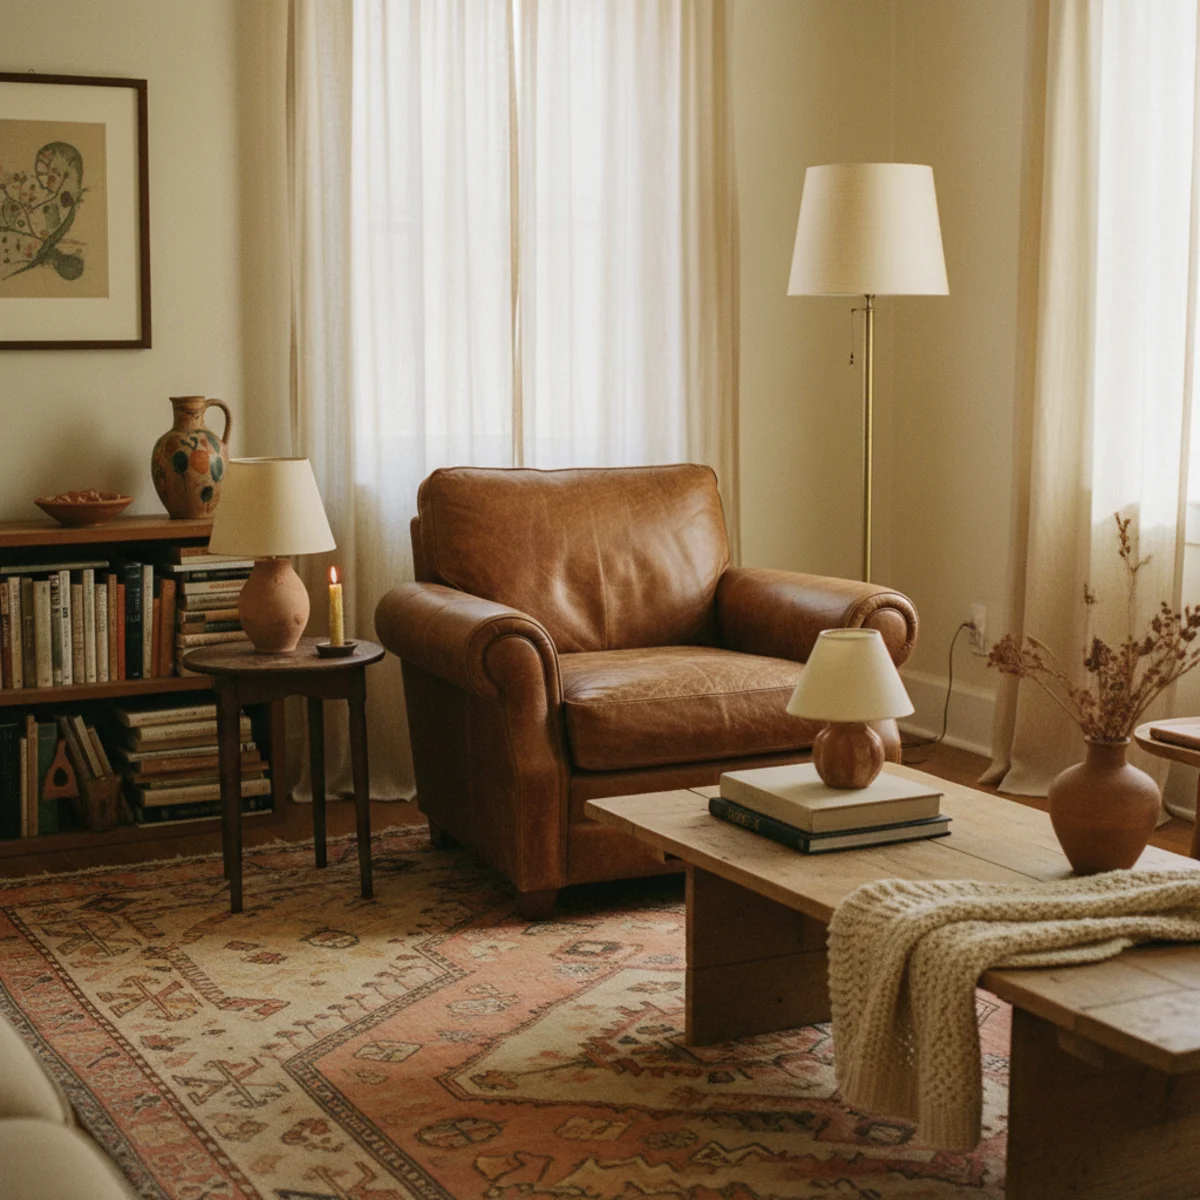
A small framed botanical set or a reclaimed-wood ledge with rotating pieces and herbs.
A thrifted-frame gallery wall or a framed vintage map to greet you at the door.
A pressed leaf in a thrifted frame is the warmest five dollars you'll ever spend on a wall.
Frequently asked questions
How do I make DIY farmhouse wall art?+
How do I press flowers for wall art?+
Where do I find cheap frames for farmhouse wall art?+
What's the easiest DIY farmhouse wall art project for a beginner?+
How do I arrange farmhouse wall art?+
Can I find vintage art for farmhouse walls at estate sales?+
Fill a wall with made and found pieces rather than mass-printed ones — they always read warmer. Start with pressed botanicals in thrifted frames; it's the cheapest project here and the one guests always ask about. We'd press the leaves for the full two weeks even though it tests your patience, because that's the difference between art that looks handmade and art that looks warped. A few dollars, a fortnight, and a bare wall becomes the most personal thing in the room.