These twelve coffee bar cabinet principles apply across cabinet types — converted vintage hutches, repurposed sideboards, dedicated coffee armoires, kitchen cabinets with opened front section, and purpose-built beverage stations. Each principle names specific construction and installation details (power strip mounting, tile or limewash backing, pull-out shelf installation), specific sourcing (vintage hutch from estate sales, tile from specialty retailers), and the styling discipline (working-parts-as-decor, minimal decorative additions) that distinguishes a genuine coffee cabinet from a styled display.
The coffee bar cabinet differs from the open-credenza coffee bar (per diy-coffee-bar) in one critical way: it closes. The closed door hides the equipment during non-use hours, making the kitchen or dining room more visually restful. The open door reveals the complete atmospheric coffee setup, including the internal lighting that transforms the interior into a warm illuminated stage. The cabinet is the theatrical version of the coffee bar; the opening is the performance.
By the end of this guide, you'll know exactly how to build a complete coffee bar cabinet — sourcing and repurposing the vintage hutch, mounting the interior power strip, hanging mugs and styling the shelf, adding a small interior lamp, installing an appliance garage door if needed, lining the back with tile or limewash, building a pull-out shelf, organizing closed storage below, styling for the open reveal, matching the cabinet to the kitchen, adding a waste drawer for espresso grounds, and lighting on a door switch for automatic atmospheric reveal.
WHAT'S INSIDE
- Why a vintage hutch from an estate sale outperforms any new coffee cabinet for warmth
- The interior power strip that organizes all cables inside the cabinet
- The door-triggered light switch — the single most-atmospheric feature of a coffee bar cabinet
- Lining the cabinet back with tile or limewash — the backdrop that makes the open reveal look custom
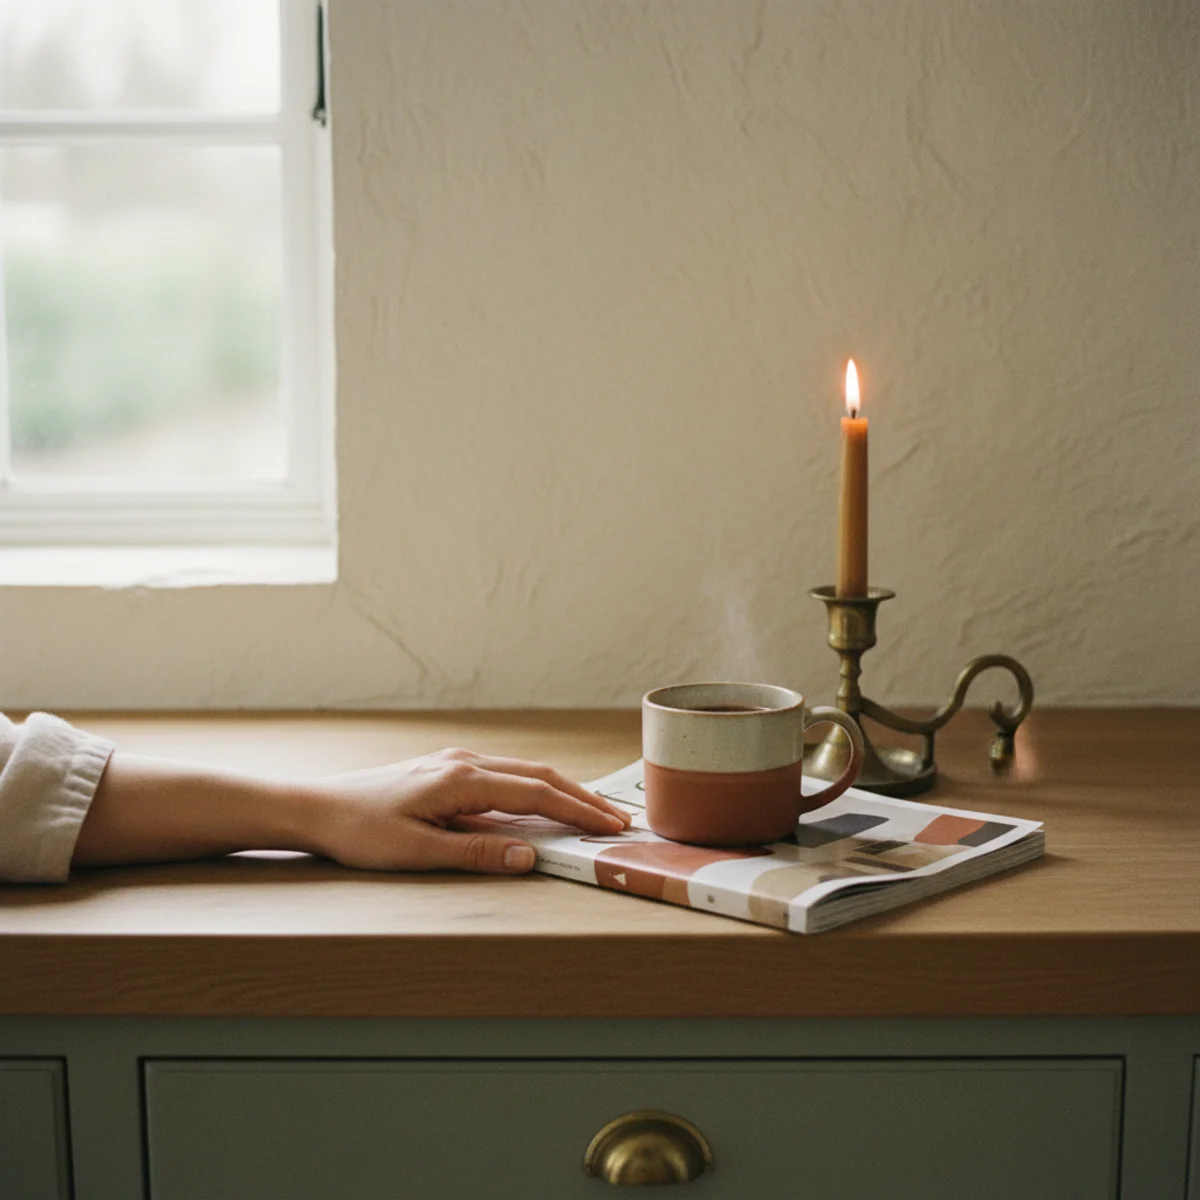
The best entertaining setups hide the work and show the welcome. A guest should see the ritual, not the mess.
— Domino entertaining feature [citation needed — verify before publish]
What is a coffee bar cabinet?
A coffee bar cabinet is an enclosed coffee station — a hutch, armoire, built-in, or upper-and-lower cabinet run — with doors that close to hide the machines, mugs, and clutter between uses. It's the version of a coffee bar built for homes that want the counter calm and the gear concealed until it's wanted.
What makes it work for entertaining is the reveal: closed, it reads as a piece of furniture; open, it's a styled station with mugs on hooks, beans in jars, and a warm light inside. The functional upgrade nobody mentions is power — a strip mounted inside means the grinder and kettle stay plugged in and ready behind closed doors.
More in Entertaining you may love
See allWhy coffee bar cabinets are everywhere in 2026
As open shelving fatigue set in, the hidden coffee bar rose to answer it — people wanted the ritual without the permanent visual clutter of machines on the counter. "Coffee bar cabinet" is one of the fastest-climbing home searches, often paired with "hidden" and "appliance garage."
It also suits how people actually entertain now: casual, kitchen-centered, coffee-and-dessert rather than formal. A cabinet that closes on weekday mess and opens into a welcoming station for guests fits that rhythm exactly. And it scales — from a thrifted hutch conversion to a custom built-in — so it works at any budget.
12 coffee bar cabinet ideas
01Repurpose a Vintage Hutch
The coffee bar cabinet builds most successfully from a vintage hutch — a piece with glass-front upper cabinets (or open upper shelving) and closed lower cabinets. The upper section becomes the displayed coffee area; the lower section hides supplies. Estate sales and Marketplace yield vintage hutches at $150-400 that outperform new alternatives at $800-2,000 in both character and construction quality.
Vintage hutch sourcing for coffee cabinet: HUTCH DIMENSIONS — ideally 36-48 inches wide, 72-82 inches tall (with upper and lower sections), 14-18 inches deep (deep enough for espresso machine). The hutch should be deep enough to accommodate the coffee maker on the upper section interior while leaving 6-8 inches of headroom inside the cabinet. HUTCH TYPES — glass-front china hutch (upper glass doors reveal interior, lower solid doors hide below), open-shelving hutch (upper shelves without doors, lower with doors), armoire-style (full doors on both sections). CONSTRUCTION QUALITY — check for: solid wood or wood-veneer-over-plywood (not MDF or particleboard), sturdy doors that close evenly, interior dimensions that accommodate the coffee maker. MODIFICATION NEEDS — most hutches require: removal of glass-front upper doors (or keeping them open permanently), addition of interior electrical, possible back panel replacement (per item 6), and hardware upgrade (per diy-coffee-bar aged-brass hardware). SOURCING — estate sales ($150-400 for quality vintage hutches), Marketplace ($120-350), Craigslist ($100-300), antique stores ($250-800), consignment shops ($200-500). The mid-century walnut china hutch is the sweet spot: excellent construction quality, elegant proportions, frequently available at estate sales at $150-300.
AFFILIATE SLOTBUILDVintage glass-front china hutch or armoire at 36-48 inches wide, $150-400 from estate sales or Marketplace; mid-century walnut at $150-300 is the sweet spotAdd affiliate URL when configuredWhy it works
Because vintage hutches were built with solid wood joinery, period-appropriate proportions, and original hardware that new mass-market coffee stations and beverage centers cannot match at equivalent price points. The same $250 investment that buys a quality vintage walnut china hutch at a Saturday estate sale would buy a mediocre flat-pack coffee station from a home goods retailer. The vintage piece has actual aged wood grain, dovetail drawer construction, and the specific settled-in character that new furniture requires decades to develop.
Pro tip — Remove the upper glass doors of a vintage china hutch rather than keeping them — the glass doors often make the upper section feel enclosed and dim; removing them converts the upper section to open-display styling that reads more like a coffee bar and less like a china cabinet. Store the glass doors in case you ever want to reinstall.
Vintage mid-century walnut hutch with upper doors removed — solid wood construction for $150-300 that new alternatives at $800+ cannot match. See also: diy-coffee-bar
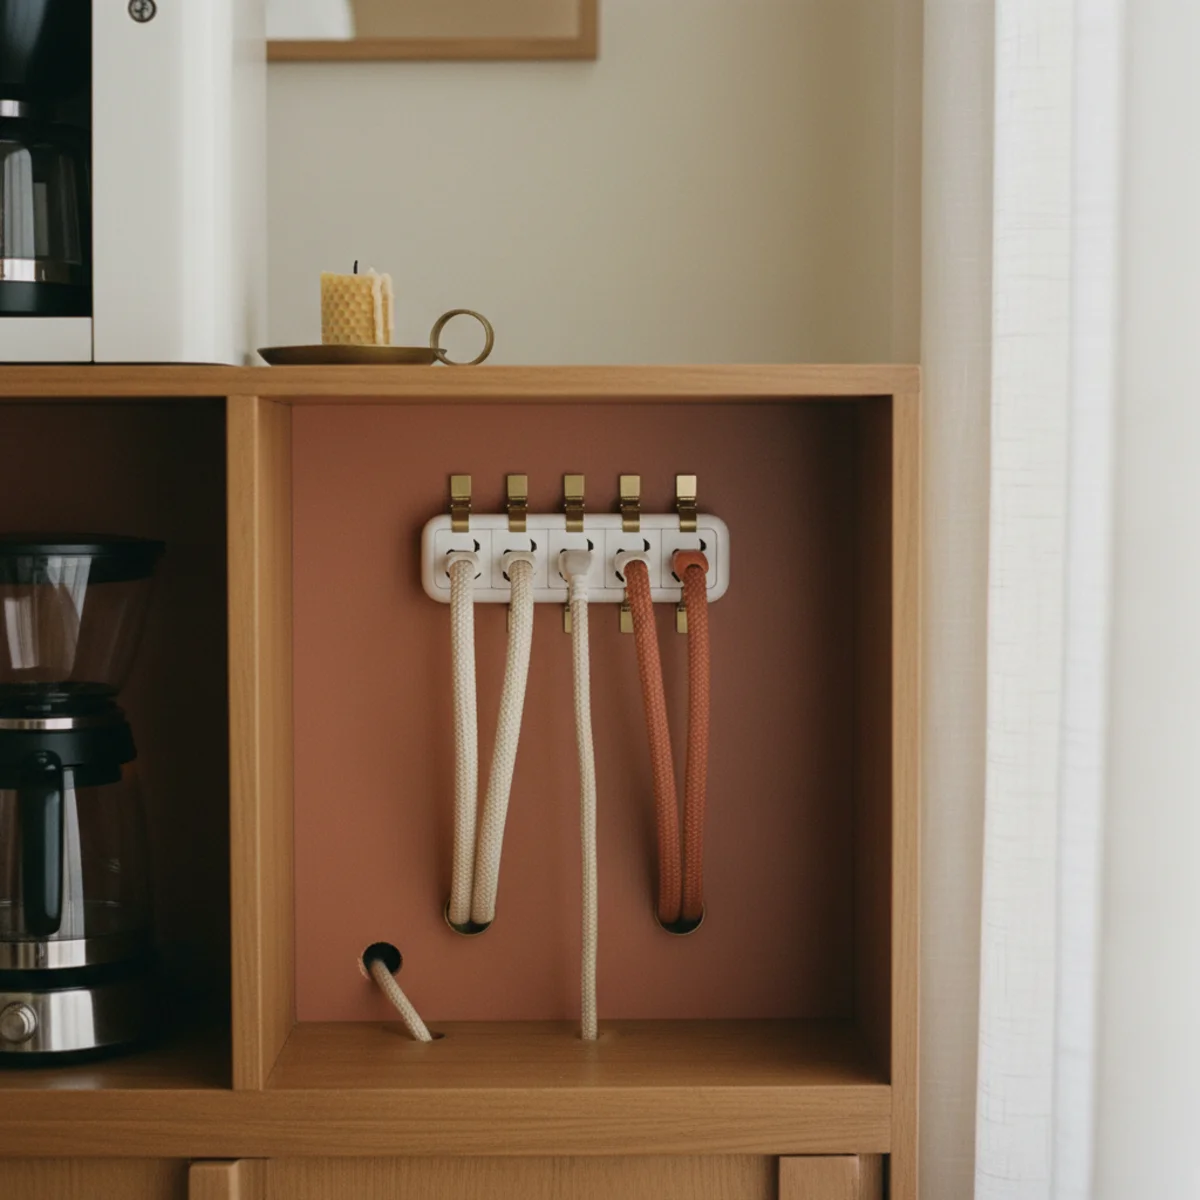
02Mount a Power Strip Inside
The interior power strip mounted on the back wall of the coffee cabinet interior is the most-critical functional step — it powers the coffee maker, grinder, and lamp from inside the cabinet with only one cord exiting to the wall outlet. All appliance cords stay inside the cabinet; the exterior reads as cord-free. Cost: $15-25 for the power strip.
Interior power strip installation: POWER STRIP SELECTION — 6-outlet surge-protected strip with side-exit plug (flat plug that exits from the side rather than straight back, sits flush against cabinet back wall). $15-25. MOUNTING POSITION — on the back wall of the upper cabinet section, positioned toward one side, approximately 8-10 inches above the cabinet floor. Accessible from above (to plug and unplug appliances) but not prominently visible from the front. MOUNTING METHOD — 3M Command heavy-duty strips (temporary, no-damage) OR screws through power strip mounting holes into the back panel. CABLE MANAGEMENT — all appliance cords route from the appliance, down behind the appliance to the power strip, and stay inside the cabinet. Use small self-adhesive cable clips ($5-10 for pack of 20) to route cords neatly along the back edges and sides of the cabinet interior. EXIT CORD — only the power strip's single cord exits through a hole drilled at the back-bottom of the cabinet (preferably behind furniture or baseboard, or through the bottom of the cabinet into the cabinet below). The exit hole should be just large enough for the cord plug (typically 1-inch diameter hole, $5-10 drill bit). TOTAL EFFECT — from the front of the open coffee cabinet, no cords are visible; from the side or back, the single organized cable exits cleanly.
AFFILIATE SLOTBUILD6-outlet surge-protected power strip with side-exit plug mounted on cabinet back wall; all appliance cords inside; single cord exits at cabinet back-bottomAdd affiliate URL when configuredWhy it works
Because cord visibility is the single most-common visual failure of home coffee setups — the tangle of appliance cords running from machines to wall outlets is what makes most home coffee stations read as 'appliances on a counter' rather than as 'designed coffee station.' The interior power strip eliminates this by making all cord management invisible inside the cabinet. The visual transformation from cord-visible to cord-hidden accomplishes 60% of the coffee cabinet's aesthetic upgrade at $20 cost.
Pro tip — Use a whole-house surge protector at the breaker level as an additional protection layer when mounting an ungrounded power strip inside a wood cabinet — the surge protector at the breaker protects all connected devices from voltage spikes, which is especially important when all coffee appliances are connected to one interior circuit inside a wooden enclosure.
Power strip on back wall, all cords inside — the $20 installation that eliminates visible cord tangle from the coffee setup. See also: cozy-coffee-corner
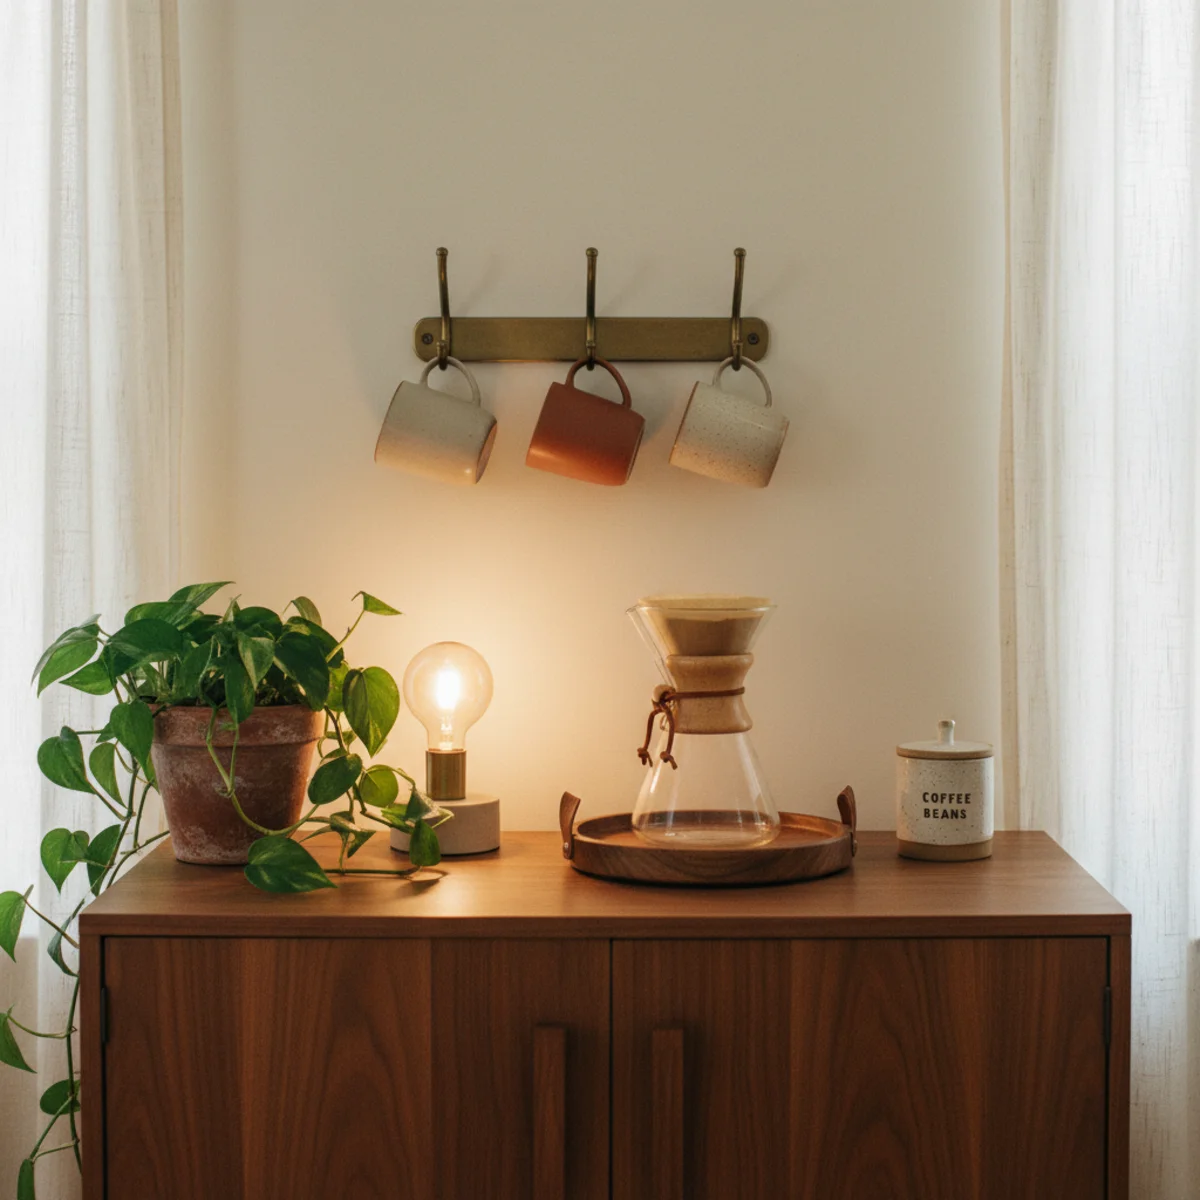
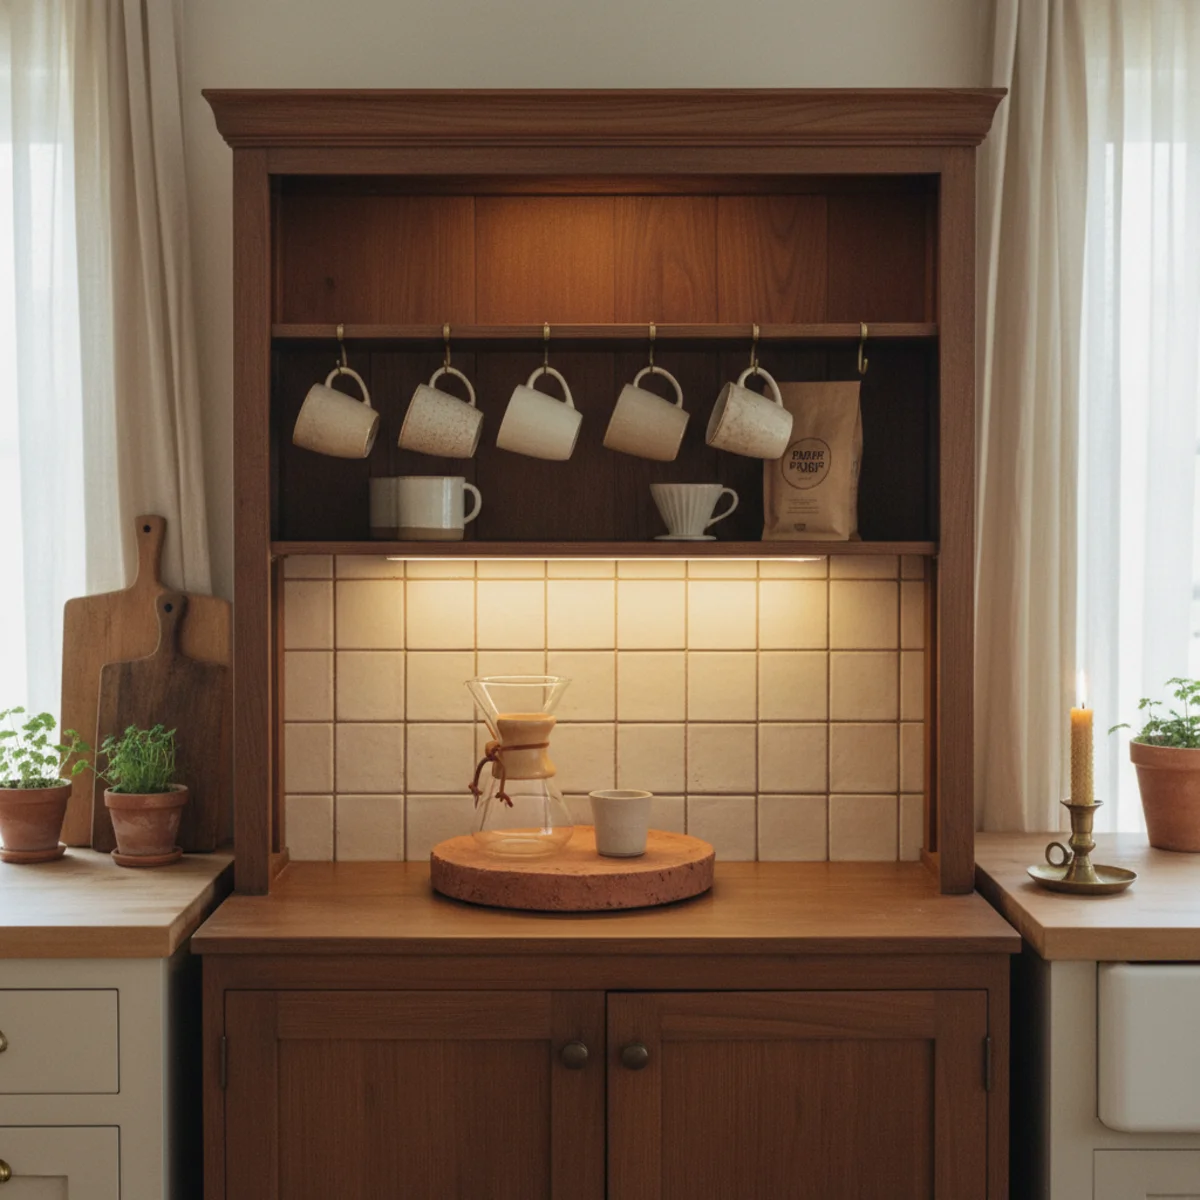
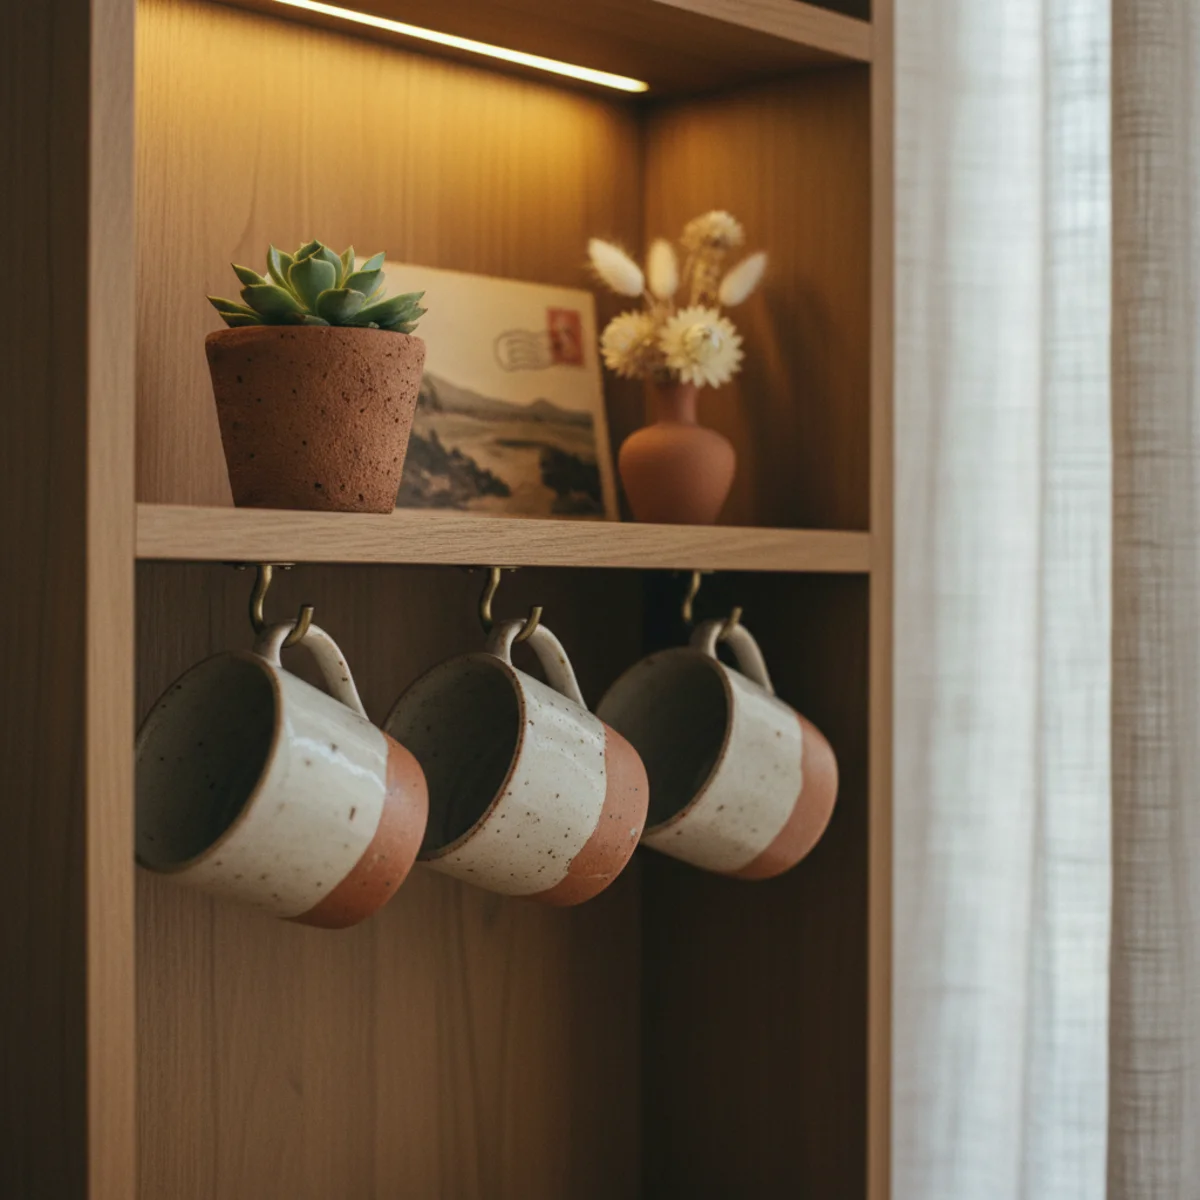
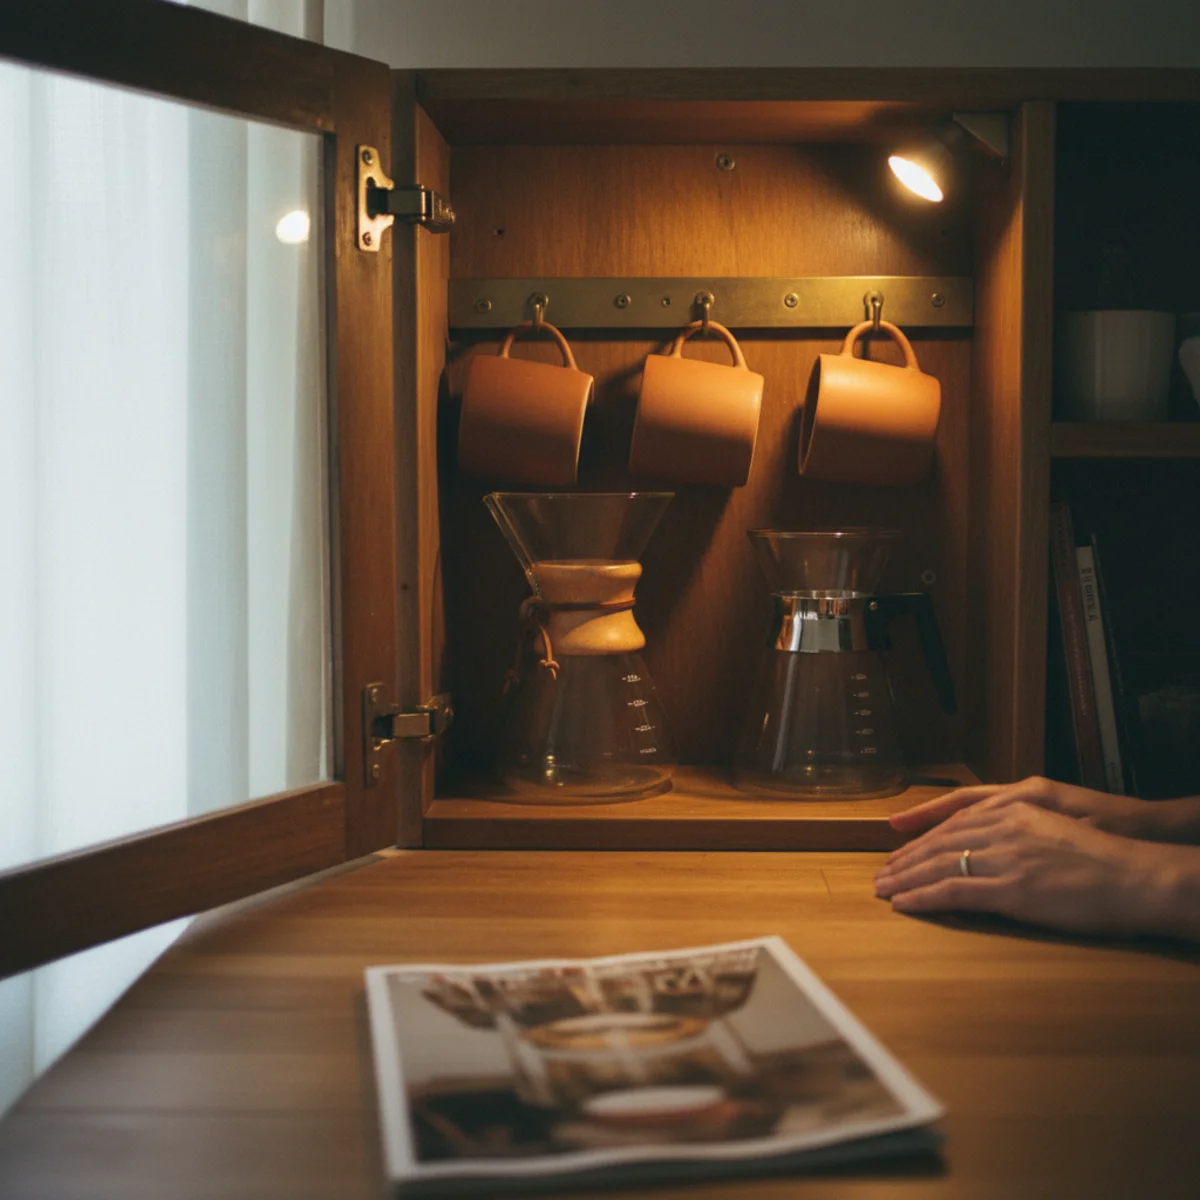
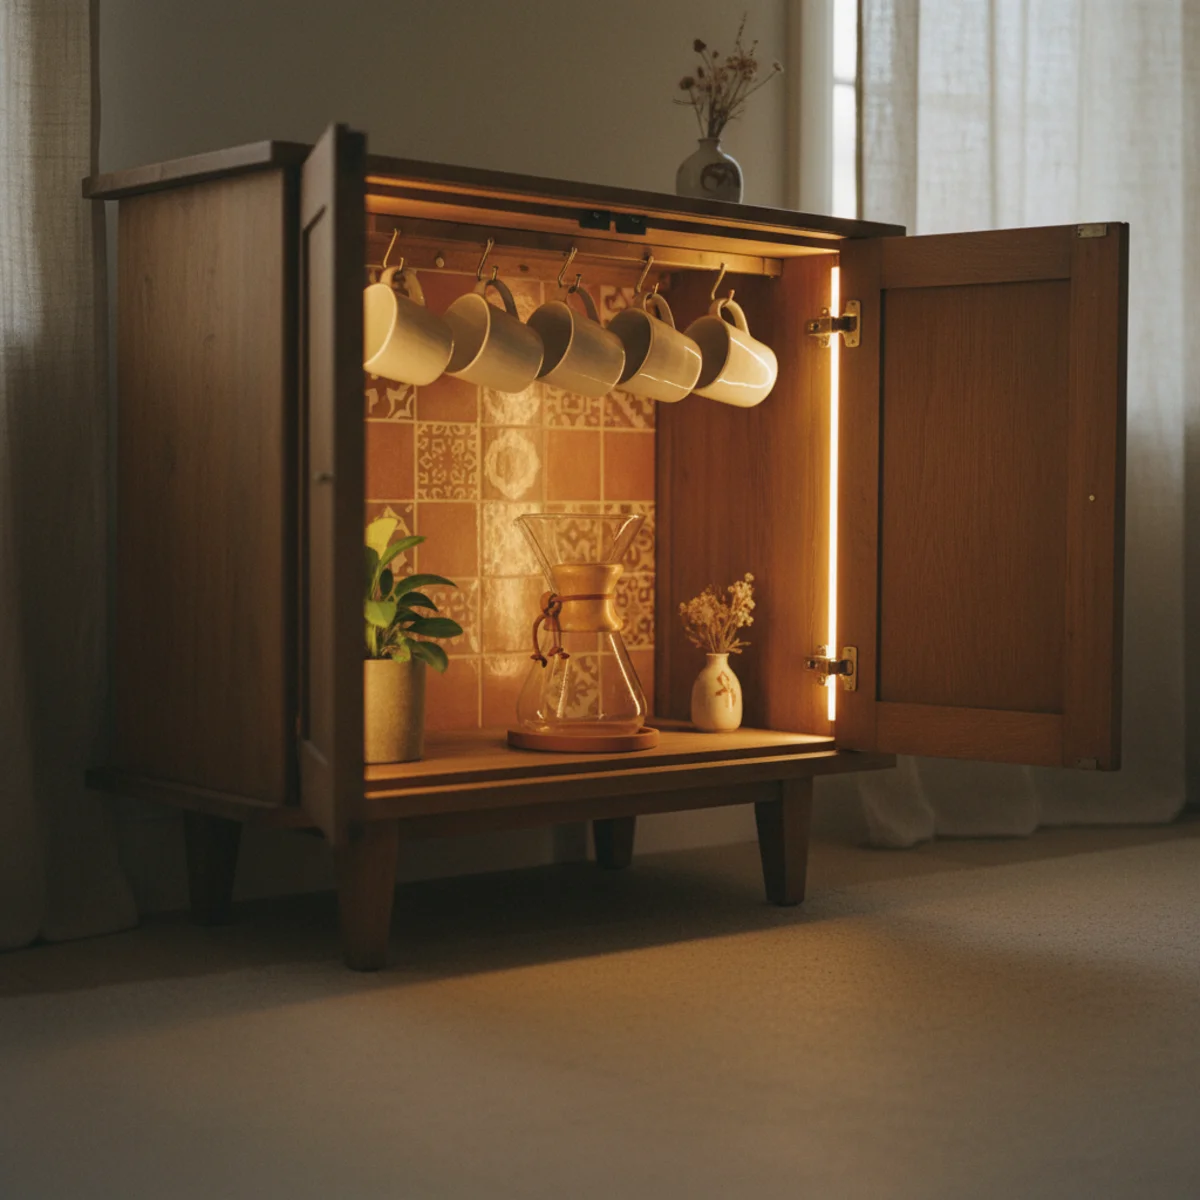
03Hang Mugs and Style the Shelf
Inside the coffee cabinet's upper section, 4-6 mug hooks on the underside of the top shelf or on the back wall provide the hung-mug display that open coffee bars also feature. Styling the one or two interior shelves (if the hutch has interior shelves in the upper section) with small ceramics, a small plant, and leaned small print completes the interior display.
Interior mug hanging and shelf styling: MUG HOOKS — 4-6 small brass cup hooks ($1-3 each) screwed into the underside of the top shelf or into the back panel of the cabinet upper section. HOOK SPACING — 4-5 inches between hooks. Height position — 3-4 inches from the shelf underside so mugs hang freely without catching the shelf above. INTERIOR SHELVES (if present) — 1-2 shelves within the upper cabinet section. Styling: one small hand-thrown ceramic plant on the highest shelf (small succulent, small cactus — chosen for low-care since the cabinet interior has variable light), small leaned print or postcard (4x5 inches, leaned against back panel behind the shelf items). SMALL CERAMIC VESSELS — one or two hand-thrown ceramic containers for spoons or sugar beside the coffee maker. BEAN CANISTER — ceramic or glass airtight canister for whole beans (per diy-coffee-bar item 8) positioned beside or behind the coffee maker. VISUAL PRINCIPLE — the interior styling follows the same principle as open coffee bars: working parts as primary decor, small ceramic and plant as character additions. The cabinet reveals this internal composition when the door opens.
AFFILIATE SLOTSTYLING4-6 brass cup hooks on shelf underside; interior shelf with small plant + leaned postcard + ceramic vessel; working coffee parts as primary interior displayAdd affiliate URL when configuredWhy it works
Because the coffee cabinet's entire appeal is the reveal — the closed door hiding the setup, the opened door presenting the complete atmospheric coffee station. If the interior is cluttered, disorganized, or visually unappealing, the reveal disappoints. If the interior is styled with the same care as an open coffee bar (mugs hung, small plant, leaned print, working parts arranged with composition discipline), the reveal is genuinely atmospheric. The door-opening moment is the coffee cabinet's primary experience; the interior styling is what makes that moment work.
Pro tip — Choose mugs for the coffee cabinet hanging specifically for their visual character when hung — elongated mugs (taller than they are wide) hang more gracefully than wide-mouth mugs. Hand-thrown ceramics with interesting glazes read better from the viewer's front-on perspective than matched commercial mugs. Mix 2-3 hand-thrown from Etsy artisans with 2-3 interesting vintage mugs.
Hung mugs, small shelf plant, leaned print, Chemex below — the interior reveal that justifies the cabinet's existence. See also: cozy-coffee-corner
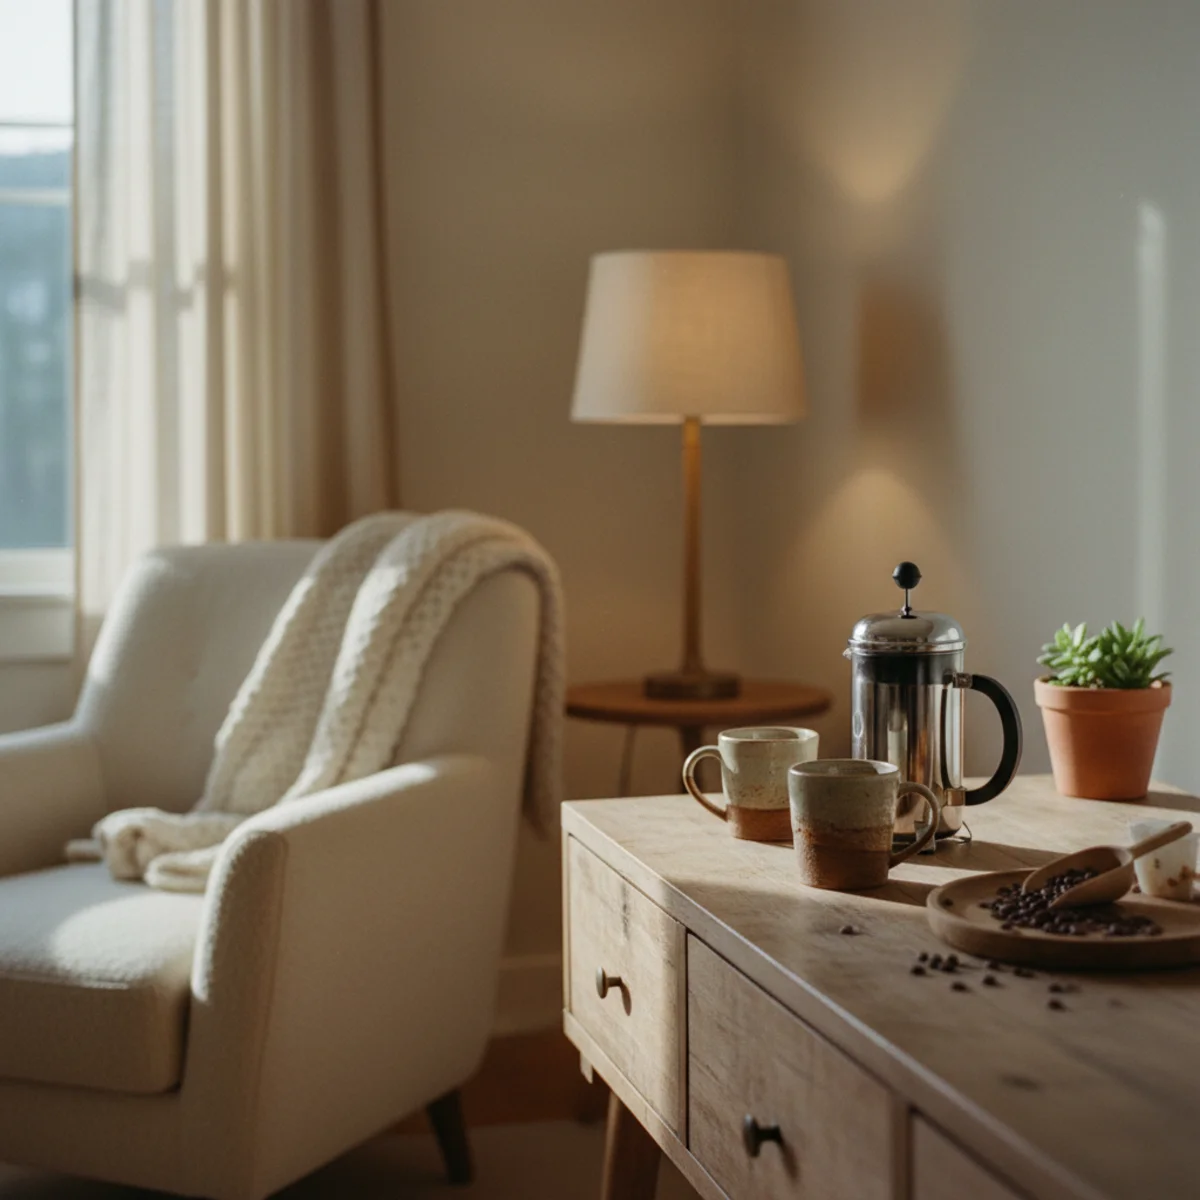
04Add a Small Lamp Inside
A small lamp inside the coffee cabinet — either a compact warm-LED puck light mounted inside, a small clip-on LED lamp attached to the interior shelf, or a miniature table lamp if space allows — transforms the open cabinet from a lighted-by-room-light display to a warm-illuminated stage. The interior warm light is what makes the coffee cabinet's reveal specifically atmospheric. Cost: $15-50.
Interior cabinet lamp options: LED PUCK LIGHTS — battery-operated adhesive LED puck lights (warm 2700K) mounted inside the cabinet's upper section. 2-4 pucks in the corners or along the back panel. $15-30 for a set of 4. No wiring required. Battery life: 3-6 months with regular daily use. RECHARGEABLE LED PUCK LIGHTS — USB-rechargeable warm puck lights ($20-40 for set of 3). Longer life and no battery replacement. SMALL CLIP-ON LED LAMP — compact LED clip lamp attached to the interior shelf underside, providing directional warm light on the lower coffee-maker area. $15-30 from Amazon. SMALL HARD-WIRED UNDER-CABINET LIGHT — if comfortable with simple wiring, a small warm LED strip ($15-25) connected to the interior power strip via inline dimmer provides always-warm interior illumination. POSITIONING — light should illuminate the interior from inside-out (light visible from outside when cabinet is open) rather than providing overhead task lighting (which is rarely needed inside the cabinet). The warm glow emanating from the interior when the door opens is the atmospheric effect.
AFFILIATE SLOTLIGHTINGBattery LED puck lights ($15-30 for 4) or USB-rechargeable LED pucks ($20-40 for 3) mounted inside cabinet upper section; 2700K warm; glows when door opensAdd affiliate URL when configuredWhy it works
Because interior lighting makes the cabinet into a warm glowing stage rather than a piece of furniture with the door open. The same interior seen under room-spill lighting and under warm-2700K interior lighting registers completely differently — with interior lighting, the mugs, the small plant, the Chemex, and the hanging brass hooks all glow warmly as a composed tableau. Without interior lighting, the cabinet interior reads as a shelf inside furniture. The lighting creates the 'reveal' experience that justifies the cabinet's existence as a distinct piece of furniture.
Pro tip — Connect the interior LED puck lights to the door switch (per item 12) rather than keeping them on battery-timer — the door-activated lighting (interior lights turn on automatically when door opens) is the most-atmospheric version and requires no manual intervention. The automation makes the reveal consistently atmospheric rather than dependent on remembering to turn on the interior lights.
Warm interior LED illuminating the cabinet stage — the lighting that transforms 'open door on furniture' to 'atmospheric reveal.' See also: best-lamps-warm-light
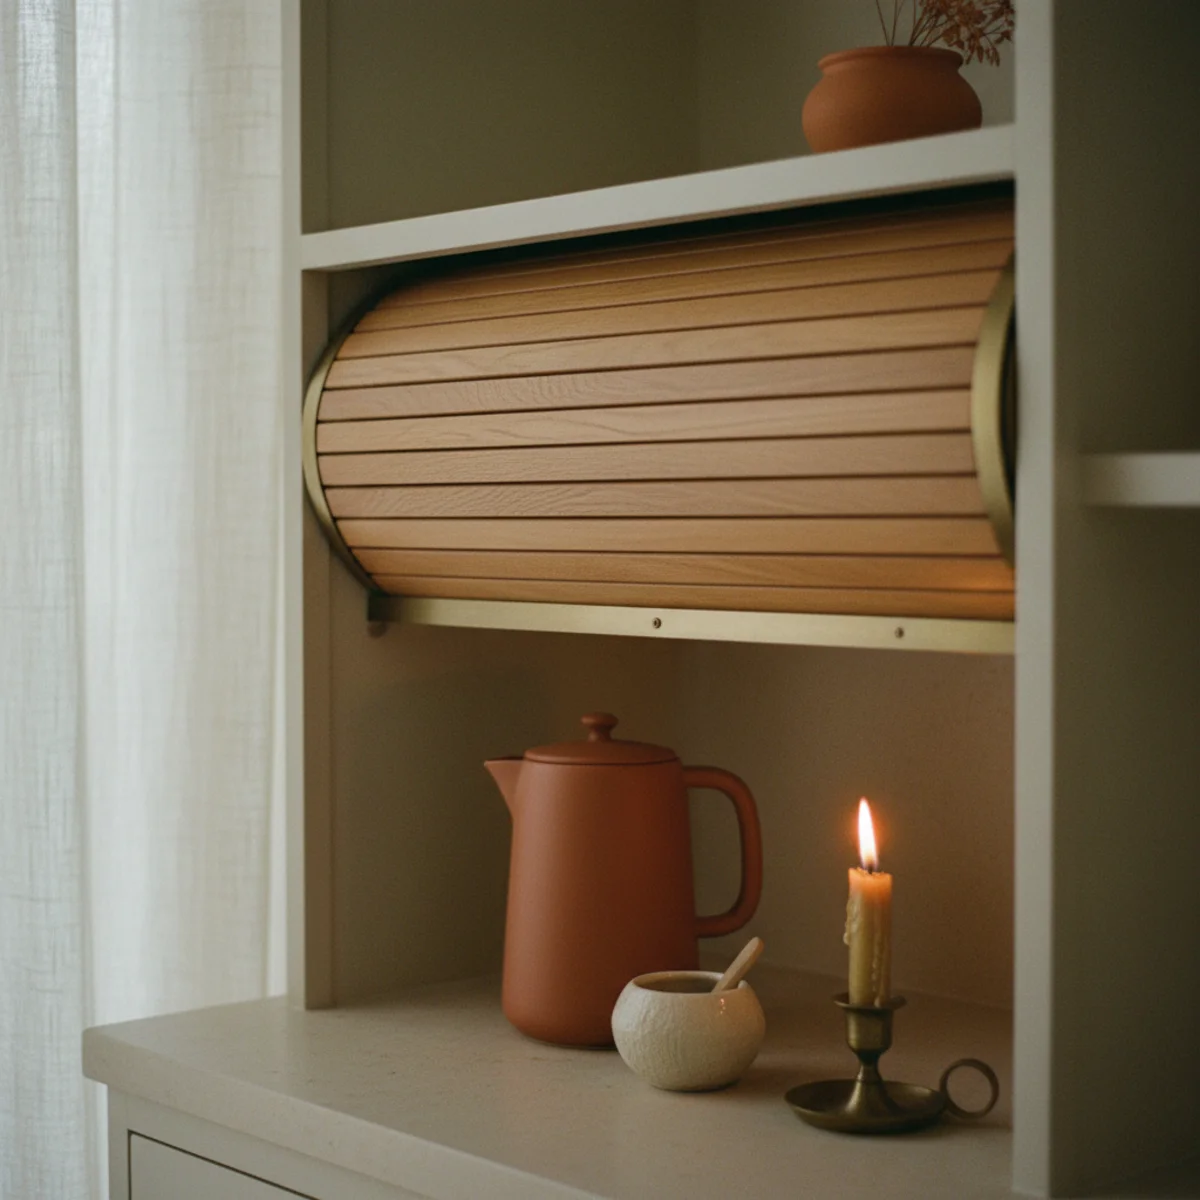
05Use an Appliance Garage Door
For coffee cabinets where the equipment needs to stay accessible without visually hiding behind a door (open layout homes, coffee areas that function as daily-use counter), an appliance garage door — a tambour roll-top door or lift-up door that conceals when open and reveals neatly when closed — provides the hide-and-reveal function without the full cabinet enclosure. Cost: $80-300 for the tambour door hardware.
Appliance garage door types: TAMBOUR ROLL-TOP DOOR — horizontal slats that roll up into the back of the cabinet when open, concealing completely when closed. Traditional appliance garage solution at $80-200 for hardware kit from Rockler or hardware specialty retailers. Requires a curved track inside the cabinet for the door to roll up into. LIFT-UP DOOR — single panel that lifts up and stores horizontally above the appliance area when open. Simpler construction than tambour, good for appliance areas under upper cabinets. $50-150 for hardware. POCKET DOOR — door that slides sideways into the cabinet side wall when open. $60-150 for pocket door hardware. FABRIC CURTAIN — simple fabric panel on a tension rod that draws sideways. Not a 'garage door' but the simplest hide-and-reveal for open shelving conversions. $20-40 for rod and fabric. DIY TAMBOUR — technically achievable for confident woodworkers using router jig for the curved track, but substantial woodworking skill required. Most households use purchased tambour kits.
AFFILIATE SLOTOPTIONTambour roll-top door ($80-200, Rockler hardware) OR lift-up door ($50-150) OR fabric curtain ($20-40) for open-layout coffee areas needing hide-and-reveal without full cabinetAdd affiliate URL when configuredWhy it works
Because they provide the visual-hide benefit of closed storage without requiring the user to fully open a door and store it out of the way. In tight kitchen and coffee areas where door clearance is limited, a tambour or lift-up door that tucks away completely lets the coffee area go from fully concealed to fully accessible with a single smooth motion. The same visual benefit of a closed door with significantly less spatial requirement for the door itself.
Pro tip — Measure the door-clearance carefully before purchasing any garage door hardware — tambour doors require the interior cabinet depth to accommodate the door-roll-up mechanism (typically 12-18 inches of back depth for the roll chamber). Lift-up doors require vertical clearance above the appliance area. Confirm your specific cabinet dimensions accommodate the chosen mechanism before purchasing hardware.
Tambour roll-top door open, coffee maker revealed — hide-and-reveal in one smooth motion without door clearance issues. See also: coffee-bar-ideas
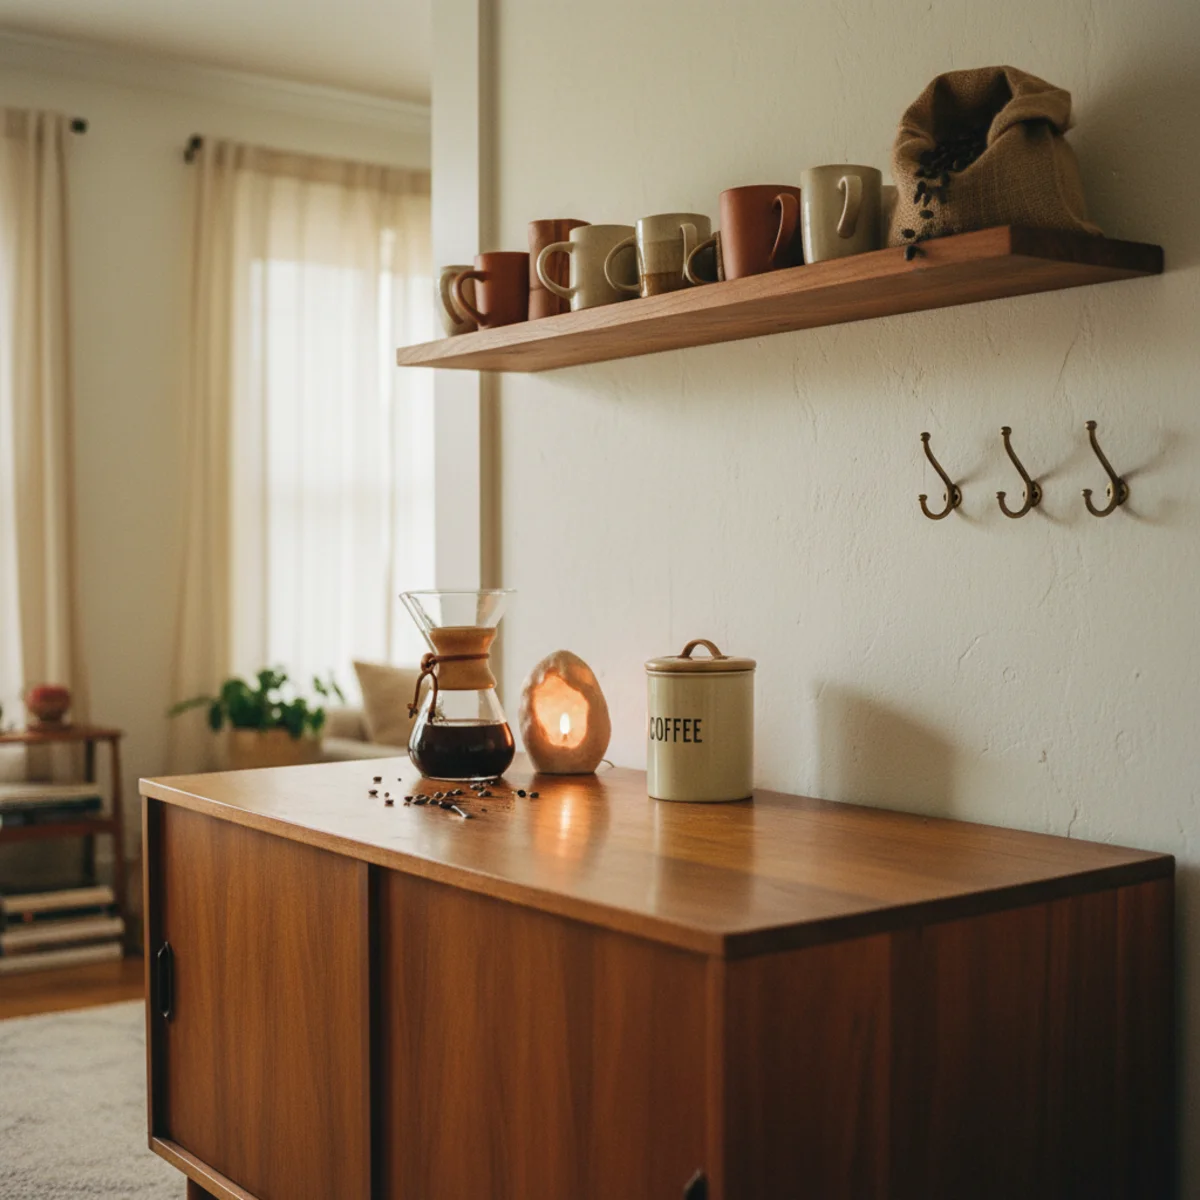
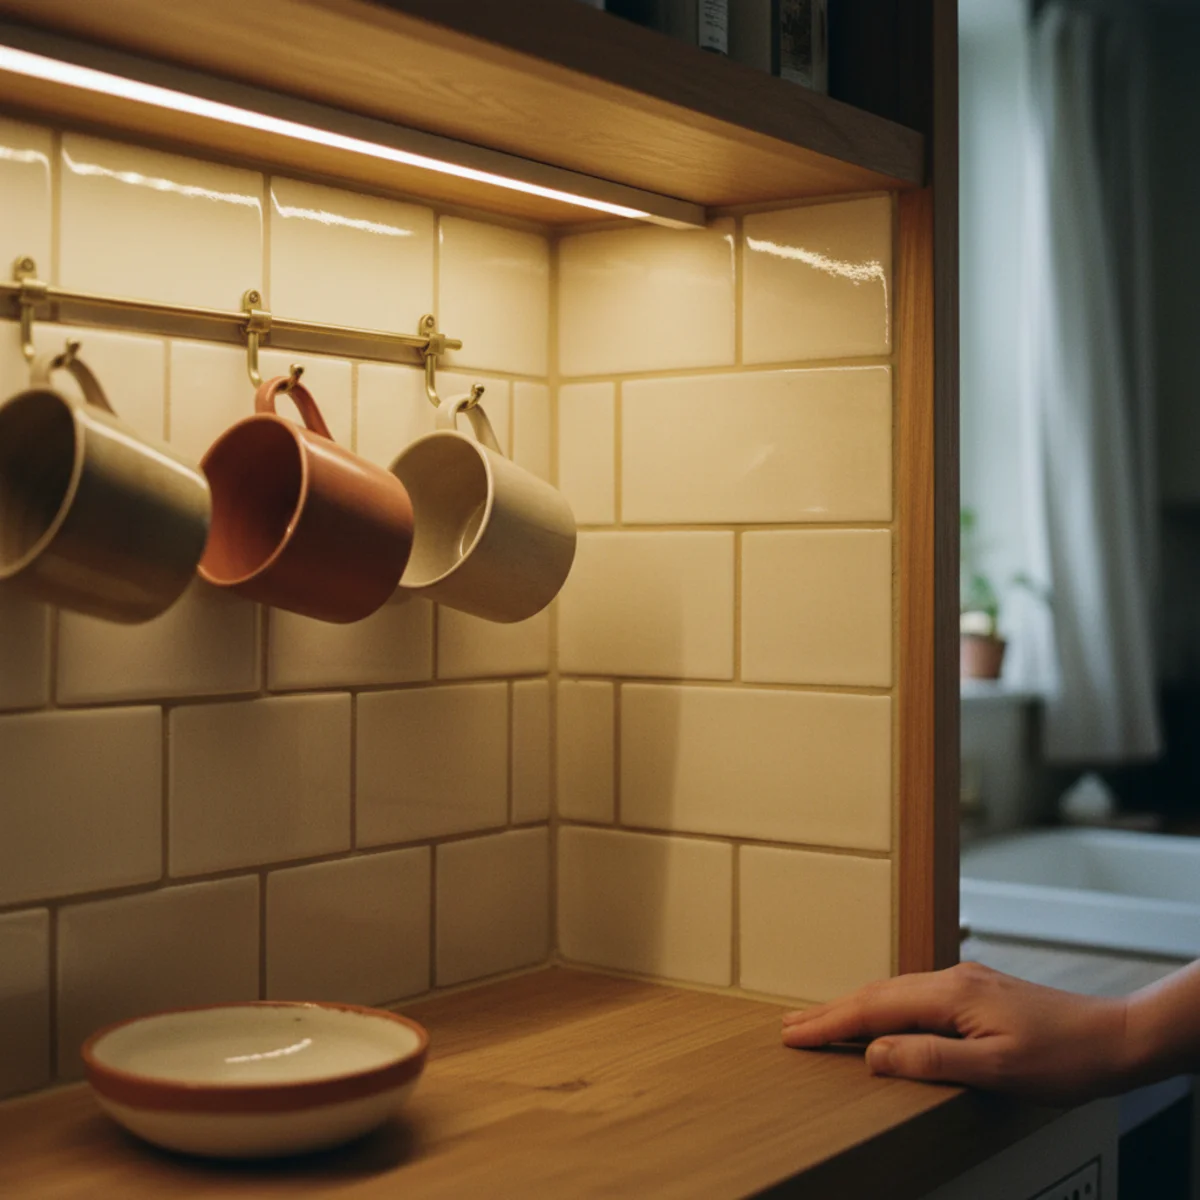
06Line the Back With Tile or Limewash
Replacing the cabinet's original back panel with tile or limewash paint creates the custom interior backdrop that makes the coffee cabinet's reveal look like purpose-built furniture rather than repurposed storage. Peel-and-stick subway tile (no wet-set installation) or a direct limewash paint application can be completed in 1-2 hours and transforms the interior appearance dramatically.
Cabinet back treatment options: PEEL-AND-STICK SUBWAY TILE — cream or warm white 3x6 subway tile from Smart Tiles, StickTiles, or Art3d. Applies directly to the original cabinet back panel. $20-50 for enough tile to cover a 36x24-inch upper cabinet back. NEUTRAL ZELLIGE-LOOK PEEL-AND-STICK — for more character than standard subway, Art3d makes peel-and-stick Zellige-texture tile at $30-60 per sheet. LIMEWASH PAINT — Portola Paints limewash or Roman Clay in warm cream or terracotta tone applied directly to the cabinet back panel. 1-2 coats with natural brush for the characteristic aged-plaster texture. $35-55 per quart (enough for multiple cabinet backs). Apply to bare wood after removing any original finish. WARM-TONED WALLPAPER — a small section of warm-toned peel-and-stick wallpaper applied to the cabinet back. $20-40 for a partial roll. KEEPING ORIGINAL WOOD — in vintage hutches with beautiful original walnut or mahogany back panel, applying Danish oil (per diy-coffee-bar item 2) to the original wood is often the best treatment — the warm wood grain reads beautifully as the cabinet interior backdrop.
AFFILIATE SLOTBUILDPeel-and-stick subway tile ($20-50) or limewash paint ($35-55) on cabinet back panel; OR Danish oil on original beautiful wood back; apply before hardware installationAdd affiliate URL when configuredWhy it works
Because the back panel is the first thing visible when the door opens — it's the interior's background and sets the entire interior's visual tone. An original cream-painted back panel reads as 'this is a storage cabinet'; a tile-lined or limewash-treated back reads as 'this was specifically designed for this purpose.' The 1-2 hour treatment transforms the interior from functional to atmospheric at $20-60 cost, representing the highest aesthetic return-on-investment of any coffee cabinet build step.
Pro tip — Apply the back treatment before installing the power strip and mug hooks — the reverse sequence (treating the back after all installations) requires working around mounted hardware and produces less clean results. Sequence: back treatment first, then hardware installation, then final styling.
Warm cream subway tile as interior backdrop — the 1-hour treatment that transforms storage cabinet into purpose-built coffee station. See also: diy-coffee-bar
07Add a Pull-Out Shelf
A pull-out shelf inside the coffee cabinet — either in the lower section or as an extension tray that slides out from the upper section floor — provides additional preparation surface for tamping espresso, pouring milk, or staging cups before service. The pull-out extends the working surface without permanently occupying it. Cost: $25-50.
Pull-out shelf for coffee cabinet: UPPER SECTION PULL-OUT — a shallow tray (3-4 inches tall, full width of the interior, 8-12 inches deep) mounted on full-extension drawer slides at the base of the upper section. Slides out to provide preparation surface; slides in to restore clean interior appearance. LOWER SECTION PULL-OUT — alternatively, a pull-out tray in the lower section for accessories (extra cups, milk frother, sugar jars). Most useful for espresso setups where the tamp-and-prep workflow happens near the machine. DRAWER SLIDES — full-extension ball-bearing slides ($15-30 per pair) attached to the cabinet interior sides. The pull-out platform is a piece of 3/4-inch plywood cut to fit the interior width minus 1/2 inch, attached to the slides. FINISH — Danish oil or paint to match cabinet interior. CORK LINING — a piece of natural cork sheet on the tray surface ($5-10) prevents cups and accessories from sliding. SEQUENCING — install pull-out shelf before installing the power strip on the back panel, as access for the power strip installation is easier with the pull-out slide hardware already in place.
AFFILIATE SLOTBUILDShallow pull-out tray on full-extension drawer slides at base of upper section; 8-12 inches deep; cork-lined surface; $25-50 in hardware and materialsAdd affiliate URL when configuredWhy it works
Because coffee preparation involves multi-step workflow (grind, tamp, extract, froth, pour) that benefits from a horizontal working surface adjacent to the machine. The coffee cabinet's primary working surface is often fully occupied by the machine itself, leaving no staging area for the preparation steps. The pull-out shelf provides this staging area only when needed (during preparation) and disappears when not in use (during closed-door or non-use periods), maintaining the cabinet's clean appearance.
Pro tip — Line the pull-out tray with both cork (for slip resistance) and a small piece of easily-wiped smooth black leather (for the tamping surface) if building an espresso-focused cabinet. The leather tamping surface is easier to clean than cork or wood, and small in surface area requirement (12x8 inches). The cork handles other accessory placement; the leather handles the specific espresso-prep step.
Pull-out shelf extended for prep work — the staging surface that disappears when not needed. See also: coffee-bar-ideas
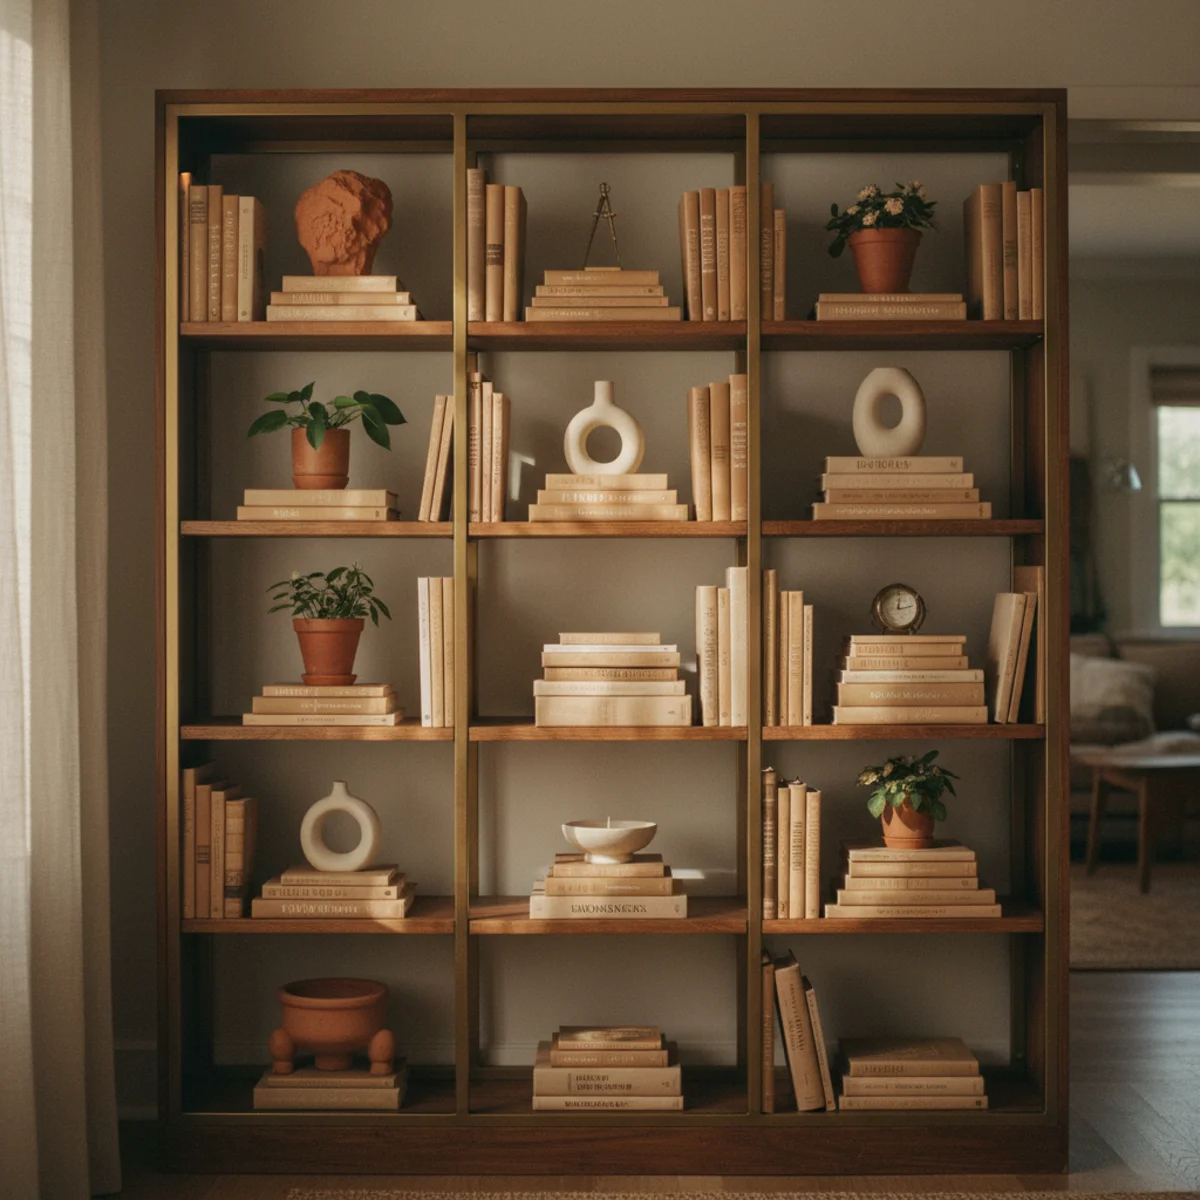
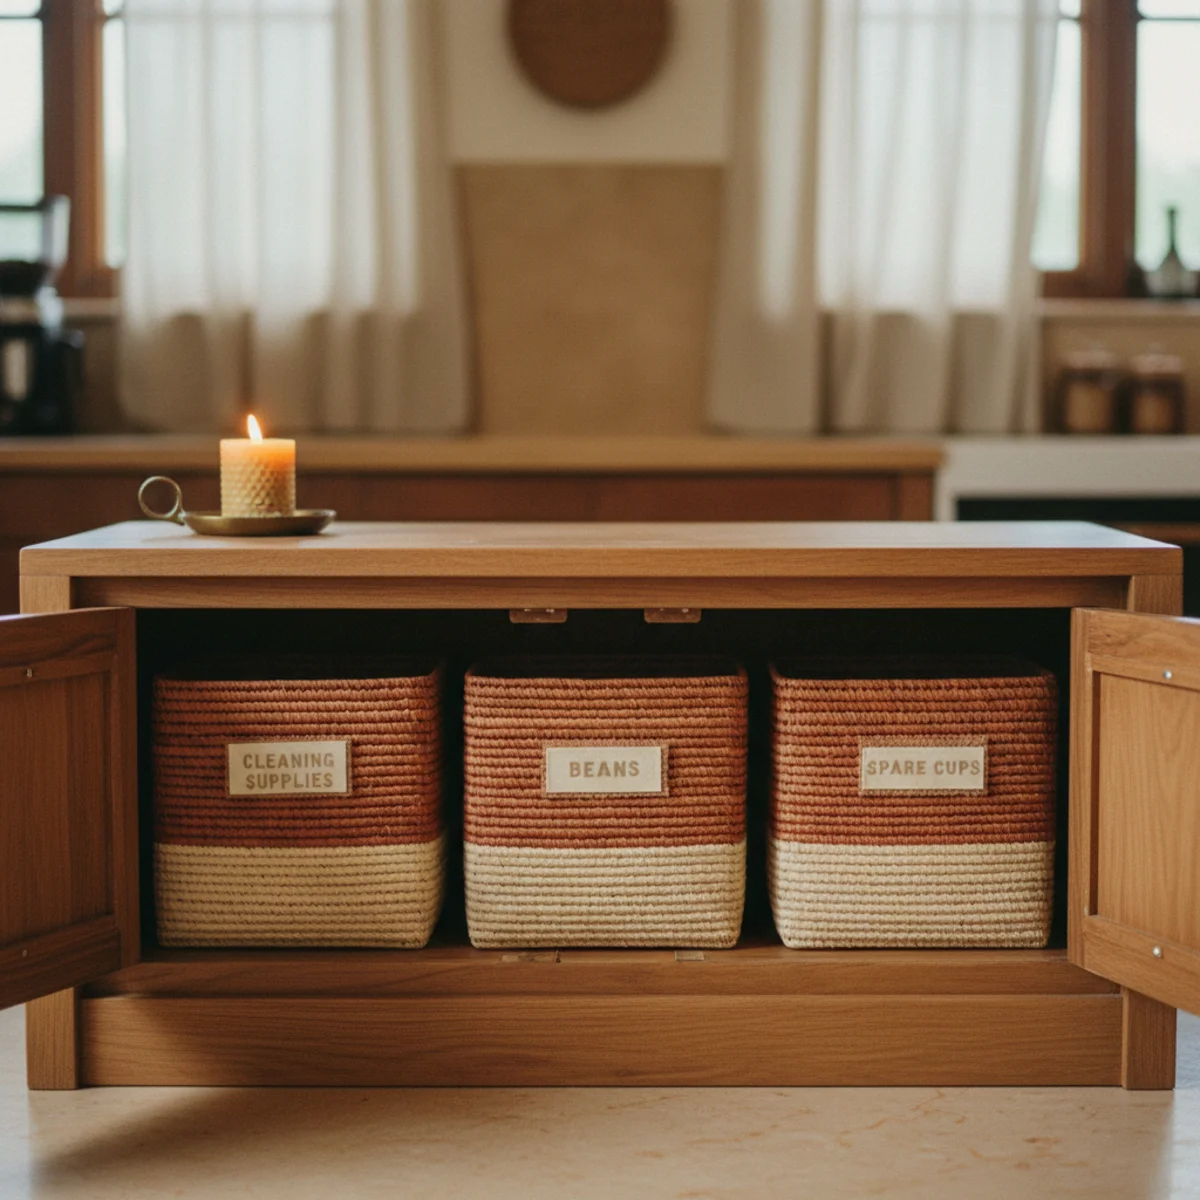
08Stack Closed Storage Below
The lower section of a hutch or sideboard coffee cabinet provides closed storage for coffee supplies, extra cups, cleaning equipment, and anything that should be hidden from view. The lower section should be maximally functional storage that keeps all the equipment's supporting materials out of sight and organized.
Lower section organization: WHAT GOES BELOW — whole bean coffee bags (in an airtight container, OR stored in original bag if using fresh specialty coffee), spare cups and glasses, extra shot glasses, milk frother accessories, coffee cleaning equipment (machine cleaning tablets, descaling solution), extra beeswax candles (if the coffee cabinet includes candle styling), paper napkins, extra sweeteners. ORGANIZING TOOLS — small baskets or boxes within the lower section to organize by category ($10-30 for 2-3 organizer bins from HomeGoods or Amazon). A basket for beans, a basket for cleaning equipment, a basket for extra cups. LABELED ORGANIZATION — small chalk labels or paper tags on baskets identify contents at a glance. LOWER SECTION DEPTH — original hutch lower sections are typically 16-20 inches deep (more than the upper section). Use this depth for larger items (spare cups, bean bags) that can't fit in the shallower upper section. THE VISUAL CLEAN PRINCIPLE — the closed lower doors should conceal all the supporting supplies so that when the upper coffee cabinet doors are open, the visible area shows only the working coffee equipment and the staged display. All the supporting clutter stays behind the lower doors.
AFFILIATE SLOTSTORAGEClosed lower section for: coffee bags in airtight container, spare cups, frother accessories, cleaning equipment, extra candles; organized with small labeled basketsAdd affiliate URL when configuredWhy it works
Because the whole cabinet's visual coherence depends on the upper section showing only what's meant to be displayed. If the lower section is disorganized, spillover clutter tends to migrate upward into the upper display area, gradually undermining the curated coffee station appearance. An organized, capacity-appropriate lower section keeps the household's tendency toward accumulation contained below the display line, maintaining the upper section's composed appearance indefinitely.
Pro tip — Establish a monthly 'lower section audit' habit — once per month, open the lower doors, check whether anything has accumulated that should be discarded or consolidated, and restore the organized arrangement. The 10-minute monthly audit prevents the gradual-clutter drift that undermines lower section organization across months of daily use.
Organized lower section with labeled baskets — the hidden capacity that keeps the display section uncluttered. See also: diy-coffee-bar
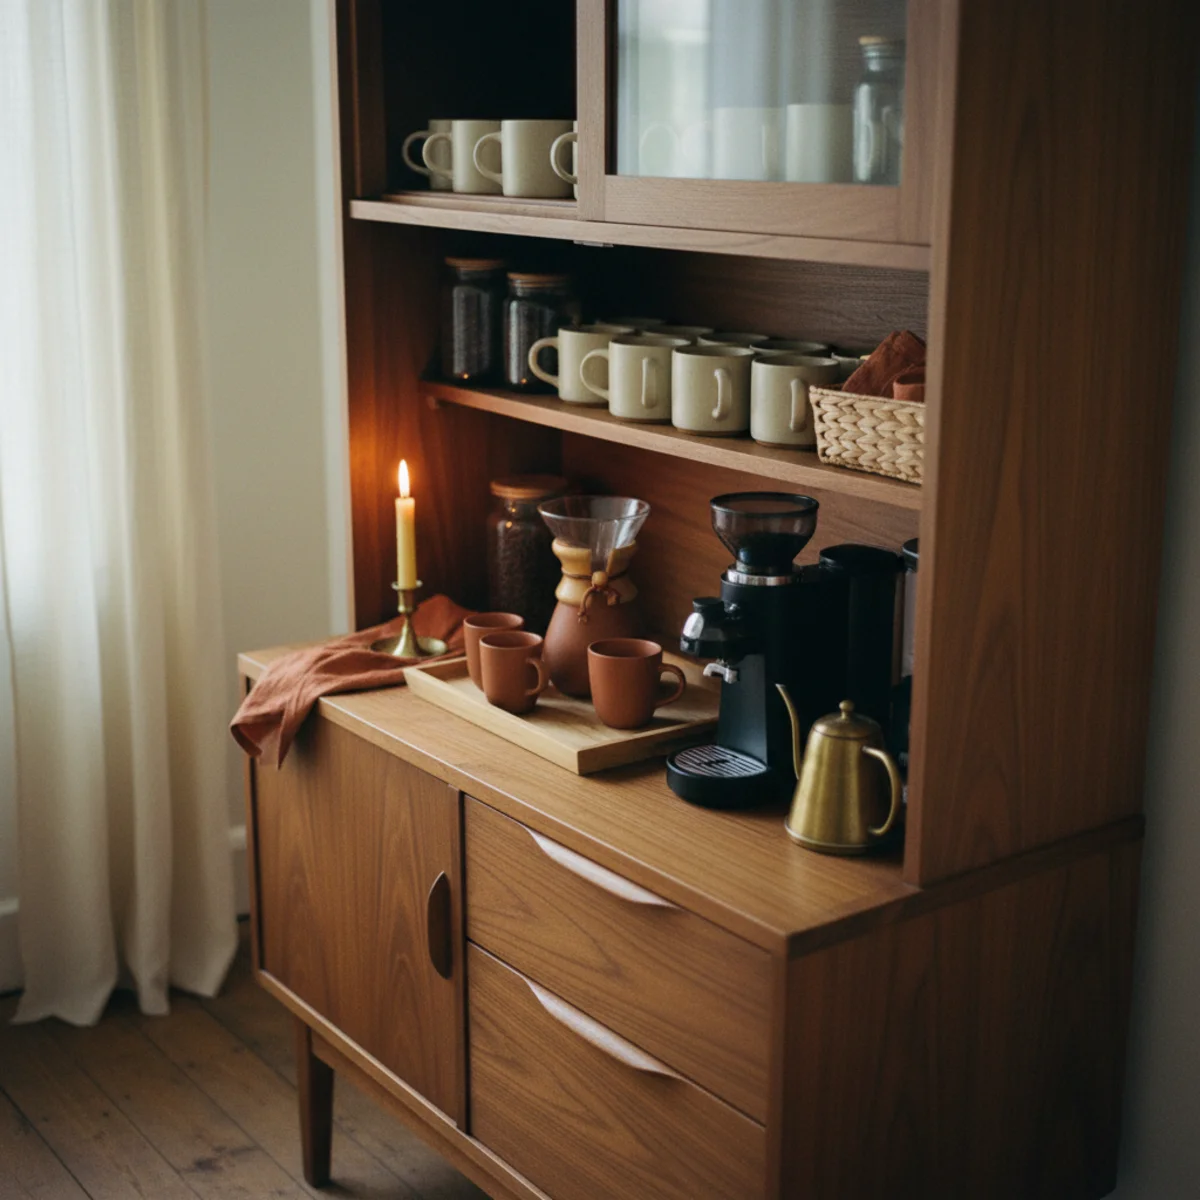
09Style for the Open Reveal
The coffee cabinet's primary styling principle is the same as all coffee setups: working parts as primary decor. The coffee maker as visual anchor, the bean canister and grinder beside it, the mugs on hooks above, the small plant in one corner, the leaned postcard behind. The open reveal should read as a composed warm-home coffee stage, not as a kitchen appliance cupboard with the door open.
Open reveal styling composition: VERTICAL ARRANGEMENT — the reveal has three levels within the upper cabinet section. TOP LEVEL (where hooks are, 4-6 inches from cabinet top): hung mugs. MIDDLE LEVEL (shelves if present, or open area): small plant, leaned small print, spare ceramic vessel. BOTTOM LEVEL (cabinet floor): coffee maker as primary anchor, bean canister + grinder grouped beside it. COFFEE MAKER POSITION — center or slightly off-center (off-center weighting per shelf-styling principles), dominating the lower interior. ACCOMPANIMENTS — bean canister beside the maker, manual grinder nearby, small brass tray with spoons in front. PLANT — small succulent or air plant in small terracotta pot, one corner of the middle or bottom level. SMALL PRINT — 3x4 inch postcard or printed image leaned against the back panel behind and beside the coffee maker. THE WARM GLOW — with interior LED on, the warm light illuminates the entire composition. The reveal should look best in morning semi-darkness: warm interior light, hung mugs, Chemex, small plant, soft backdrop. That is the coffee cabinet's peak moment.
AFFILIATE SLOTSTYLINGCoffee maker as anchor at bottom, mugs hung at top, small plant + print at middle; interior LED warm, working parts as primary decor; clean reveal dailyAdd affiliate URL when configuredWhy it works
Because the coffee maker, grinder, and ceramic canister have their own visual character — the Chemex's elegant glass and wood, the manual grinder's solid ceramic and wood, the hand-thrown ceramic canister's glaze irregularity — and these working tools are inherently beautiful in a way that decorative additions (coffee-themed signs, artificial flowers, decorative non-functional objects) are not. The reveal is more beautiful with the working equipment as the center because that equipment earned its place through daily function.
Pro tip — Clean the interior and return mugs to hooks before the first morning coffee session — the 3-minute morning cabinet-preparation ritual maintains the reveal quality for the daily opening. The coffee cabinet that is consistently tidy has the consistently atmospheric morning reveal; the one that gradually accumulates cabinet-top clutter and misplaced items loses the reveal quality within weeks.
Chemex below, hung mugs above, small plant at middle, warm LED throughout — the composed coffee cabinet reveal at morning. See also: cozy-coffee-corner
10Match the Cabinet to the Kitchen
The coffee bar cabinet's exterior should relate to the kitchen's existing material palette — painted to match lower cabinets if painted, or stained to complement the wood tones if in a wood-tone kitchen. The cabinet should read as integrated with the kitchen's design rather than as a separate piece of furniture dropped into the kitchen space.
Cabinet-kitchen integration approaches: PAINTED MATCHING — if the kitchen has painted cabinets (white, sage green, navy), paint the hutch exterior to match. This is the most-integrating approach; the hutch reads as an additional kitchen cabinet rather than as furniture. COMPLEMENTARY WOOD TONE — if kitchen has natural wood cabinets, stain or Danish-oil the hutch in a complementary wood tone. Dark walnut hutch in a light oak kitchen reads as accent piece; matching-tone hutch reads as integrated. CONTRASTING ACCENT PIECE — in a neutral cream/white kitchen, a navy or sage-painted hutch reads as intentional accent piece. More acceptable in kitchens where the coffee bar is a destination rather than a kitchen-integrated element. HARDWARE ALIGNMENT — match the hutch's hardware to the kitchen's primary hardware. If kitchen has brushed nickel, upgrade hutch hardware to aged brass as an intentional upgrade (all warm hardware throughout reads cohesive). FOOT TRIM — adding simple plinth molding at the hutch base (matching kitchen cabinet base trim) visually integrates the hutch into the kitchen's architectural base line.
AFFILIATE SLOTINTEGRATIONPaint hutch exterior to match kitchen lower cabinets (most integrated) OR complement wood tone OR serve as intentional accent color; match hardware family throughoutAdd affiliate URL when configuredWhy it works
Because a coffee bar cabinet is positioned in the kitchen or dining room — in permanent view of the household and guests. An unrelated piece in a clearly-differentiated style from the kitchen reads as 'furniture that was placed here' rather than as 'designed feature of this kitchen.' The integration, even through simple paint-color matching, transforms the hutch from visible addition to architectural feature.
Pro tip — Test the proposed exterior paint color on the back of the hutch (hidden when against the wall) before painting the sides and front — the back-panel test reveals whether the color reads correctly against the kitchen's existing palette before any visible painting is done. The test takes 5 minutes and one coat of paint; it prevents the need to repaint the full exterior.
Cabinet exterior matching kitchen lowers — the integration that transforms an addition into an architectural feature. See also: coffee-bar-ideas
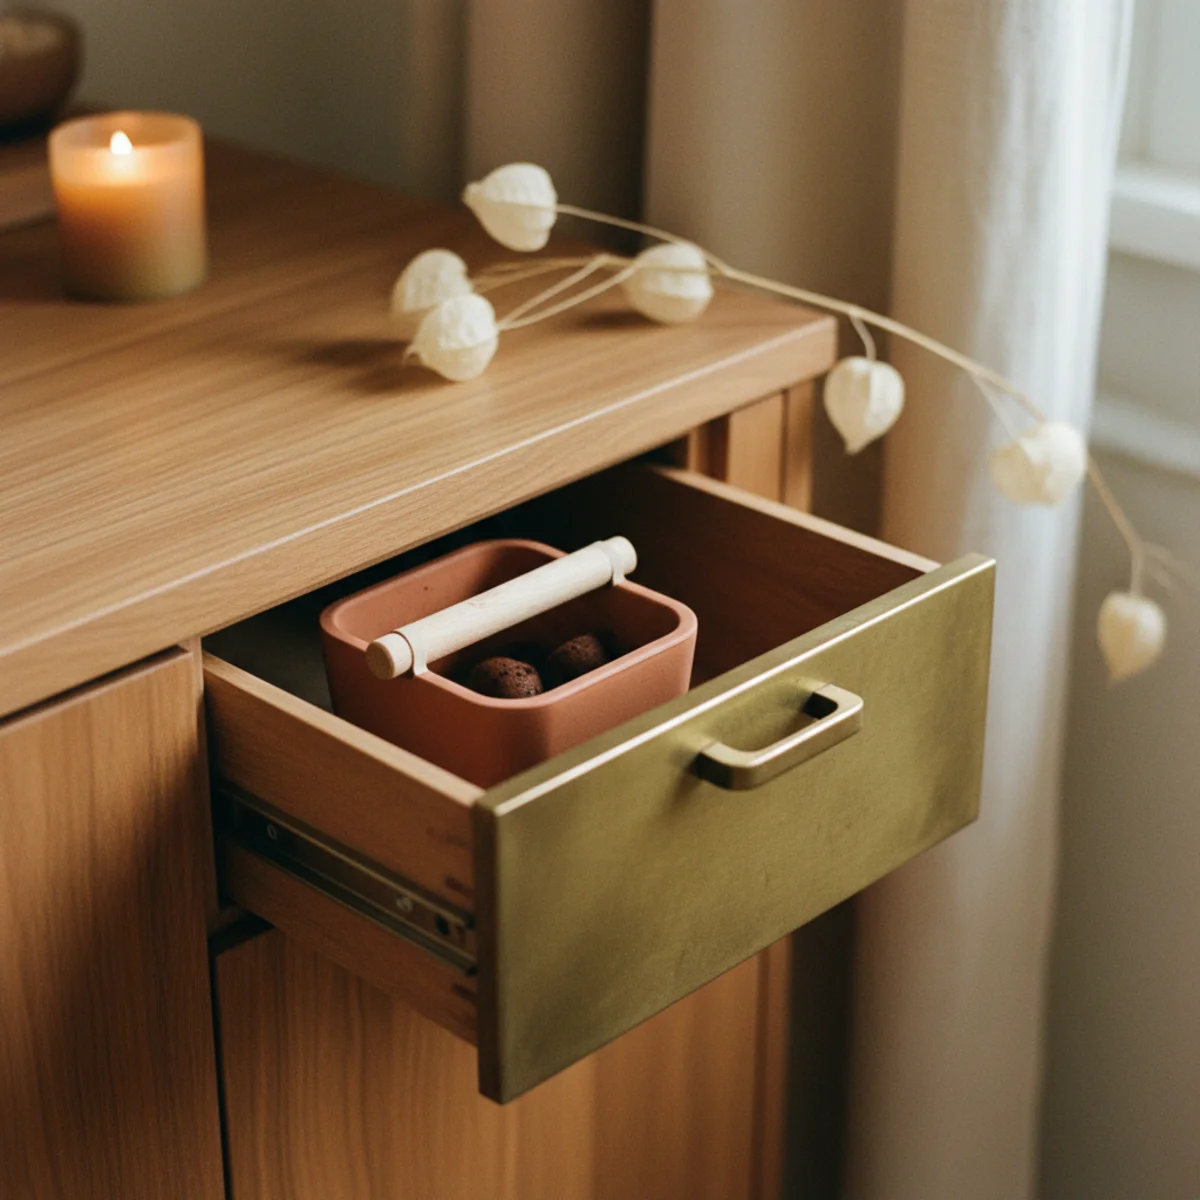
11Add a Waste Drawer for Grounds
For espresso setups: a dedicated waste drawer for espresso grounds and portafilter knock-waste inside the lower cabinet section keeps the entire espresso workflow contained within the cabinet. The waste drawer (a small removable container inside a shallow drawer slide) receives the portafilter knock-out and holds used grounds until emptying. Cost: $15-30 for the drawer hardware.
Coffee grounds waste drawer: SAME CONSTRUCTION as the knock-box drawer in diy-coffee-bar item 10. CONTAINER — 6x8 inch plastic or stainless container with 2-3 inch walls. KNOCK BAR — 3/4-inch wooden dowel wrapped in rubber tubing across the container midpoint. DRAWER SLIDES — 10-12 inch ball-bearing drawer slides ($15-25 per pair). INSTALLATION — in the lower section of the cabinet, a dedicated narrow drawer (3-4 inches tall drawer face) sized to accommodate the knock-box container. Position the drawer within reach of the espresso machine (with the machine on a pull-out shelf or at the bottom of the upper section, the waste drawer should be directly below or very nearby). EMPTYING ROUTINE — empty into compost or garbage every 3-4 shots. A full knock box holds approximately 8-12 double shots of espresso grounds before needing emptying. ALTERNATIVE — a small stainless steel knock box on the pull-out tray rather than a dedicated drawer. The dedicated drawer is more integrated; the knock box on the tray is more visible but more accessible.
AFFILIATE SLOTBUILDKnock-box drawer in lower section for espresso setups: 6x8 container + rubber-wrapped dowel + drawer slides; positioned within reach of espresso machine; espresso onlyAdd affiliate URL when configuredWhy it works
Because espresso production is a multi-step workflow that generates waste at a specific point (the knocked-out spent puck) and that waste needs a specific destination. Without a dedicated destination, spent grounds either go to the sink (messy), to a separate container on the counter (visually cluttered), or to the general waste across the room (interrupts the workflow). The waste drawer resolves the waste destination within the cabinet's workflow without requiring any extra equipment or counter space.
Pro tip — Line the waste drawer container with a small compostable bag liner — the liner makes emptying the grounds into compost faster (remove and compost the whole bag rather than dumping the container) and keeps the container cleaner between emptyings. Compostable bags at $8-12 for a pack of 50; each bag lasts 1-2 days of regular espresso production.
Waste drawer open showing knock-box — the espresso workflow contained entirely within the cabinet. See also: diy-coffee-bar
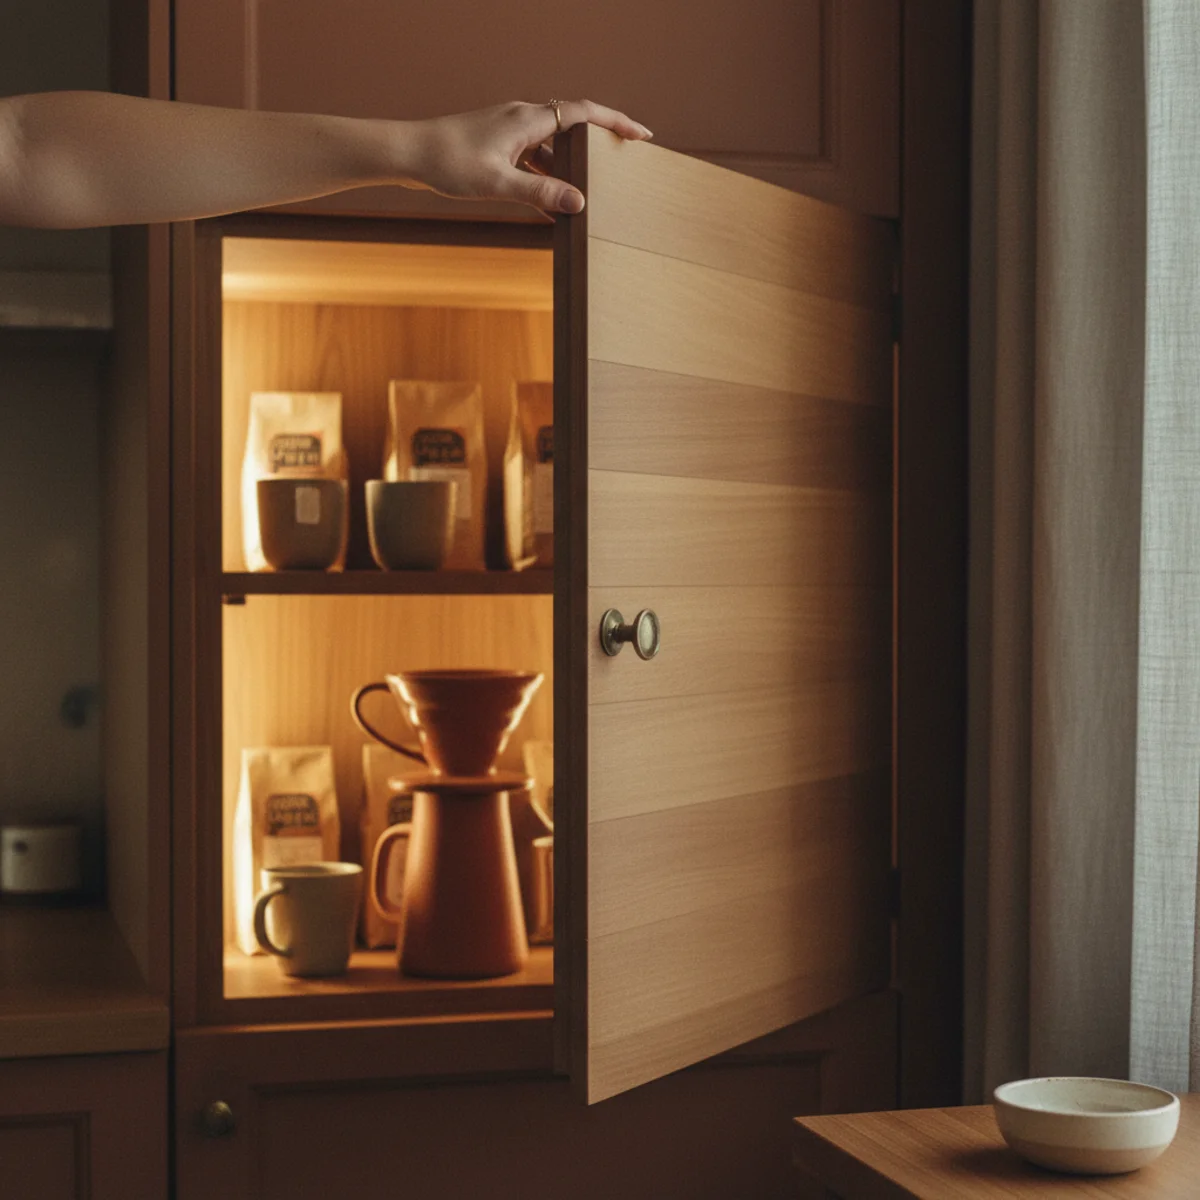
12Light It on a Door Switch
The most-atmospheric feature of a coffee bar cabinet: a door-triggered light switch that automatically turns on the interior LED lights when the cabinet door opens and turns them off when it closes. This creates the automatic reveal effect — the warm interior light comes on without any action from the user, transforming the door-opening into a daily atmospheric moment. Cost: $10-25 for the switch.
Door-triggered lighting setup: PUSH-BUTTON DOOR SWITCH — a small door-activated push-button switch (the same type used in refrigerators and many cabinet applications) mounted in the door frame. When the door opens, the button releases and the circuit closes, turning on the light. When the door closes, the button depresses and breaks the circuit, turning off the light. $5-15 from hardware stores (often sold as 'cabinet light switch' or 'door plunger switch'). BATTERY-LED PUCK LIGHT ADAPTATION — the simplest version: position a battery-operated LED puck light where the cabinet door physically presses a small on/off button on the puck when closed. Arrange so the door opening releases the button pressure and the puck turns on. MAGNETIC SWITCH — a reed switch (magnetic field) can also trigger LED lights: magnet on the door, reed switch on the frame. When door opens and separates magnet from switch, the light circuit activates. $8-20 from electronics suppliers. THE ATMOSPHERIC EFFECT — every morning, opening the coffee cabinet triggers the warm interior light automatically. The first reveal of the day — mugs on brass hooks, Chemex, small plant, warm tile backdrop, warm LED glow — is the coffee ritual's specific atmospheric start.
AFFILIATE SLOTLIGHTINGPush-button door plunger switch ($5-15 from hardware store) or magnetic reed switch ($8-20) triggering interior LED puck lights automatically when door opensAdd affiliate URL when configuredWhy it works
Because automation removes the attention overhead from the ritual — the household member who opens the coffee cabinet doesn't think about turning on the interior light; the light is simply there, already warm, already glowing, already making the reveal beautiful. The automation of the warm light is what makes it atmospheric; manual-switch lighting requires action and draws attention to the lighting mechanism rather than to the cabinet's composition. The door-triggered switch is the completion move that makes every coffee cabinet opening a genuinely atmospheric moment.
Pro tip — Test the door-switch positioning with a sticky note before permanent installation — tape a small note to the planned button/switch position, then open and close the door multiple times to confirm the contact point is reliable before drilling or permanently mounting the switch hardware. Reliable contact requires precise alignment; the sticky-note test confirms it before commitment.
Door opens, interior warms automatically — the atmospheric reveal that makes every morning coffee moment distinctive. See also: cozy-coffee-corner

How to build a coffee bar cabinet
Whether you convert a hutch or plan a built-in, the logic is the same. Work in this order.
- 1Choose a deep-enough cabinet
Measure your machine with the water lid open and the portafilter out. The cabinet must clear both, plus a few inches of venting space above.
- 2Run power to the inside
Mount a power strip to the back or have an outlet added inside. This is the step that turns a cabinet into a working bar.
- 3Set the working layout
Machine on a pull-out or vented shelf, grinder beside it, kettle within reach. Closed storage below for beans and filters.
- 4Style the open reveal
Hooks for mugs, a jar of beans, a small lamp, one plant. Finish the back panel so the open cabinet reads as intentional.
Quick tips
- Measure the machine with its lid open before buying or building the cabinet.
- Leave venting space above the machine, and pull it forward to steam.
- Mount a power strip inside so no cords trail across the counter.
- Empty the grounds bin daily — closed cabinets trap moisture and grounds mold fast.
- Use warm 2700K interior lighting; cool light makes the cabinet feel clinical.
- Finish the interior back panel — guests see it on the open reveal.
Coffee bar cabinets for different homes
Convert a freestanding hutch or armoire; add removable tile and a plug-in power strip, no built-in work needed.
An appliance-garage door on the counter hides the machine without sacrificing a full cabinet.
Dedicate an upper-and-lower cabinet run with a pull-out shelf, interior outlet, and door-switch lighting.
A handsome armoire that faces the living space and closes completely on the morning mess.
The best coffee bar cabinet hides the mess on a Monday and shows off on a Saturday.
Frequently asked questions
How do I build a coffee bar cabinet?+
What kind of cabinet should I use for a coffee bar?+
How do I add lighting to a coffee bar cabinet?+
What should go inside a coffee bar cabinet?+
How do I make the coffee cabinet reveal look atmospheric?+
What's the difference between a coffee bar and a coffee bar cabinet?+
Choose a cabinet deep enough to clear the machine, run power to the inside, and never seal a steaming machine in an unvented box. We'd convert a thrifted hutch over building in — it's cheaper, it's portable, and the worn wood reads warmer than new cabinetry. Style the open shelves like a little vignette, wire a warm lamp to the doors, and you've got a station that's calm all week and quietly generous the moment a guest walks in.